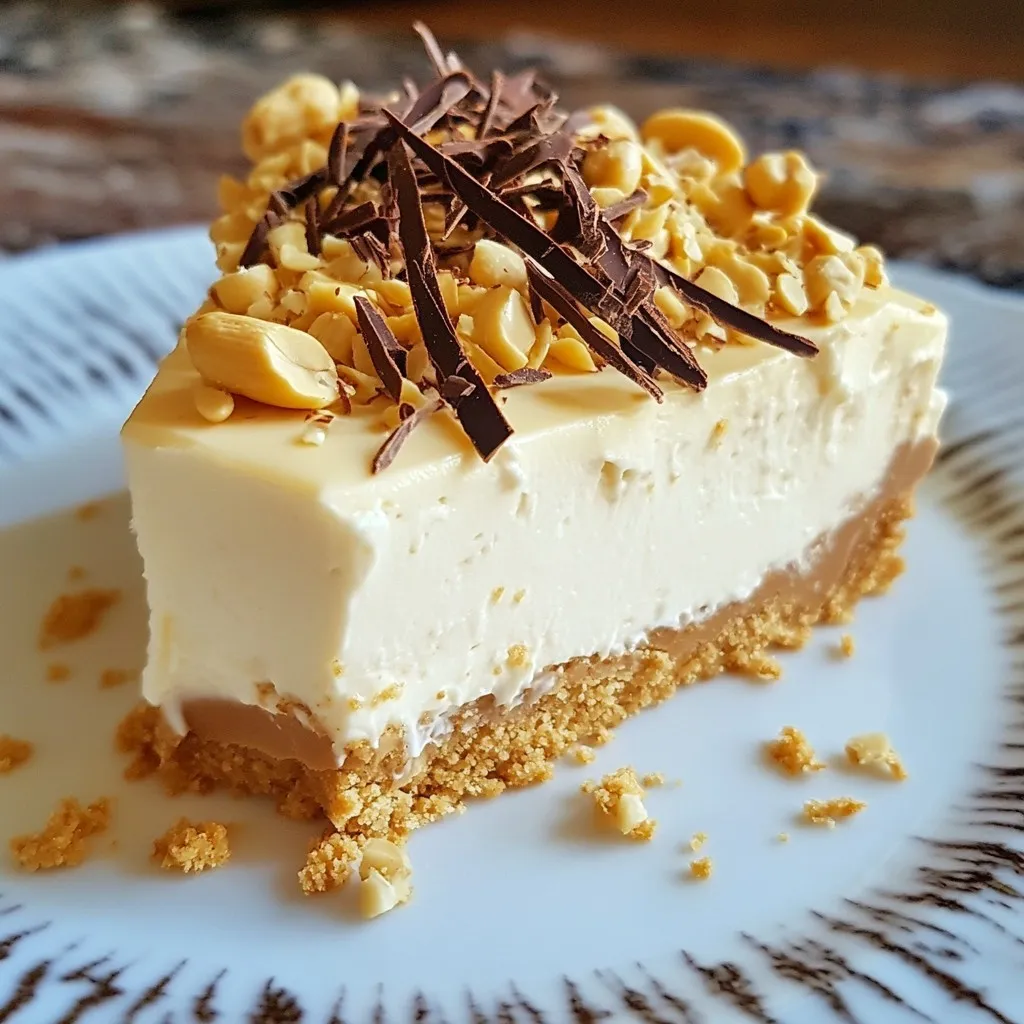
Are you craving a dish that’s both simple and delicious? Look no further! This No-Bake Peanut Butter Cheesecake is perfect for any occasion. With just a few common ingredients and easy steps, you can whip up a creamy treat that will impress everyone. No baking required! Join me as I share this fun recipe that guarantees satisfaction with every bite. Let’s dive in and make something tasty together!
Why I Love This Recipe
- Easy to Make: This no-bake cheesecake requires minimal effort and time, making it perfect for both novice and experienced bakers.
- Delicious Flavor: The combination of creamy peanut butter and smooth cream cheese creates a rich and indulgent dessert that satisfies any sweet tooth.
- Perfect for Any Occasion: Whether it’s a holiday gathering or a casual dinner, this cheesecake is a crowd-pleaser that impresses guests every time.
- Customizable: You can easily add your favorite toppings like chocolate shavings or crushed peanuts to make it unique and tailored to your taste.
Ingredients
Complete List of Ingredients
– 1 ½ cups graham cracker crumbs
– ½ cup unsalted butter, melted
– 1 cup creamy peanut butter
– 1 cup cream cheese, softened to room temperature
– 1 cup powdered sugar
– 1 teaspoon vanilla extract
– 1 cup heavy whipping cream
– Pinch of salt
– Optional: Chocolate shavings or crushed peanuts for garnish
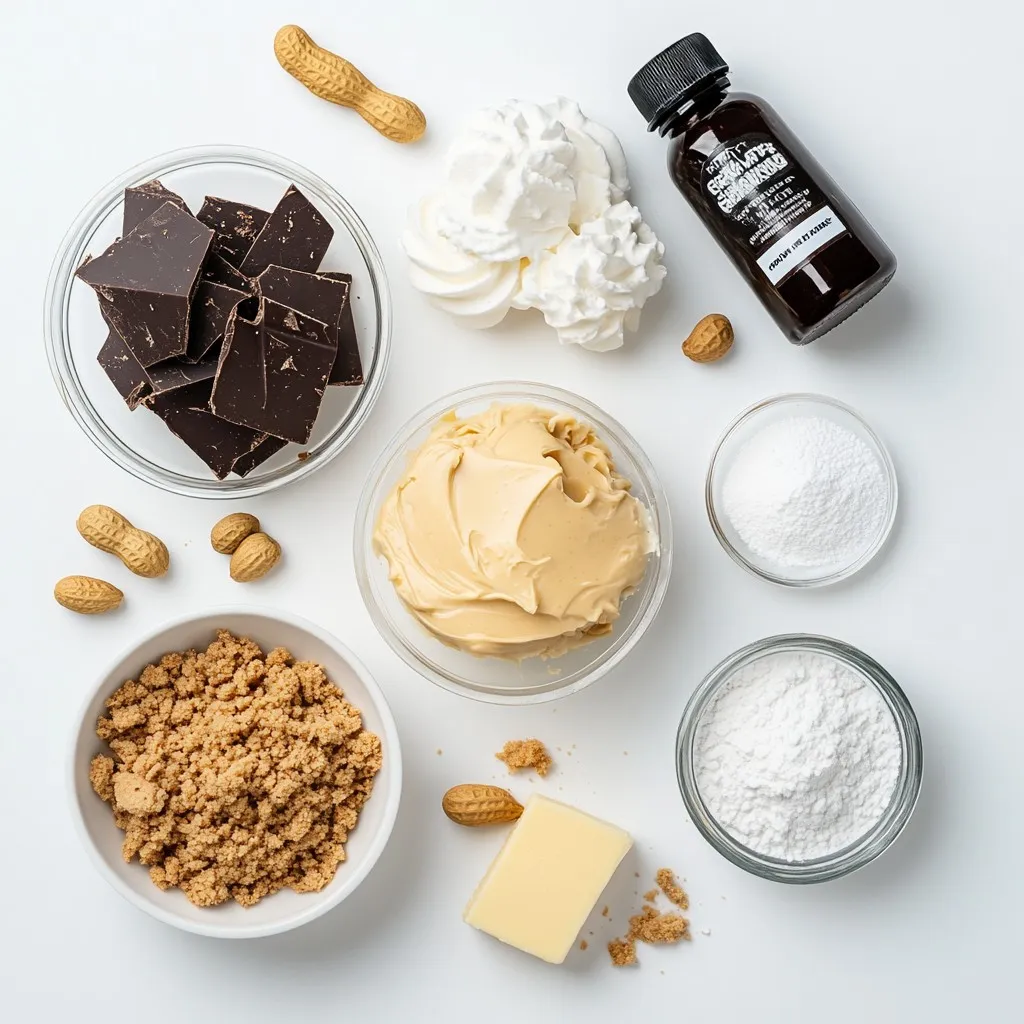
Gathering the right ingredients is key for this no-bake peanut butter cheesecake. I love the crunchy crust made from graham cracker crumbs. It gives a nice texture. The melted unsalted butter helps bind the crumbs together. For the filling, creamy peanut butter shines through. It pairs perfectly with soft cream cheese.
Powdered sugar adds sweetness. Vanilla extract brings warmth to the flavors. Heavy whipping cream adds lightness to the filling. A pinch of salt balances the sweet flavors. You can also use chocolate shavings or crushed peanuts as garnishes. They add a fun look and extra taste.
Make sure to use fresh ingredients for the best results. This cheesecake is easy to make, and it feels special. You will enjoy every bite!
Step-by-Step Instructions
Preparing the Crust
– Mix 1 ½ cups of graham cracker crumbs with ½ cup of melted unsalted butter in a bowl. Stir until the crumbs stick together.
– Press this crumb mixture firmly into the bottom of a 9-inch springform pan. Make it even. Chill it in the fridge while you make the filling.
Making the Filling
– In a large bowl, beat 1 cup of cream cheese at medium speed until smooth. This takes about 2-3 minutes.
– Add 1 cup of creamy peanut butter, 1 cup of powdered sugar, 1 teaspoon of vanilla extract, and a pinch of salt. Mix well until silky and smooth.
Folding in Whipped Cream
– In a separate bowl, whip 1 cup of heavy cream until stiff peaks form. This will take about 3-5 minutes.
– Gently fold the whipped cream into the peanut butter mixture using a spatula. Be careful not to deflate the whipped cream. Mix until just combined.
Assembling and Chilling
– Pour the peanut butter filling over the chilled crust. Use a spatula to smooth the top evenly.
– Cover the cheesecake with plastic wrap, making sure it does not touch the filling. Chill for at least 4 hours until firm.
Serving the Cheesecake
– Once set, carefully release the springform pan sides. Transfer the cheesecake to a serving plate.
– Before serving, add chocolate shavings or crushed peanuts on top for a tasty finish.
Tips & Tricks
Common Mistakes to Avoid
– Overmixing the filling: Mix just until smooth. If you mix too much, the filling can become too runny. It’s best to combine carefully.
– Not chilling long enough: Patience is key. If you don’t chill the cheesecake long enough, it will not set properly. Aim for at least 4 hours, but overnight is even better.
Enhancing Flavor and Texture
– Suggestions for adding more peanut butter flavor: Want a stronger peanut butter taste? Try adding more creamy peanut butter, about 1/4 cup extra. You can also use crunchy peanut butter for added texture.
– How to make the crust crunchier: To make a crunchier crust, add a bit of sugar or a pinch of salt. Press the crumbs down firmly into the pan.
Tools and Equipment
– Recommended mixers and utensils: A hand mixer is great for whipping cream. Use a sturdy spatula for folding in the whipped cream gently.
– Best types of springform pans: A 9-inch springform pan works best for this recipe. Choose one with a tight seal to prevent leaks during chilling.
Pro Tips
- Chill the Ingredients: For a firmer cheesecake, ensure that both the cream cheese and the heavy whipping cream are well-chilled before mixing. This helps the filling set better.
- Use a Quality Peanut Butter: Choose a creamy peanut butter that has a smooth texture and rich flavor. Natural peanut butter can work, but ensure it’s well-mixed beforehand.
- Don’t Overmix the Whipped Cream: When folding the whipped cream into the peanut butter mixture, be gentle. Overmixing can deflate the whipped cream and lead to a denser cheesecake.
- Garnish for Presentation: Consider garnishing with a drizzle of chocolate sauce or a sprinkle of sea salt on top for an added flavor contrast and visual appeal.
Variations
Flavor Variations
You can play with flavors in your no-bake peanut butter cheesecake. One option is to make a chocolate peanut butter cheesecake. Just add cocoa powder to the peanut butter mix. This gives it a rich, chocolatey taste. You can also swirl in melted chocolate for extra flair.
Another fun twist is to add flavors like banana or caramel. For banana, mix in mashed ripe bananas. This adds sweetness and a fruity touch. For caramel, drizzle some into the filling before chilling. It creates a sweet surprise in every bite.
Dietary Adjustments
If you need a gluten-free option, you can swap the graham crackers. Use gluten-free cookies or nuts for the crust. Just crush them and mix with melted butter. It works great and keeps the crust tasty.
For those following a vegan diet, you can find substitutes for cream cheese and whipping cream. Look for vegan cream cheese at the store. You can whip coconut cream for a dairy-free topping. These options keep your cheesecake creamy and delicious.
Serving Suggestions
When serving your cheesecake, consider pairing it with sauces. Chocolate or caramel sauce drizzled on top adds richness. You can also serve it with fresh fruit like strawberries or bananas for a fresh taste.
Toppings can change the dish, too. Try adding crushed peanuts for crunch or chocolate shavings for a fun look. A sprinkle of sea salt can enhance the peanut flavor, making each slice even better.
Storage Info
Proper Storage Techniques
To keep your no-bake peanut butter cheesecake fresh, store leftovers in a sealed container. I recommend using an airtight container to prevent any odors from the fridge. If you don’t have one, wrap the cheesecake in plastic wrap. Ensure the wrap is tight but does not touch the surface of the cheesecake.
Shelf Life
Your cheesecake will stay good in the fridge for about 5 days. After that, it may start to lose flavor and texture. Always check for signs of spoilage such as an off smell or a change in color. If you notice any of these signs, it’s best to throw it away.
Freezing the Cheesecake
If you want to save some for later, you can freeze it! First, let the cheesecake set fully in the fridge. After that, wrap it well in plastic wrap and then in aluminum foil. This way, it won’t get freezer burn. You can freeze it for up to 2 months. When you’re ready to eat it, move it to the fridge to thaw overnight. Enjoy your creamy treat later!
FAQs
How long does it take for a no-bake cheesecake to set?
A no-bake cheesecake needs about 4 hours to set in the fridge. This time helps it firm up well. For best results, let it chill overnight. It will be even tastier this way. The longer it sits, the better the flavors blend.
Can I make this cheesecake in advance?
Yes, you can make this cheesecake a day or two ahead of time. It keeps well in the fridge. Just cover it tightly with plastic wrap. This makes it a great dessert for parties or gatherings.
What can I use instead of cream cheese?
If you want a substitute for cream cheese, try Greek yogurt or silken tofu. These options can give a creamy texture. They will change the flavor a bit, but they still work well.
How can I make a no-bake cheesecake firmer?
To make your cheesecake firmer, try these tips:
– Use full-fat cream cheese for a richer texture.
– Add more whipped cream, but whip it to stiff peaks first.
– Consider adding gelatin for extra firmness. Just dissolve it in water before mixing.
Is it necessary to use a springform pan?
Although a springform pan is not a must, it makes serving easier. The sides come off, which helps you remove the cheesecake without breaking it. If you don’t have one, a regular pie dish will work, but be careful when serving.
This no-bake cheesecake is easy and fun to make, featuring creamy peanut butter and a crunchy crust. We covered the right ingredients, step-by-step instructions, and tips to avoid mistakes. You can also explore tasty variations and proper storage methods.
With this guide, you can create a delicious dessert for any occasion. Enjoy your cheesecake and impress your friend