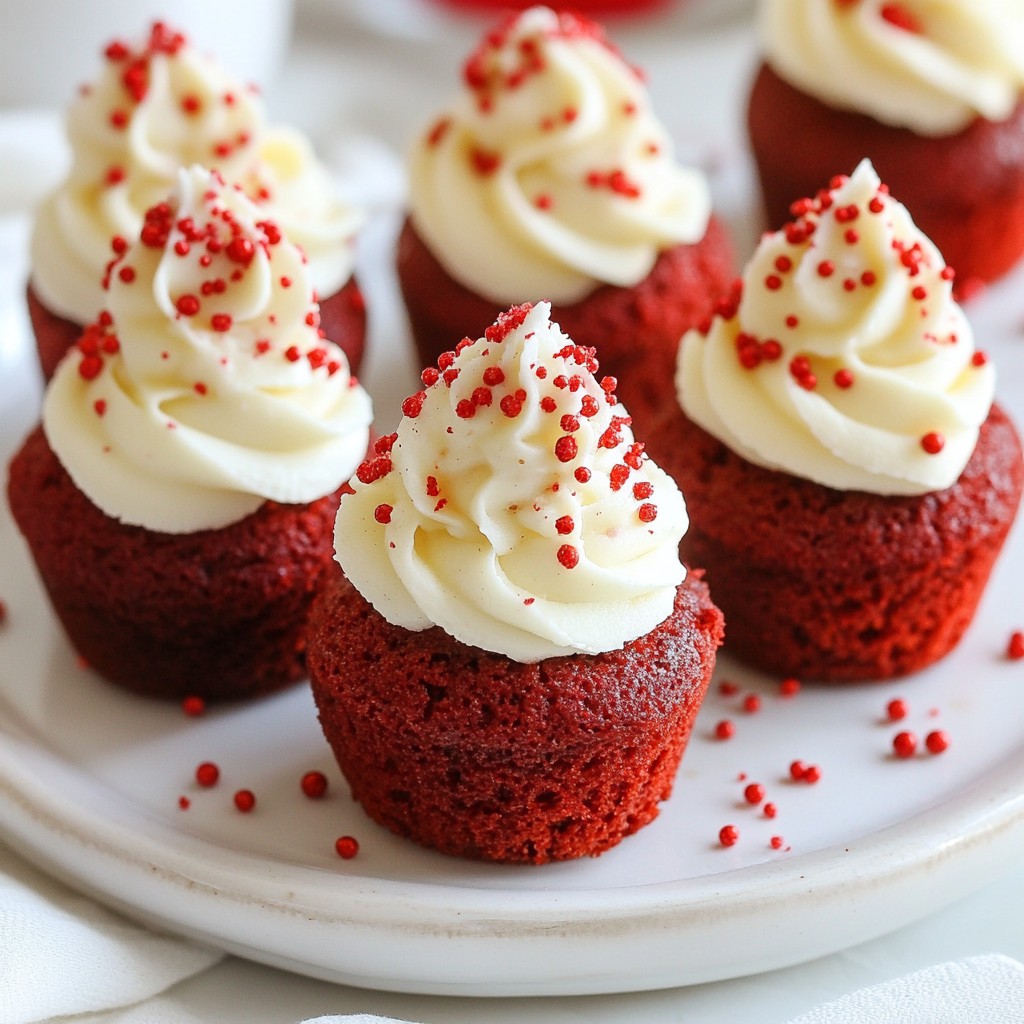
Are you ready to create the ultimate dessert experience? These decadent air fryer Red Velvet Cake Bites will wow your taste buds and impress your friends. Imagine rich, moist cake cloaked in creamy frosting, all cooked to perfection in an air fryer. I’ll guide you through simple steps and tips to make this delightful treat at home. Get your apron on—let's dive into this tasty journey together!
Why I Love This Recipe
- Decadent Flavor: The rich cocoa and vibrant red color make these cake bites a showstopper that pleases both the eye and the palate.
- Easy to Make: This recipe simplifies the process, allowing you to whip up delicious red velvet bites without the hassle of traditional baking.
- Air Fryer Convenience: Cooking in the air fryer yields moist and fluffy cake bites in a fraction of the time compared to conventional baking methods.
- Perfect for Any Occasion: These delightful treats are versatile enough to serve at parties, celebrations, or as a sweet indulgence at home.
Ingredients
List of Ingredients
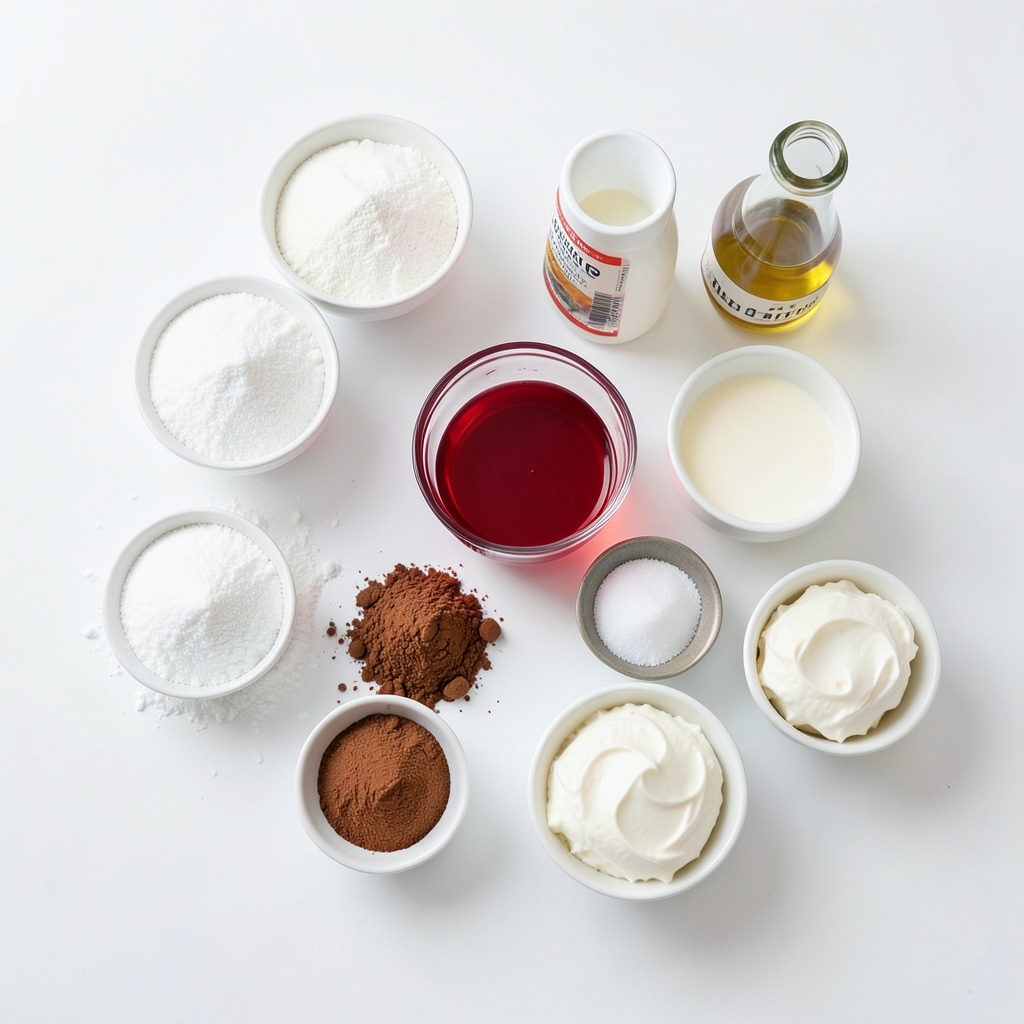
To make decadent air fryer red velvet cake bites, you'll need:
- 1 ½ cups all-purpose flour
- 1 cup granulated sugar
- ½ cup unsweetened cocoa powder
- 1 teaspoon baking soda
- ½ teaspoon salt
- 1 cup vegetable oil
- 1 cup buttermilk (or milk mixed with 1 teaspoon of vinegar)
- 2 large eggs
- 2 tablespoons red food coloring
- 1 teaspoon vanilla extract
- ½ teaspoon white vinegar
- 1 cup cream cheese frosting (store-bought or homemade)
Possible Ingredient Substitutions
You can switch some ingredients for different tastes or needs:
- Use whole wheat flour for a nuttier flavor.
- Swap the granulated sugar for brown sugar for added moisture.
- If you want a healthier option, try using applesauce instead of oil.
- Use almond milk or oat milk in place of buttermilk.
- For a vegan option, replace eggs with flaxseed meal mixed with water.
Cooking Equipment Needed
Here's what you will need to make these cake bites:
- A large mixing bowl
- A whisk for mixing dry ingredients
- A second bowl for the wet ingredients
- An air fryer to cook the bites
- A silicone mold or mini muffin tray
- A spatula or wooden spoon for mixing
- A piping bag or knife for frosting
- A wire rack for cooling
Gather all these items before you start. This way, you ensure a smooth cooking process.
Step-by-Step Instructions
Mixing Dry Ingredients
Start with a large bowl. Sift together the all-purpose flour, granulated sugar, cocoa powder, baking soda, and salt. Use a whisk to blend them well. This step helps make your cake bites light and fluffy.
Preparing Wet Ingredients
In another bowl, mix the vegetable oil, buttermilk, eggs, red food coloring, vanilla extract, and white vinegar. Beat this mixture until it is smooth. This blend gives your red velvet cake its rich color and flavor.
Combining and Filling Molds
Slowly add the wet mixture to the dry bowl. Use a spatula or wooden spoon to mix gently. Stop mixing when just combined; overmixing can make your cake bites tough. Now, prepare your silicone mold or mini muffin tray with cooking spray. Pour the batter into each mold, filling them about three-quarters full.
Cooking in the Air Fryer
Preheat your air fryer to 320°F (160°C). Once heated, place the filled mold into the basket. Cook for 10-12 minutes. Check if they are done by inserting a toothpick into the center. If it comes out clean, they are ready.
Cooling and Frosting the Cake Bites
After cooking, take the mold out of the air fryer. Let the cake bites cool in the mold for about 5 minutes. Then, move them to a wire rack to cool fully. Once cooled, add a swirl of cream cheese frosting on top. For a special touch, sprinkle cocoa powder or red sprinkles on top for a festive look.
Tips & Tricks
Best Practices for Air Frying
To make perfect air fryer red velvet cake bites, start with a preheated fryer. Set it to 320°F (160°C). This temperature cooks the bites evenly, giving them a soft center. Use silicone molds or mini muffin trays, as they help with even cooking. Grease them lightly to avoid sticking.
Avoiding Common Mistakes
Mix your dry and wet ingredients separately first. This helps the flavors blend well. Be careful not to overmix when combining them. Overmixing can lead to dense bites instead of light ones. Also, always check your cake bites with a toothpick. If it comes out clean, they are done.
Ensuring Moisture and Texture
Keep moisture in the cake bites by using buttermilk. If you have no buttermilk, a milk and vinegar mix works too. The vegetable oil also helps keep the bites moist. When frosting, use a good amount of cream cheese frosting. This adds flavor and makes them look great. Serve them warm for the best taste!
Pro Tips
- Use Room Temperature Ingredients: Ensure your eggs and buttermilk are at room temperature for better emulsification and a smoother batter.
- Don't Overmix: Mix the batter just until the ingredients are combined to prevent tough cake bites; a few lumps are okay!
- Check for Doneness: Use a toothpick to check for doneness; if it comes out clean, your cake bites are ready!
- Experiment with Flavors: Consider adding a teaspoon of almond extract or espresso powder to the batter for a unique flavor twist.
Variations
Alternative Frostings
You can have fun with frostings. Cream cheese frosting is classic. But you can try other options too. Here are some ideas:
- Buttercream Frosting: A sweet and fluffy choice. Use vanilla or add cocoa for a chocolate twist.
- Whipped Cream: Light and airy, this adds a nice touch. Mix in some vanilla or almond extract for flavor.
- Ganache: Melted chocolate ganache gives a rich finish. It pairs well with the red velvet taste.
Flavor Add-Ins and Enhancements
Want to jazz up your cake bites? Here are a few ways to add flavor:
- Chocolate Chips: Fold in semi-sweet or dark chocolate chips for extra sweetness.
- Nuts: Walnuts or pecans add a nice crunch. Chop them finely and mix them in.
- Spices: A dash of cinnamon or nutmeg adds warmth. Just a little can change the whole flavor.
Dietary Adjustments (Gluten-Free, Vegan)
You can easily make these cake bites fit different diets:
- Gluten-Free: Swap all-purpose flour for a gluten-free blend. Make sure it has a good texture for baking.
- Vegan: Use a plant-based milk and replace eggs with flax eggs. Mix 1 tablespoon of flaxseed meal with 2.5 tablespoons of water per egg.
- Dairy-Free: Use coconut cream or dairy-free cream cheese for frosting. It keeps the taste creamy without dairy.
Feel free to mix and match these ideas! Each variation gives a new twist to your cake bites.
Storage Info
How to Store Leftovers
To keep your cake bites fresh, place them in an airtight container. This helps prevent drying out. Store them at room temperature if you plan to eat them within two days. For longer storage, refrigerate them. They will stay good for about a week in the fridge.
Freezing Instructions
If you want to save some cake bites for later, freezing is a great option. First, make sure they cool completely. Then, wrap each bite in plastic wrap. After that, place them in a freezer-safe bag or container. They can last in the freezer for up to three months. When you're ready to enjoy, just take out how many you want.
How to Reheat Cake Bites
To reheat your cake bites, use the air fryer for the best results. Preheat your air fryer to 300°F (150°C). Place the cake bites in the basket for about 3-5 minutes. You can also use a microwave, but the air fryer gives them a better texture. Just be careful not to overheat them, or they might dry out. Enjoy your tasty treats warm!
FAQs
How to Prevent Cake Bites from Sticking?
To prevent cake bites from sticking, grease your mold well. Use cooking spray or a brush of oil. Silicone molds work best for easy release. If using a metal tray, be sure to grease thoroughly. You can also line the mold with parchment paper for extra safety. This way, your bites will pop out smoothly and stay intact.
Can I use a regular oven instead of an air fryer?
Yes, you can use a regular oven! Preheat your oven to 350°F (175°C). Pour the batter into a greased mini muffin pan. Bake for about 15-20 minutes. Check for doneness with a toothpick. If it comes out clean, your cake bites are ready. The texture may be slightly different, but they will still taste amazing.
How long do Red Velvet Cake Bites last?
Red velvet cake bites last about 3-5 days when stored properly. Keep them in an airtight container at room temperature. If you want them to last longer, you can refrigerate them. Just note that refrigeration may change their texture slightly. They will still be tasty, though!
What can I serve with Red Velvet Cake Bites?
These cake bites are perfect with coffee or tea. You can also serve them with a scoop of vanilla ice cream. For a fun twist, try pairing them with berries like strawberries or raspberries. They add a nice contrast to the rich flavor. You can even drizzle a bit of chocolate sauce for extra decadence!
You learned how to make tasty Red Velvet Cake Bites. We covered the right ingredients, useful substitutions, and the best tools. I shared step-by-step instructions, tips to avoid mistakes, and ways to add unique flavors. You also discovered how to store and reheat these delightful treats. Remember, experimenting with recipes can make your treats unique. Enjoy sharing these delicious bites with friends and family!