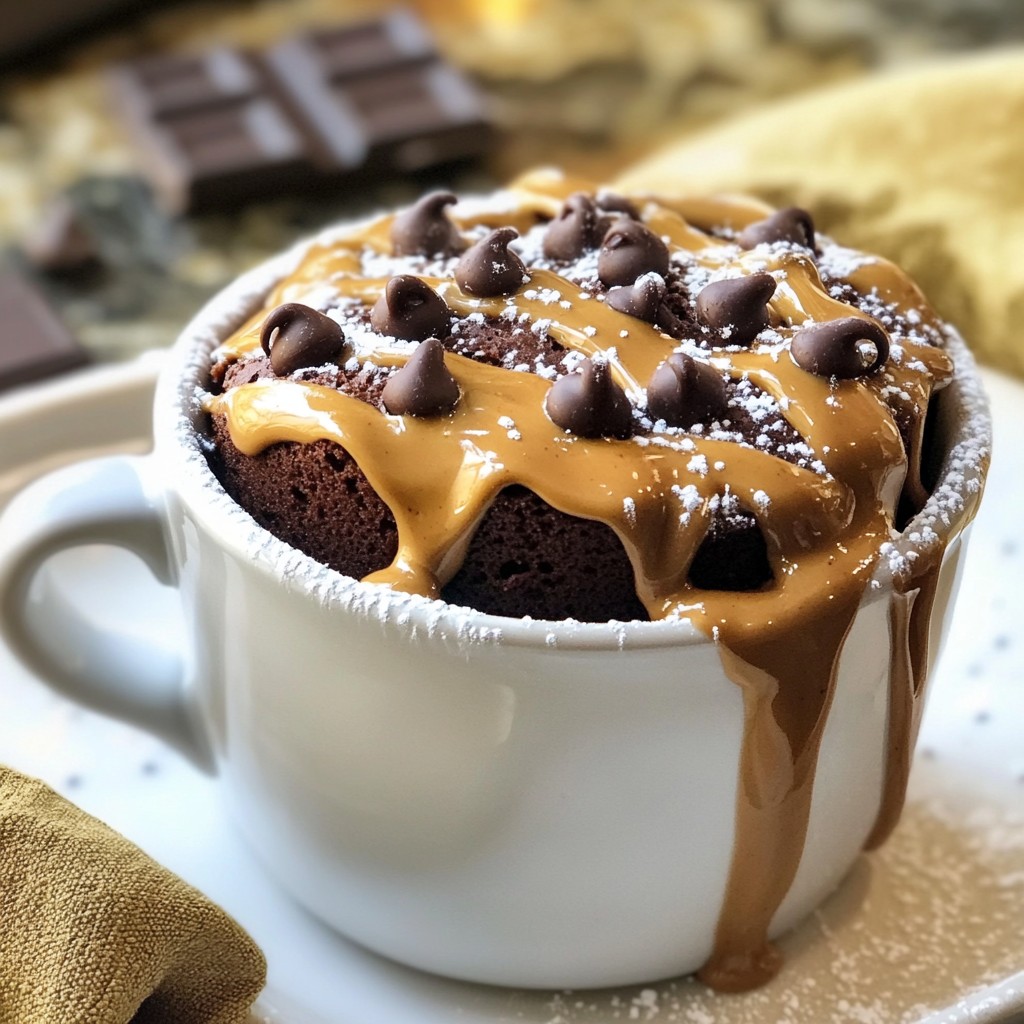
Craving a quick and easy dessert? Meet the Chocolate Peanut Butter Mug Cake, your new best friend! In just a few minutes, you can enjoy a delicious cake made right in your microwave. With simple ingredients and easy steps, this treat is perfect for busy days or late-night cravings. Ready to satisfy your sweet tooth? Let’s dive into this delightful recipe that will make you a mug cake fan!
Why I Love This Recipe
- Quick and Easy: This mug cake takes only 5 minutes to prepare and cook, making it perfect for a last-minute dessert craving.
- Decadent Flavor: The combination of rich chocolate and creamy peanut butter creates an indulgent treat that satisfies any sweet tooth.
- Customizable: You can easily modify the recipe by adding chocolate chips, nuts, or even a scoop of ice cream on top for extra indulgence.
- Single Serving: This recipe is designed for one, so you can enjoy a delicious dessert without the temptation of leftovers.
Ingredients
Complete List of Ingredients
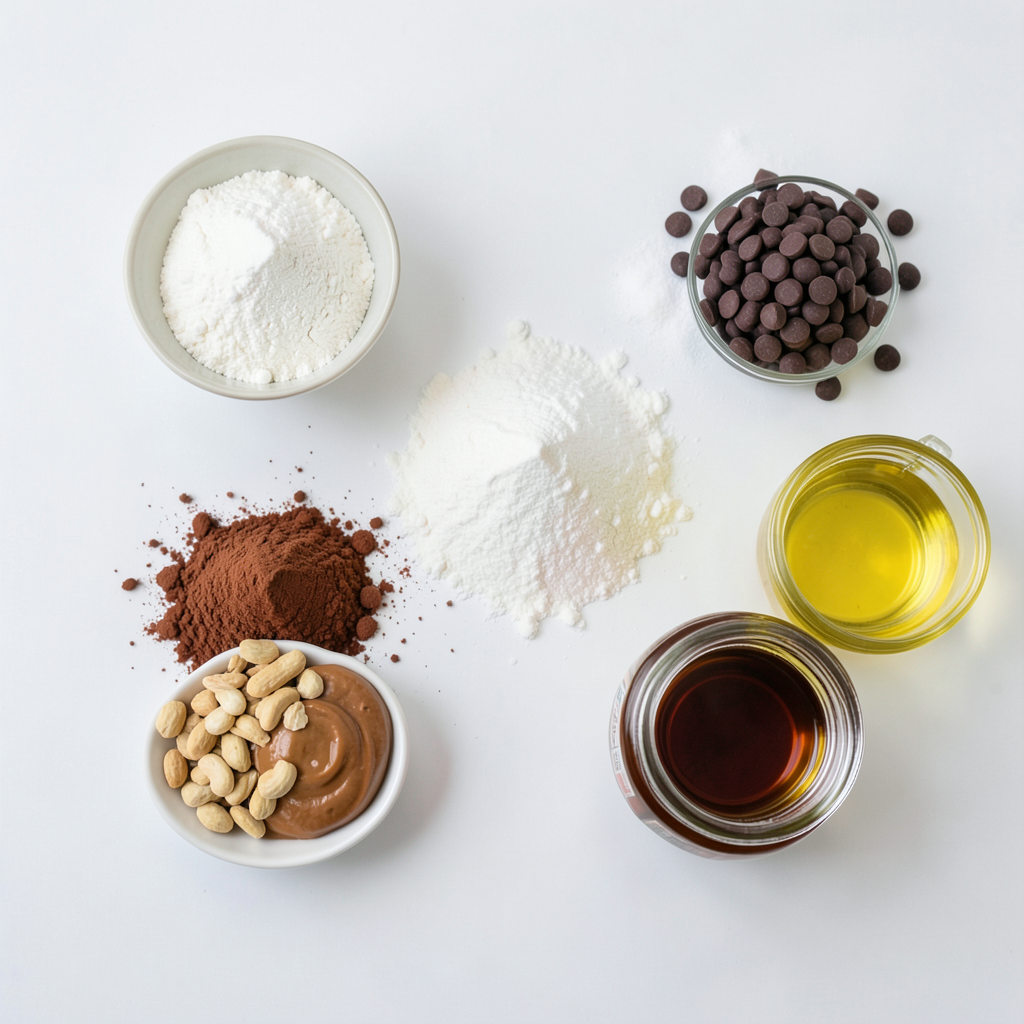
To make the best Chocolate Peanut Butter Mug Cake, gather the following key ingredients:
- 4 tablespoons all-purpose flour
- 4 tablespoons granulated sugar
- 2 tablespoons unsweetened cocoa powder
- 1/8 teaspoon baking powder
- 1/8 teaspoon salt
- 3 tablespoons milk (or a non-dairy alternative such as almond or oat milk)
- 2 tablespoons peanut butter (choose between smooth or crunchy based on preference)
- 1 tablespoon vegetable oil
- 1/4 teaspoon vanilla extract
- Optional: a handful of chocolate chips for an extra layer of richness
Measurements and Substitutions
Using the right measurements is key. If you need to make swaps, here are some tips:
- All-purpose flour can be replaced with gluten-free flour for a gluten-free version.
- Granulated sugar can be swapped with brown sugar for a deeper flavor.
- Cocoa powder might be replaced with carob powder if you want a different taste.
- Any milk can work, but almond or oat milk adds a nice twist.
Suggested Ingredient Variations
Get creative with your mug cake by trying these variations:
- Add a pinch of cinnamon for warmth.
- Mix in a tablespoon of chopped nuts for crunch.
- Use flavored peanut butter, like chocolate or honey.
- Top with whipped cream or ice cream for a special treat.
These small changes can make your mug cake unique and fun. Enjoy exploring the flavors!
Step-by-Step Instructions
Preparing Your Mug
Choose a microwave-safe mug, around 12 oz. This size works best.
Mixing Dry Ingredients
In your mug, add:
- 4 tablespoons all-purpose flour
- 4 tablespoons granulated sugar
- 2 tablespoons unsweetened cocoa powder
- 1/8 teaspoon baking powder
- 1/8 teaspoon salt
Use a fork or small whisk to mix these dry items. Make sure they blend well. This helps the cake rise evenly.
Combining Wet Ingredients
Now, pour in:
- 3 tablespoons milk (or almond/oat milk)
- 2 tablespoons peanut butter
- 1 tablespoon vegetable oil
- 1/4 teaspoon vanilla extract
Stir these wet ingredients into the dry mix. Use your fork again to create a smooth batter. If you want, add a handful of chocolate chips for extra sweetness.
Microwaving the Mug Cake
Put your mug in the microwave. Cook it on high for 60 to 90 seconds. Check at 60 seconds. The cake should rise and look firm at the edges. The center should stay a bit gooey. This gives it a great texture.
After microwaving, let it cool for about one minute. Enjoy your delicious chocolate peanut butter mug cake!
Tips & Tricks
Achieving the Perfect Texture
To get that ideal texture, you want to cook just right. Microwaves can vary, so start with 60 seconds. Check the cake. It should rise but still feel soft in the middle. If it looks too wet, give it 10 more seconds. Remember, the center should stay a bit gooey for that luscious bite.
Common Mistakes to Avoid
One common mistake is overmixing. If you beat the batter too much, your cake can become tough. Just mix until no lumps show. Another mistake is not checking the cooking time. If you leave it too long, your cake might turn dry. Lastly, don’t forget to use a large enough mug. A smaller mug can overflow and make a mess!
Serving Suggestions and Enhancements
Serving this mug cake is simple and fun. You can enjoy it right from the mug for a cozy feel. For a fancier look, transfer it to a plate. Add a scoop of vanilla ice cream or some fresh berries on the side. You can also drizzle chocolate sauce on top or add a dollop of peanut butter for more flavor. Each bite gets even better with these tasty extras!
Pro Tips
- Use a Larger Mug: Choose a mug that holds at least 12 oz to prevent overflow while cooking.
- Check for Doneness: Microwave times may vary, so start checking at 60 seconds and adjust as necessary.
- Customize Your Cake: Feel free to mix in nuts or swap the peanut butter for almond or cashew butter for a different flavor.
- Serve Warm: Enjoy your mug cake warm for the best texture, and consider adding a scoop of ice cream on top.
Variations
Healthier Alternatives
You can easily make this mug cake a bit healthier. Swap out the all-purpose flour for whole wheat flour. Use less sugar or try a sugar substitute like stevia. For a lighter touch, choose almond milk or oat milk instead of regular milk. If you want to cut calories, use a smaller amount of peanut butter or a nut butter blend.
Flavor Variations
If you crave new flavors, think beyond chocolate and peanut butter. Add a pinch of cinnamon for warmth. Swap cocoa powder with matcha powder for a green tea twist. You can also mix in nuts or seeds for added crunch. Try using almond butter instead of peanut butter for a different taste. A splash of coffee can enhance the chocolate flavor too!
Holiday or Seasonal Twists
Seasonal changes can inspire fun twists. For fall, add a dash of pumpkin spice. Around winter, mix in peppermint extract for a festive touch. You could even sprinkle crushed candy canes on top for a holiday vibe. In spring, fresh berries can brighten up the cake. During summer, a scoop of ice cream on top makes it feel like a treat for warm days!
Storage Info
Storing Leftovers
If you have any leftover mug cake, let it cool completely. Cover it tightly with plastic wrap or place it in an airtight container. This helps keep it fresh. Store in the fridge for up to two days. The mug cake may dry out if left uncovered.
Reheating Instructions
To reheat, take the mug cake out of the fridge. Place it in the microwave. Heat on high for about 10 to 15 seconds. Check if it's warm enough. If not, heat for a few more seconds. Be careful not to overheat it, or it may become tough.
Freezing Options
Freezing the mug cake is simple. Let it cool down fully, then wrap it tightly in plastic wrap. Place it in a freezer-safe container or bag. You can freeze it for up to a month. When you're ready to eat, thaw it in the fridge overnight. Reheat it in the microwave as needed.
FAQs
How do I make a vegan version of Chocolate Peanut Butter Mug Cake?
To make a vegan mug cake, swap the milk for a non-dairy option like almond or oat milk. Use your favorite plant-based peanut butter, and make sure your sugar is vegan-friendly. You can skip the egg since this recipe doesn't need one. The texture stays moist and delicious!
Can I bake this mug cake in the oven?
Yes, you can! Preheat your oven to 350°F (175°C). Pour the batter into a small oven-safe dish. Bake for about 15 to 20 minutes or until a toothpick comes out clean. Keep an eye on it so it does not overbake and dry out.
How can I make this dessert lower in calories?
To lower the calories, use less sugar or a sugar substitute. You can also use low-fat milk or a non-dairy alternative. Reducing the amount of peanut butter can help, too. Just remember, this may change the flavor and texture a bit.
What are some toppings I can add to enhance flavor?
Toppings can take your mug cake to the next level. Consider adding:
- A scoop of vanilla ice cream
- Fresh berries like strawberries or raspberries
- A drizzle of chocolate syrup
- A sprinkle of crushed nuts
- A dollop of whipped cream
These additions will not only look good but taste great as well!
You learned how to make a tasty mug cake with our detailed guide. We covered the ingredients, step-by-step instructions, and useful tips. Remember, you can customize flavors or make healthier choices. Store leftovers properly to enjoy later, or even freeze them. Keep experimenting to find your perfect mug cake recipe. I hope this inspires you to create your own delicious treats with ease!