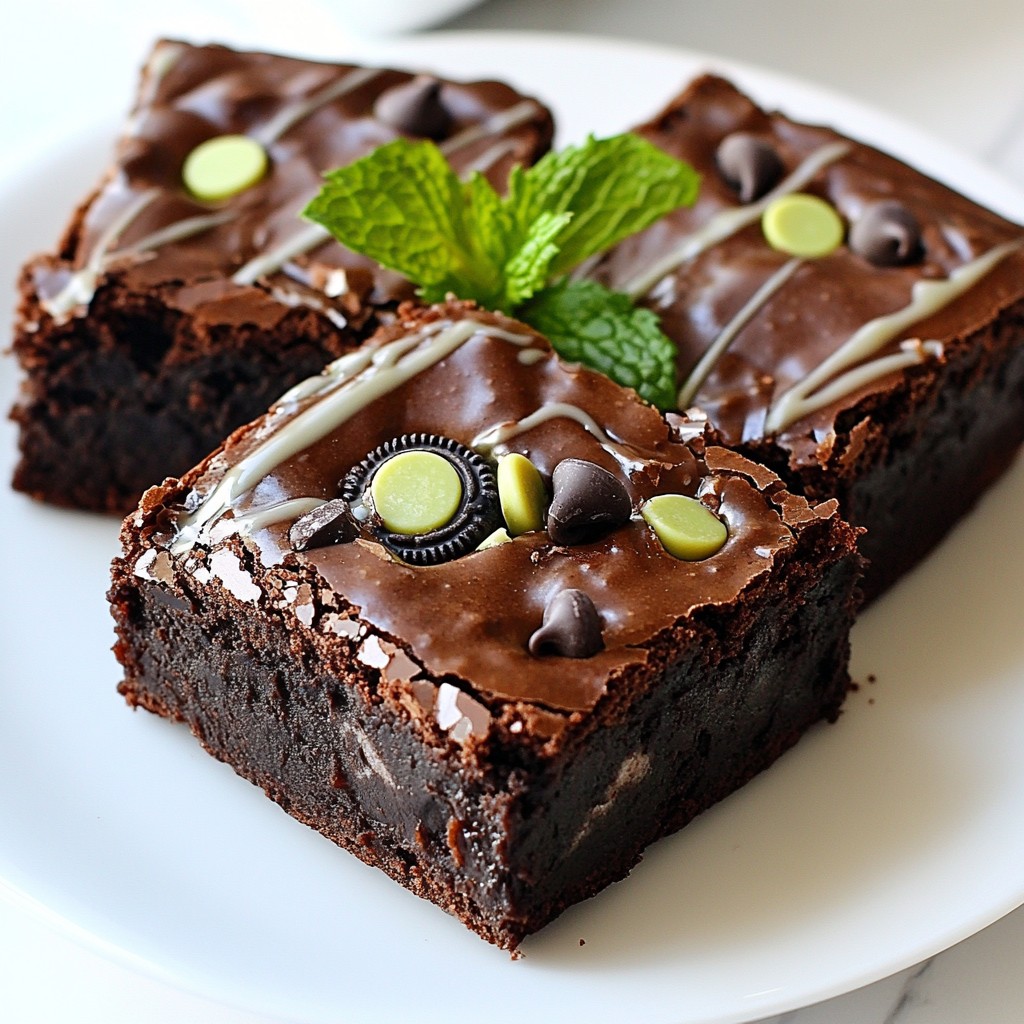
If you crave something sweet and minty, you're in for a treat! These Chocolate Mint Oreo Brownies are smooth, rich, and packed with flavor. Picture fudgy brownies loaded with mint-flavored Oreos and chocolate chips. This recipe is simple and perfect for kids and adults alike. Let's dive into the ingredients and steps to create your new favorite dessert!
Why I Love This Recipe
- Decadent Flavor: The combination of chocolate and mint creates a rich and refreshing flavor that is simply irresistible.
- Easy to Make: This recipe is straightforward with minimal steps, making it perfect for both novice and experienced bakers.
- Perfect for Sharing: With 20 servings, these brownies are ideal for parties, potlucks, or a sweet treat for family and friends.
- Customizable: You can easily adjust the sweetness or add different mix-ins to suit your taste preferences.
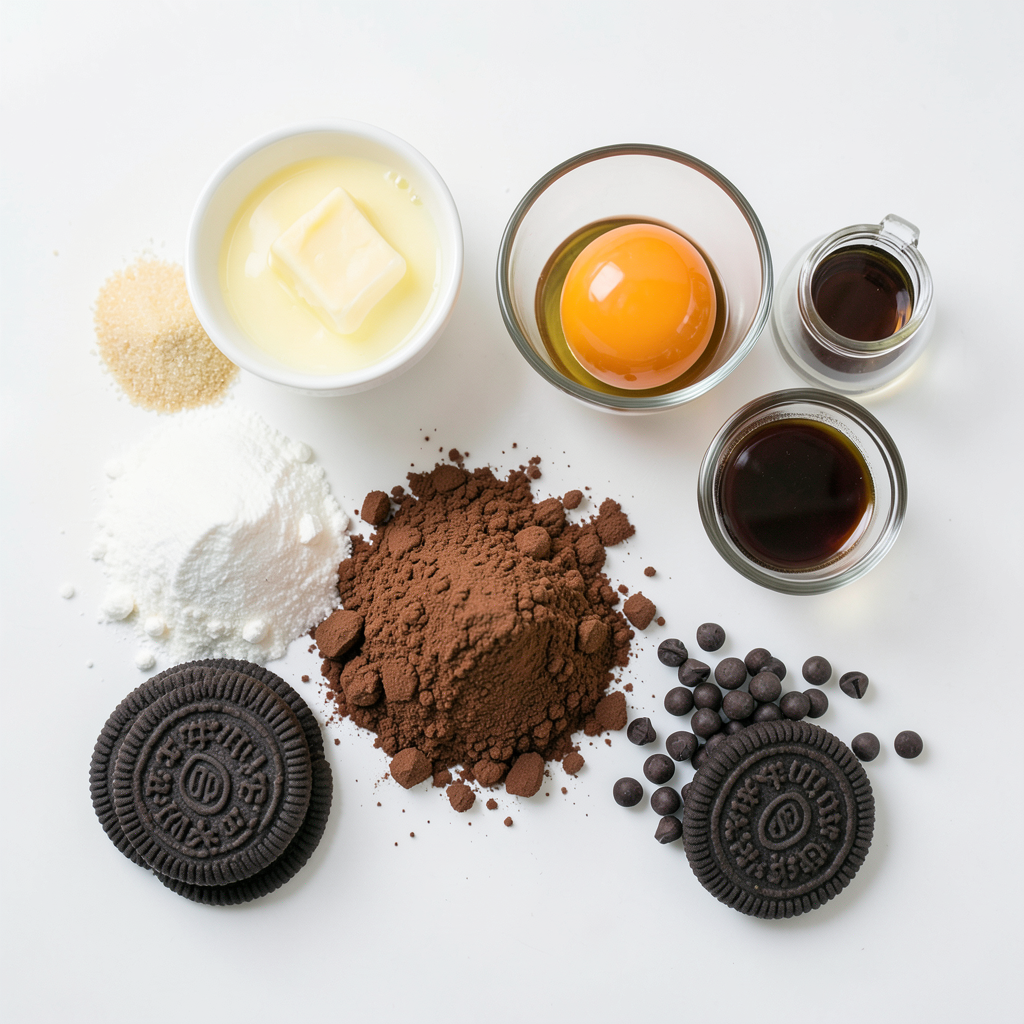
Ingredients
List of Essential Ingredients
- 1 cup unsalted butter, melted
- 2 cups granulated sugar
- 4 large eggs
- 1 teaspoon vanilla extract
- 1 cup all-purpose flour
- 1 cup unsweetened cocoa powder
- 1/2 teaspoon baking powder
- 1/2 teaspoon salt
- 1 cup chopped mint-flavored Oreo cookies (about 10-12 cookies)
- 1/2 cup chocolate chips
- Fresh mint leaves for garnish (optional)
Gather all these ingredients before you start. Each one plays a key role in making your brownies smooth and rich. The unsalted butter gives moisture, while the sugar adds sweetness. Eggs help the brownies rise and bind the mix. Vanilla boosts flavor.
Flour and cocoa powder are the base for that classic brownie taste. Baking powder helps them rise, and salt balances the sweetness. The mint-flavored Oreo cookies are the star, bringing delightful mint and chocolate. Lastly, chocolate chips add extra richness.
You can use fresh mint leaves for a pretty garnish. They add a nice touch when serving. Having everything ready makes the process smooth and fun!
Step-by-Step Instructions
Preparation Steps
- Preheat your oven to 350°F (175°C).
- Grease a 9x13 inch baking pan. Line it with parchment paper. Let some paper hang over the edges. This helps with easy removal later.
- In a large bowl, mix the melted butter and granulated sugar. Whisk them until smooth.
- Add four large eggs, one at a time. Whisk well after each egg. Stir in one teaspoon of vanilla extract.
Baking Process
- In another bowl, sift together one cup of all-purpose flour, one cup of cocoa powder, half a teaspoon of baking powder, and half a teaspoon of salt.
- Gradually add this dry mix to your wet ingredients. Stir gently until just combined. Don’t overmix!
- Fold in one cup of chopped mint-flavored Oreo cookies and half a cup of chocolate chips. Ensure they are evenly mixed.
- Transfer the batter into the prepared baking pan. Use a spatula to smooth the top.
- Bake for 25-30 minutes. Check for doneness by inserting a toothpick in the center. It should have a few moist crumbs.
Cooling and Serving
- Let the brownies cool completely in the pan. Set the pan on a wire rack.
- Use the parchment paper overhang to lift the brownies out of the pan.
- Cut them into squares. Garnish each square with a fresh mint leaf if you like. Enjoy your rich, smooth chocolate mint Oreo brownies!
Tips & Tricks
Common Mistakes to Avoid
- Overmixing the batter: Mixing too much can make brownies tough. Stir just until combined.
- Incorrect baking time: Bake for 25-30 minutes. Check with a toothpick. It should come out with a few moist crumbs.
- Not allowing brownies to cool properly: Let them cool in the pan. This step helps set the texture.
Enhancing Flavor and Texture
- Adding peppermint extract: A little bit of peppermint extract boosts the mint flavor. Use just 1/2 teaspoon to start.
- Using different types of chocolate chips: Try dark, milk, or white chocolate chips. Each adds a unique taste.
Best Practices for Perfect Brownies
- Tips for measuring ingredients accurately: Use a scale for dry ingredients. This ensures the right balance.
- Importance of using room temperature eggs: Eggs mix better when they are at room temperature. This helps create a smooth batter.
Pro Tips
- Use Room Temperature Eggs: Make sure your eggs are at room temperature before adding them to the batter. This helps create a smoother mixture and better texture in your brownies.
- Don’t Overmix the Batter: When combining the dry ingredients with the wet, stir just until incorporated. Overmixing can lead to tough brownies.
- Add Extra Mint Flavor: For a more intense mint flavor, consider adding a few drops of peppermint extract to the batter along with the vanilla.
Variations
Alternative Add-ins
You can change up the flavor of your brownies. Try adding nuts like walnuts or pecans. Chopped nuts give a nice crunch. You can also use other cookie flavors. Try peanut butter or chocolate chip cookies for fun twists. Another idea is to create swirls of cream cheese or caramel. These additions create a rich, creamy layer. It will make your brownies even more special.
Gluten-Free Option
If you need a gluten-free option, switch to gluten-free all-purpose flour. Many brands work well in this recipe. Just make sure to use the same amount as regular flour. This way, your brownies will still be tasty and fudgy.
Vegan Adaptation
For a vegan version, replace the eggs and butter. Use applesauce instead of eggs. A quarter cup of applesauce works well for each egg. For the butter, you can use coconut oil or vegan butter. These swaps keep the texture rich and moist. Enjoy your brownies without any animal products!
Storage Info
Proper Storage Techniques
To keep your Chocolate Mint Oreo Brownies fresh, store them in an airtight container. This helps prevent them from drying out. Make sure the container is sealed well. You can also layer the brownies with parchment paper to avoid sticking. This method keeps each piece intact and ready to enjoy.
Freezing and Thawing
You can freeze these brownies for later! Cut them into squares and wrap each piece in plastic wrap. Then, place them in a freezer-safe bag. When you're ready to eat, take them out and let them thaw at room temperature. For a quick treat, you can warm them slightly in the microwave.
Shelf Life
When stored correctly, your brownies can last up to one week at room temperature. If you freeze them, they can stay fresh for up to three months. Just remember to check for any signs of freezer burn before enjoying them.
FAQs
How to make Chocolate Mint Oreo Brownies from scratch?
To make these brownies, you first melt the butter. Then mix it with sugar until smooth. Next, add eggs and vanilla, whisking well. In a separate bowl, combine flour, cocoa powder, baking powder, and salt. Gradually mix the dry ingredients into the wet ingredients. Finally, fold in chopped mint Oreos and chocolate chips. Pour the batter into a greased baking pan and bake.
Can I use regular Oreos instead of mint-flavored ones?
Yes, you can use regular Oreos. However, the flavor will change. You may want to add a bit of peppermint extract to keep that minty taste. This way, you still get a nice chocolate-mint blend.
What can I substitute for eggs in this recipe?
You can use applesauce, mashed bananas, or flaxseed meal as egg substitutes. For flaxseed, mix one tablespoon with three tablespoons of water. Let it sit for a few minutes to thicken. These options help keep the brownies moist.
How do I know when the brownies are done baking?
You can check by inserting a toothpick in the center. If it comes out with a few moist crumbs, they are done. If it comes out clean, the brownies may be overbaked. Aim for that fudgy texture.
Can I add other flavors like peanut butter or caramel?
Absolutely! You can swirl in peanut butter or caramel into the batter. Just be careful not to overmix. This will add a fun twist to the chocolate mint flavor. Enjoy experimenting with different tastes!
You now know how to make delicious Chocolate Mint Oreo Brownies. We covered the essential ingredients, step-by-step instructions, and storage tips. Remember to avoid common mistakes and try fun variations. Fresh brownies bring joy, so enjoy them with family and friends. Use your newfound knowledge to impress others with your baking skills. Happy baking!