If you're craving a decadent dessert that impresses, you're in the right place! My Chocolate Marble Pound Cake combines rich chocolate and sweet vanilla for a treat that's hard to resist. In this blog post, I'll guide you through simple ingredients, easy steps, and helpful tips for perfecting this classic dish. Whether you're new to baking or a seasoned pro, you'll find everything you need to create a stunning cake everyone will love. Let's get started!
Why I Love This Recipe
- Decadent Flavor: This chocolate marble pound cake offers a delightful combination of rich chocolate and buttery vanilla flavors that is simply irresistible.
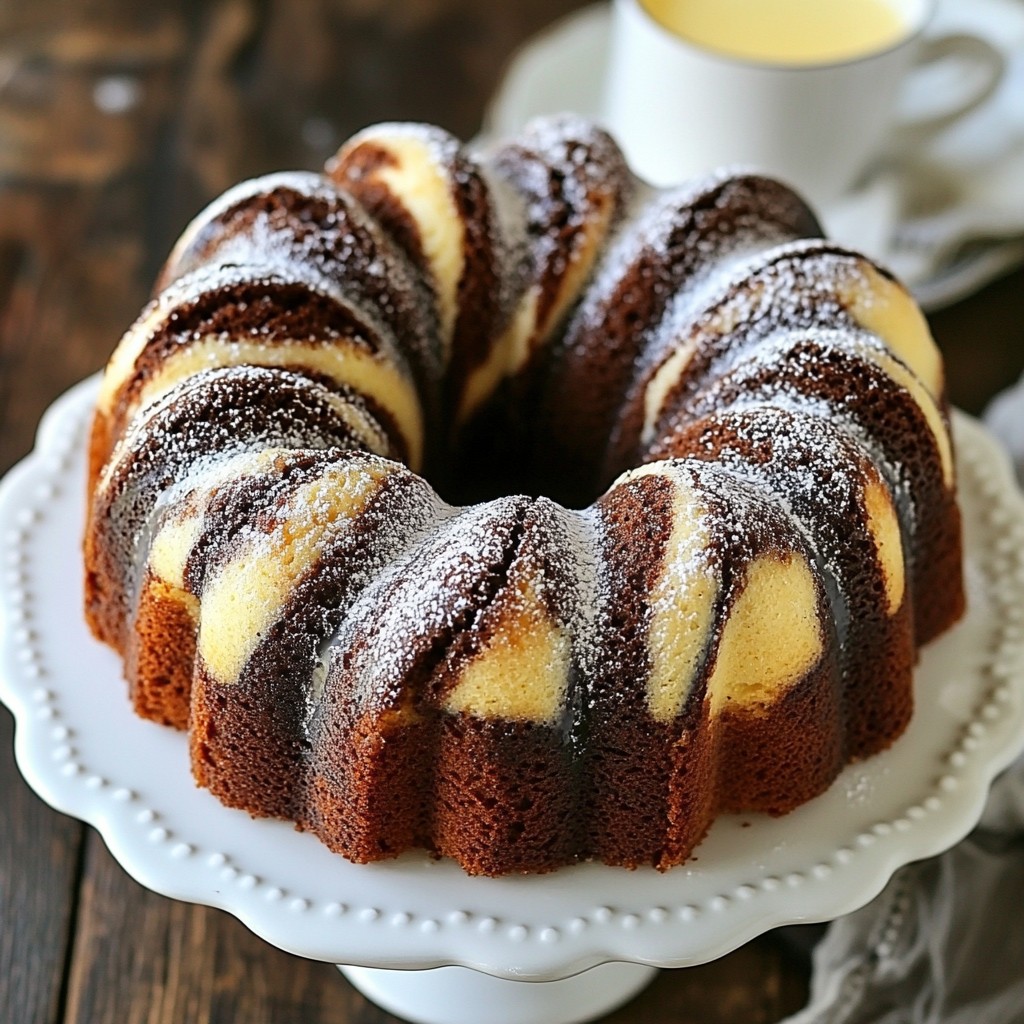
- Visual Appeal: The marbled effect adds an eye-catching presentation to the cake, making it perfect for any gathering or special occasion.
- Easy to Make: With straightforward steps and common ingredients, this recipe is accessible for bakers of all skill levels.
- Versatile Enjoyment: Whether served plain, glazed, or with whipped cream and berries, this cake is a treat for any dessert lover.
Ingredients
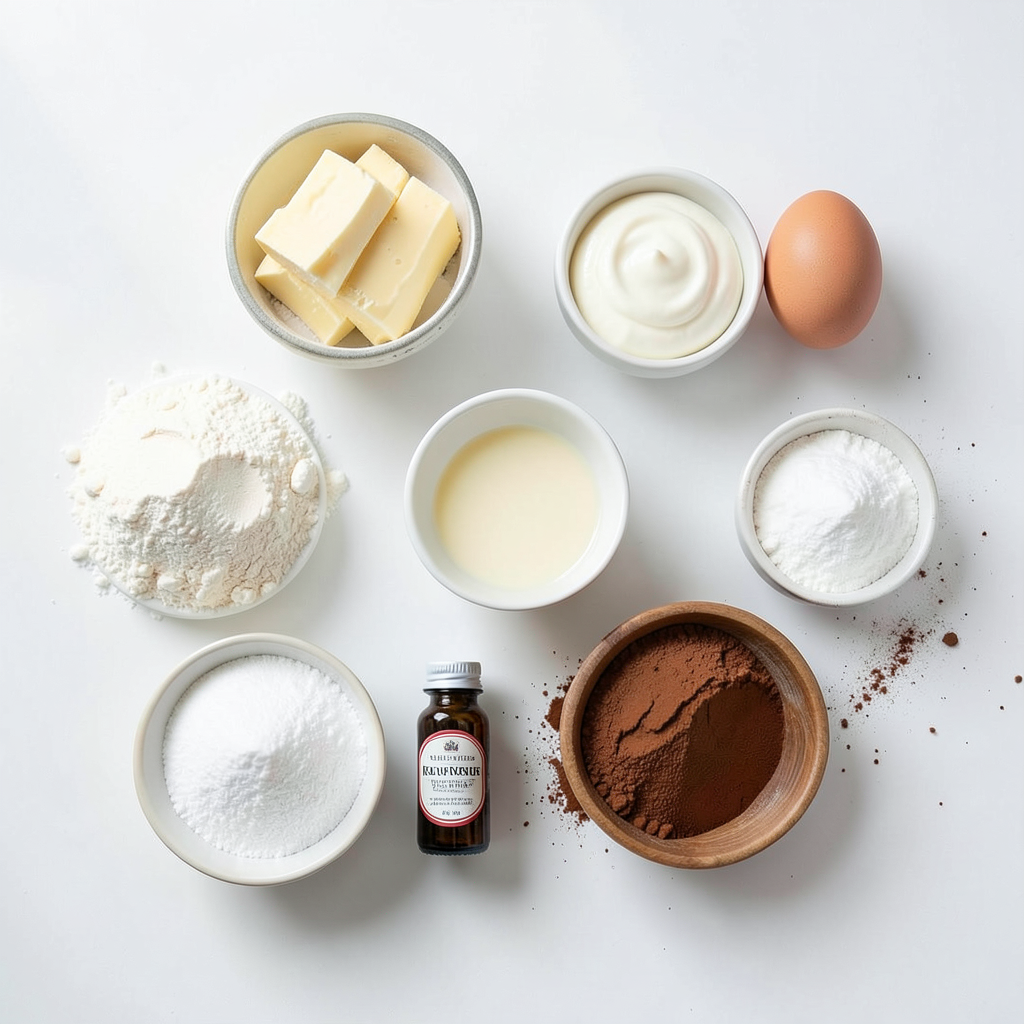
Essential Ingredients for Chocolate Marble Pound Cake
To make a rich chocolate marble pound cake, you need the following key ingredients:
- 2 cups all-purpose flour
- 1 teaspoon baking powder
- 1/2 teaspoon salt
- 1 cup unsalted butter, softened
- 1 cup granulated sugar
- 4 large eggs, at room temperature
- 1 teaspoon pure vanilla extract
- 1/4 cup sour cream
- 1/2 cup unsweetened cocoa powder
These items are the foundation of your cake. The flour gives structure, while the butter and sugar add richness. The eggs help bind everything together, and the cocoa powder brings in that lovely chocolate flavor.
Optional Glaze Ingredients
If you want to add a sweet touch, here are the glaze ingredients:
- 1/2 cup powdered sugar
- 2 tablespoons milk
This glaze is simple to make and adds a nice finish to the cake. It gives a bit of shine and extra sweetness that many enjoy.
Tips for Ingredient Substitutions
You can easily swap out some ingredients if needed:
- For dairy-free options, use coconut oil or vegan butter.
- Use almond flour in place of all-purpose flour for a gluten-free cake.
- If you lack sour cream, plain yogurt works well too.
These substitutions keep your cake delicious while fitting various diets. Just remember that changes might slightly affect the texture or taste.
Step-by-Step Instructions
Detailed Baking Instructions
1. First, preheat your oven to 350°F (175°C).
2. Grease a 9x5-inch loaf pan. Dust it lightly with flour.
3. In a bowl, mix 2 cups of flour, 1 teaspoon of baking powder, and 1/2 teaspoon of salt.
4. In another bowl, beat 1 cup of softened butter and 1 cup of sugar. Mix until light and fluffy.
5. Add 4 eggs, one at a time. Mix well after each addition.
6. Add 1 teaspoon of vanilla extract and 1/4 cup of sour cream. Mix until smooth.
7. Gradually add the flour mix to the wet mix. Stir gently until just combined.
8. Divide the batter into two bowls. Sift 1/2 cup of cocoa powder into one bowl. Mix well.
9. Spoon the vanilla and chocolate batters into the pan, alternating them.
10. Use a knife to gently swirl the batters together for a marbled look.
11. Bake for 55 to 65 minutes. Check with a toothpick; it should come out clean.
12. Let the cake cool in the pan for 15 minutes. Then, transfer it to a wire rack.
Tips for Preparing Your Oven and Pan
- Always preheat your oven before baking. This helps the cake rise well.
- Grease the loaf pan well to prevent sticking. Use butter or non-stick spray.
- Dusting with flour adds an extra layer of protection against sticking.
How to Achieve the Perfect Marble Effect
- Use equal spoonfuls of each batter when layering. This helps with balance.
- Swirl gently with a knife or skewer. Avoid over-mixing to keep the marbled look.
- Practice makes perfect! Don’t worry if it’s not perfect on the first try.
Tips & Tricks
Common Baking Mistakes to Avoid
Baking can be tricky. Here are some mistakes to watch for:
- Overmixing: This can make your cake tough. Mix until just combined.
- Wrong Oven Temperature: Always preheat your oven. Use an oven thermometer for accuracy.
- Not Measuring Ingredients: Use measuring cups and spoons. This keeps your ratios correct.
- Not Greasing the Pan: Make sure to grease your loaf pan well. Otherwise, the cake may stick.
Recommended Tools for Best Results
Having the right tools makes baking easier and more fun. Here are my must-haves:
- Electric Mixer: This helps blend butter and sugar well.
- Loaf Pan: A 9x5-inch pan works best for this recipe.
- Mixing Bowls: Use different sizes for wet and dry ingredients.
- Rubber Spatula: Great for scraping the batter out of bowls.
- Toothpick: Use this to check if your cake is done.
How to Ensure Moisture in Your Cake
A moist cake is a happy cake. Here are ways to keep it moist:
- Use Room-Temperature Ingredients: This helps the batter mix better.
- Add Sour Cream: It adds moisture and richness to your cake.
- Don’t Overbake: Check your cake a few minutes early. It should be golden, not dark.
- Cool Properly: Let the cake cool in the pan for a bit. This keeps it moist.
Pro Tips
- Use Room Temperature Ingredients: Ensuring that your butter, eggs, and sour cream are at room temperature will help them combine more easily, resulting in a smoother batter and a more even texture in the cake.
- Don't Overmix: When incorporating the flour mixture, mix just until combined. Overmixing can lead to a dense cake, so stop as soon as you no longer see dry flour.
- Swirl with Care: When creating the marble effect, use a gentle hand to swirl the batters together. Too much mixing can lead to a less defined marble pattern.
- Cool Properly: Allow the cake to cool in the pan for about 15 minutes before transferring it to a wire rack. This prevents it from breaking apart and helps maintain its shape.
Variations
Flavor Variations for Chocolate Marble Pound Cake
You can change the flavor of your chocolate marble pound cake easily. Try adding orange zest for a bright, citrusy twist. Lemon zest also works well for a fresh touch. If you love spices, add a pinch of cinnamon or nutmeg to the vanilla batter. For a richer taste, use dark cocoa powder instead of regular cocoa. You can even swap in different extracts like almond or coffee for unique flavors.
Dietary Adjustments (gluten-free, vegan options)
Making a gluten-free chocolate marble pound cake is simple. Just use a 1:1 gluten-free flour blend instead of all-purpose flour. For a vegan version, replace the eggs with flax eggs. Mix one tablespoon of ground flaxseed with three tablespoons of water and let it sit. Use non-dairy butter and a plant-based sour cream alternative. This way, everyone can enjoy this treat!
Creative Add-ins for Extra Flavor
Want to elevate your chocolate marble pound cake? Add in some chocolate chips for extra richness. Chopped nuts like walnuts or pecans add a nice crunch. Dried fruit, such as cranberries or cherries, can bring a sweet surprise. You could even fold in some espresso powder to enhance the chocolate flavor. Be playful and try your favorite mix-ins for a personal touch!
Storage Info
Best Practices for Storing Pound Cake
To keep your chocolate marble pound cake fresh, store it in an airtight container. This helps to keep moisture in and prevents it from drying out. Place a piece of wax paper or plastic wrap over the cake before sealing it. It’s best stored at room temperature for up to three days. If you want it to last longer, consider freezing.
How to Freeze Chocolate Marble Pound Cake
Freezing is a great option if you want to save some cake for later. First, let the cake cool completely. Wrap it tightly in plastic wrap. Then, place it inside a freezer-safe bag or container. Make sure to label it with the date. The cake can stay in the freezer for up to three months without losing its flavor.
Thawing and Reheating Tips
When you’re ready to enjoy the cake, take it out of the freezer. Leave it wrapped and let it thaw in the fridge overnight. If you want to eat it warm, you can reheat slices in the microwave for about 10 to 15 seconds. This gives you a warm and tasty treat, just like fresh out of the oven!
FAQs
How do I know when my pound cake is done?
To check if your pound cake is ready, insert a toothpick into the center. If it comes out clean or with just a few moist crumbs, it's done. The edges will be golden, and the top should spring back when lightly pressed. If it looks too wet, give it a few more minutes in the oven.
Can I make this recipe in advance?
Yes, you can make this chocolate marble pound cake in advance. Once it cools, wrap it tightly in plastic wrap. Store it at room temperature for up to three days. You can also freeze it for a longer shelf life. Just make sure it’s well-wrapped to keep it fresh.
What can I serve with chocolate marble pound cake?
You can enjoy this cake plain, but there are great options to add. Serve it with a drizzle of the optional glaze for sweetness. Fresh berries or a dollop of whipped cream are wonderful too. For coffee lovers, a cup of coffee or tea pairs nicely with this rich treat.
In this blog, we explored the essential ingredients for chocolate marble pound cake. You learned step-by-step baking instructions and tips for a perfect marble effect. I shared common mistakes to avoid and tools you need for success. We also discussed variations and storage tips to keep your cake fresh.
Remember, baking is about fun and creativity. Don't hesitate to experiment with flavors and ingredients. Enjoy every bite of your delicious creation!