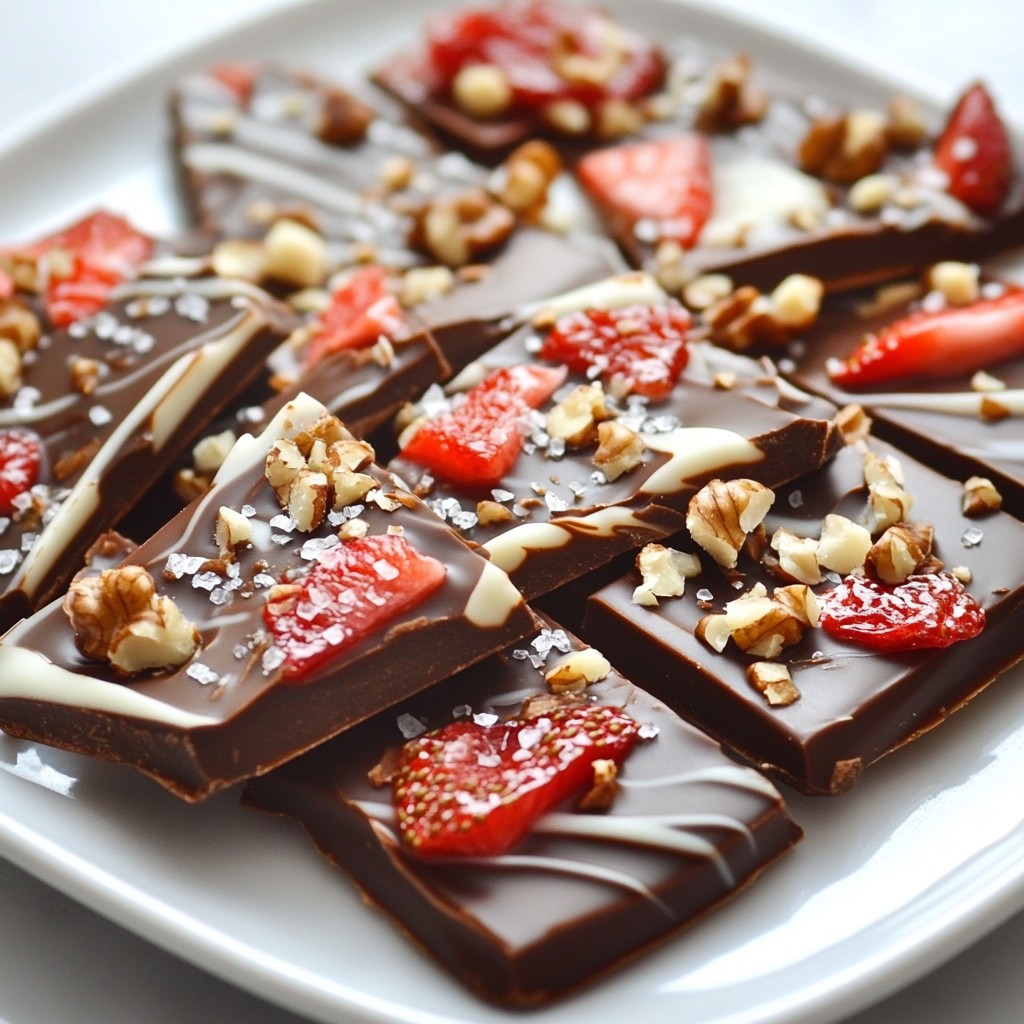
Indulging in Chocolate Covered Strawberry Bark is a simple joy. This treat combines rich chocolate and sweet strawberries in one easy recipe. With just a few common ingredients, you can create a delightful dessert that looks and tastes amazing. Whether you're celebrating a holiday or just treating yourself, this bark will impress. Let’s dive into the fun of making your very own Chocolate Covered Strawberry Bark!
Why I Love This Recipe
- Decadent Flavor Combination: The rich dark chocolate paired with the creamy white chocolate creates a delightful contrast that is simply irresistible.
- Easy to Make: This recipe requires minimal ingredients and can be prepared in just a few simple steps, making it perfect for any skill level.
- Customizable Toppings: You can easily switch up the toppings to suit your taste, whether you prefer different nuts or dried fruits.
- Perfect for Sharing: This bark is ideal for parties or gatherings, allowing you to serve a delicious treat that everyone will love.
Ingredients
List of Required Ingredients
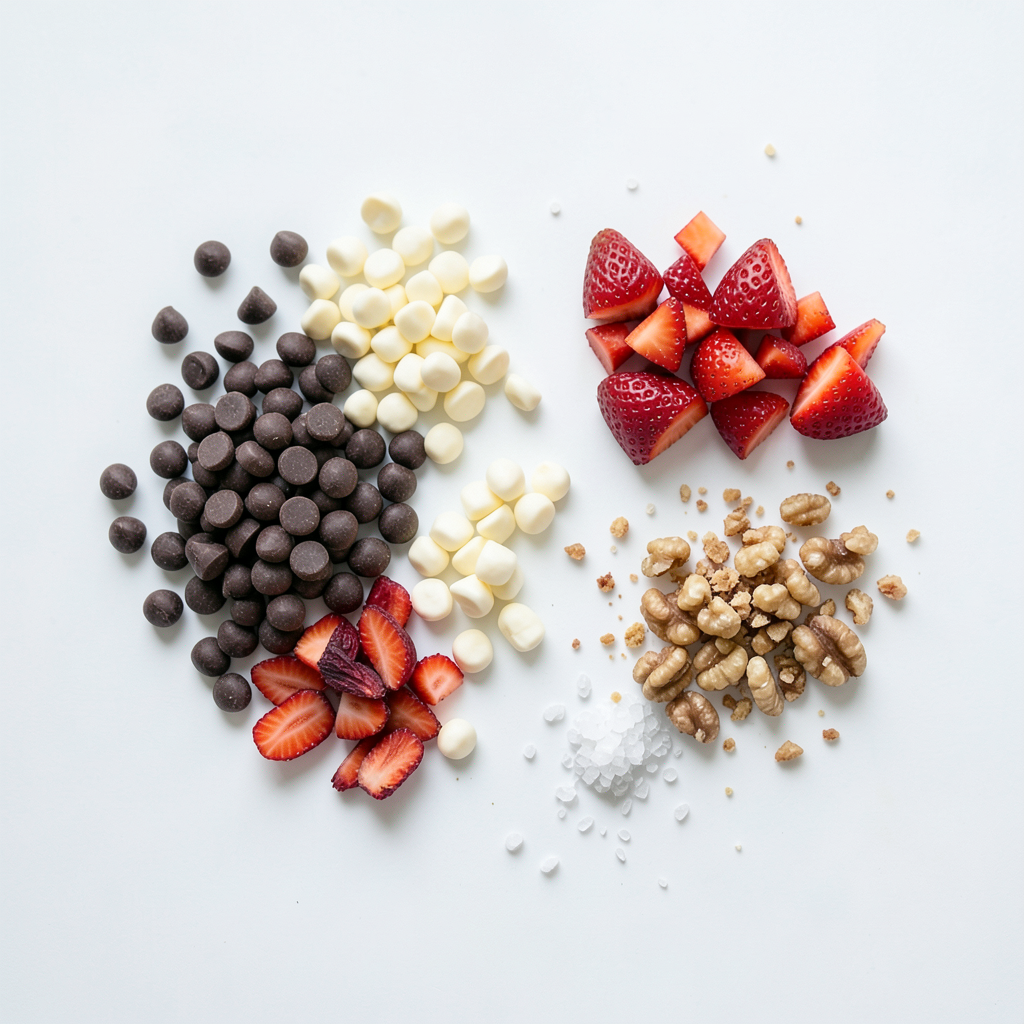
- 2 cups dark chocolate chips
- 1 cup white chocolate chips
- 1 cup dried strawberries, diced
- 1/2 cup crushed walnuts (or other nuts)
- A pinch of sea salt
Optional Additional Ingredients
- Edible glitter for decoration
- Different types of chocolate (milk, semi-sweet)
- Other dried fruits or toppings
To start, gather your ingredients. You'll need dark chocolate chips, white chocolate chips, dried strawberries, and walnuts. You can use other nuts if you prefer. A pinch of sea salt will enhance the flavor.
If you want to add some fun, consider edible glitter. It adds sparkle and makes the treat look fancy. You can also mix in different types of chocolate or other dried fruits. The options are endless!
Using high-quality chocolate chips makes a big difference. Look for brands that melt smoothly. Fresh ingredients like bright strawberries will give your bark a vibrant look.
Ensure that your nuts are chopped well. This helps them stick better to the chocolate. If you want a different taste, you can switch nuts. Almonds or pecans work great too!
Remember, these ingredients are just a starting point. Feel free to get creative! Adjust the toppings based on your taste for something unique.
Step-by-Step Instructions
Preparing the Baking Sheet
Start by lining a baking sheet with parchment paper. This step is key. The parchment paper keeps the chocolate from sticking. It also makes cleanup simple. Set this lined sheet aside for later.
Melting the Chocolate
To melt the dark chocolate, grab a microwave-safe bowl. Add the dark chocolate chips into the bowl. Heat them in the microwave for 30 seconds. Stir after each interval. You want it smooth and shiny. This process generally takes 1 to 2 minutes.
For the white chocolate, use a separate microwave-safe bowl. Add the white chocolate chips. Follow the same melting method. Be sure to stir often. This helps avoid burning the chocolate.
Assembling the Bark
Once the dark chocolate is melted, pour it onto the lined baking sheet. Use a spatula to spread it evenly. Aim for a rectangle or square that is about 1/4 inch thick.
Now, take the melted white chocolate. Drizzle it generously over the dark chocolate. Use a toothpick or knife to gently swirl the two chocolates. This creates a lovely marbled look.
Adding Toppings and Final Steps
Next, sprinkle the chopped dried strawberries over the chocolate. Then, add the crushed walnuts. Press them down lightly with your fingers. This helps them stick better.
Finish by adding a pinch of sea salt on top. This little touch brings out the sweetness of the chocolate.
Finally, place the baking sheet in the refrigerator. Let it chill for about 30 minutes. This allows the chocolate to fully set. Once firm, remove it from the fridge. Break the bark into pieces for a rustic finish. Enjoy!
Tips & Tricks
Melting Chocolate Tips
To melt chocolate well, avoid overheating. Heat chocolate slowly. For dark chocolate, use a microwave-safe bowl. Heat in 30-second bursts. Stir after each burst. This way, you can catch it before it burns. If you prefer, use a double boiler. Fill a pot with water, and bring it to a simmer. Place a bowl on top, making sure it does not touch the water. Stir the chocolate until smooth.
Creating the Perfect Swirl
For a lovely marbled look, drizzle white chocolate over dark chocolate. Use a toothpick or a knife to swirl them together. Do this gently. You want to blend them, not mix them fully. This creates beautiful patterns that look great and taste amazing!
Storage and Serving Suggestions
To store your chocolate bark, keep it in an airtight container. You can store it at room temperature or in the fridge. If you want a nice touch for serving, place it on a decorative platter. Add fresh strawberries for color and flavor. Drizzle more melted chocolate over the top just before serving for extra delight!
Pro Tips
- Use High-Quality Chocolate: The flavor of your bark largely depends on the quality of chocolate you use. Opt for premium dark and white chocolate for the best results.
- Chill Between Layers: If you prefer a more defined separation between the dark and white chocolate, chill each layer slightly before adding the next.
- Experiment with Toppings: Feel free to switch up the toppings! Try adding crushed freeze-dried fruits, coconut flakes, or even a drizzle of caramel for added flavor.
- Store Properly: To maintain the freshness and texture of the bark, store it in a cool, dry place, and avoid exposure to heat or moisture.
Variations
Flavor Variations
You can change the flavor of your bark easily. Use different types of chocolate for fun. Try milk chocolate for a sweeter taste. If you prefer white chocolate, it adds a creamy touch. You can also mix chocolates for a layered look.
Switch up the nuts for extra crunch. You can use almonds or pecans instead of walnuts. Each nut brings its unique flavor. Seeds like pumpkin or sunflower can replace nuts, too. This keeps it nut-free and still tasty.
Ingredient Substitutions
If dried strawberries are not available, use fresh or freeze-dried ones. Fresh strawberries add a juicy burst, but they can make the bark soft. Freeze-dried strawberries keep their crunch and flavor. They also look great on your bark.
You can also swap out the dried strawberries for other dried fruits. Dried cherries or cranberries can add a tart kick. This simple swap can change the whole taste of your bark.
Themed Versions
Make themed versions for special occasions. For Christmas, add crushed peppermint to the bark. The minty flavor pairs well with chocolate. You can also drizzle some red and green chocolate on top for a festive look.
For Valentine’s Day, add pink or red sprinkles. This adds color and makes it special. You can also use heart-shaped molds for fun shapes. Each holiday can inspire a new version of your chocolate bark.
Storage Info
Best Storage Practices
Store your chocolate covered strawberry bark in an airtight container. This helps keep it fresh. You can also use plastic wrap, but it’s not as good. Airtight containers keep moisture out. They also protect the bark from strong smells. If you store it properly, it will taste great for longer.
Shelf Life
Chocolate covered strawberry bark lasts about a week at room temperature. Keep it in a cool, dry place. If you put it in the fridge, it can last up to two weeks. Just remember, cold storage can make it a bit harder. Let it sit at room temp for a few minutes before enjoying.
Signs of Spoilage
Look for white spots on the chocolate. This is known as "bloom" and means the chocolate is not fresh. If the bark smells off or has a strange texture, don’t eat it. Always trust your senses. If it looks or smells wrong, it’s best to throw it away.
FAQs
Can I use fresh strawberries instead of dried?
No, using fresh strawberries can change the bark's texture. Fresh strawberries contain a lot of moisture. This moisture can make the chocolate seize up and become grainy. Dried strawberries work better. They add sweetness and crunch without water.
How do I make this recipe gluten-free?
To make this bark gluten-free, choose gluten-free chocolate chips. Most brands are naturally gluten-free. Check the labels to be sure. Use nuts that are not processed with gluten. This will keep your treat safe for gluten-sensitive folks.
What can I do if my chocolate isn't melting smoothly?
If your chocolate isn't melting well, check the heat. Heat it slowly in short bursts. Stir often to prevent it from burning. If clumping happens, add a tiny bit of vegetable oil. This can help smooth it out.
This recipe shows how to make delicious chocolate bark with ease. You learned about ingredients, assembly, and variations to suit your taste. Don’t forget the tips for melting chocolate smoothly and storing it correctly. With these steps, you’ll create a treat perfect for any occasion. Have fun mixing and matching ingredients to make it your own. Enjoy your tasty creation!