FREE DINNER EBOOK! Get your copy!
  • Cookie Policy
  • GDPR Policy
  • Disclaimer
  • Terms Of Use
  • Visit my other site: Fun Cookie Recipes
crunchy chronicle
  • Home
  • Dinner
  • Desserts
  • Drinks
  • Appetizers
  • Contact
  • About
  • Privacy Policy
  • Home
  • Dinner
  • Desserts
  • Drinks
  • Appetizers
  • Contact
  • About
  • Privacy Policy
  • Cookie Policy
  • GDPR Policy
  • Disclaimer
  • Terms Of Use
Visit my other site: Fun Cookie Recipes

HOME / CATEGORIES /

Latest

- 4 tilapia fillets - 1 cup freshly grated Parmesan cheese - 1 cup panko breadcrumbs - 2 tablespoons fresh parsley, finely chopped - 1 teaspoon garlic powder - 1 teaspoon onion powder - 1 teaspoon sweet paprika - ½ teaspoon freshly ground black pepper - ½ teaspoon sea salt - 2 tablespoons extra virgin olive oil - 1 tablespoon freshly squeezed lemon juice What can I use instead of tilapia? You can use other fish like cod or haddock. These fish also bake well and have a mild taste. What if I need a gluten-free option? Use gluten-free breadcrumbs instead of panko. They work just as well and keep the crust crispy. Should I use fresh or dried herbs? Fresh herbs like parsley add great flavor. If you use dried, cut the amount in half since they are stronger. First, preheat your oven to 400°F (200°C). This heat is perfect for a crispy crust. Next, line a baking sheet with parchment paper. This makes cleanup easy and prevents sticking. In a medium bowl, combine 1 cup of freshly grated Parmesan cheese with 1 cup of panko breadcrumbs. Add 2 tablespoons of chopped parsley, 1 teaspoon of garlic powder, 1 teaspoon of onion powder, 1 teaspoon of sweet paprika, ½ teaspoon of black pepper, and ½ teaspoon of sea salt. Mix these well. You want a flavorful blend that will give your tilapia a great crunch. In a small bowl, whisk together 2 tablespoons of extra virgin olive oil and 1 tablespoon of freshly squeezed lemon juice. This will keep the fish moist and add flavor. Take each tilapia fillet and dip it into this mixture. Make sure to coat both sides well. Then, dip the fillet into the breadcrumb mix. Press firmly so the crust sticks. Place the fillets on your prepared baking sheet with a little space between each one. Now, it's time to bake! Place the baking sheet in the oven and set a timer for 15-20 minutes. The tilapia is ready when it flakes easily with a fork and the crust turns golden brown. This is the perfect sign that your meal is delicious and cooked just right! To get a great crust, coat the fish evenly. Start by pressing the tilapia into the breadcrumb mix firmly. This helps the crust stick well. For a crispy texture, use panko breadcrumbs instead of regular ones. They add more crunch and lightness. You can spice things up with a few extras. Try adding a pinch of cayenne for heat or some lemon zest for brightness. Fresh herbs like dill or thyme also add great flavor. Pair your tilapia with sides like roasted veggies or a fresh salad. They balance the meal and add more nutrients. Letting the fish rest after baking is key. This step helps keep the moisture in, making each bite tender. For leftovers, reheat them gently in the oven. This keeps the crust crispy. You can also use the microwave, but be careful not to overdo it. {{image_4}} You can make this dish your own with a few simple changes. Try adding fresh lemon zest to the crust for a bright taste. You can also mix in fresh herbs like dill or thyme. They give a fresh and aromatic touch. For a kick, consider using hot paprika or cayenne for some heat. This adds a spicy layer that many will love. Just adjust the amount to suit your taste. Baking the tilapia gives it a light, crispy texture. The fish stays moist, which makes it a winner for me. Fried tilapia, on the other hand, offers a richer flavor. If you prefer frying, use a hot oil that reaches 350°F (175°C). Coat the fish as usual, then fry each fillet until golden brown. This will take about 3-4 minutes per side. Just keep an eye on it to avoid overcooking. A well-rounded meal makes any dish shine. Pair your tilapia with steamed vegetables like broccoli or green beans. A fresh salad with mixed greens and a light vinaigrette adds crunch. For a fun twist, serve the tilapia on a bed of quinoa or rice. To plate, place the fillet at an angle on the plate. Add a lemon wedge and sprinkle some parsley on top for a pop of color. This makes the dish look stunning and taste even better! To keep your baked Parmesan crusted tilapia fresh, store it in the fridge. Place the fillets in an airtight container. This keeps moisture in and prevents odors from mixing. Your leftovers will last for about 2 to 3 days in the fridge. After that, the fish may lose its flavor and texture. If you want to save the tilapia for later, freezing works well. First, let the fish cool completely. Then, wrap each fillet tightly in plastic wrap. Place the wrapped fillets in a freezer bag, removing as much air as possible. They can stay in the freezer for up to 2 months. When you are ready to eat, move the tilapia to the fridge and let it thaw overnight. This method keeps the fish tasting great. To enjoy your tilapia again, reheating is key. The best way to reheat is in the oven. Preheat it to 350°F (175°C). Place the fillets on a baking sheet and cover them with foil. This keeps them moist. Bake for about 10-15 minutes or until heated through. If you use a microwave, set it to low power. Heat in short bursts, checking often. This helps maintain the texture of the crispy crust. I recommend baking tilapia for 15 to 20 minutes at 400°F (200°C). The fish is done when it flakes easily with a fork. This ensures a moist texture and a crispy crust. Yes, you can use frozen tilapia. Just make sure to thaw it first for even cooking. Thaw the fillets in the fridge overnight or run them under cold water for quick thawing. Bake as usual after thawing. I love pairing this tilapia with fresh sides. Here are some great options: - Steamed broccoli - Roasted asparagus - Quinoa salad - Mixed green salad with lemon vinaigrette These sides enhance the dish and add variety to your meal. Tilapia is a good source of protein and low in calories. It contains omega-3 and omega-6 fatty acids, which are great for your heart. Plus, it's easy to cook and very versatile in meals. You now have the tools to make delicious baked Parmesan crusted tilapia. We covered the key ingredients, from tilapia fillets to panko breadcrumbs. You learned how to prepare, coat, and bake for that perfect crust. I shared tips for keeping it crispy and ideas for variations. Don't forget about proper storage and reheating methods. With these steps, you'll enjoy a tasty meal you can make again and again. Dive into experimenting and delight in your culinary creation!

Baked Parmesan Crusted Tilapia Flavorful Dinner Dish

- 4 boneless, skinless chicken thighs - 1/4 cup packed brown sugar - 4 cloves garlic, finely minced - 1 tablespoon soy sauce - 1 tablespoon apple cider vinegar - 1 tablespoon extra virgin olive oil - 1 teaspoon freshly grated ginger - 1/2 teaspoon red pepper flakes (optional, for a spicy kick) - Salt and black pepper to taste - Sliced green onions for garnish You can add more flavor with these options: - Red pepper flakes for heat - Fresh herbs, like cilantro or parsley - Sesame seeds for added crunch - Calories: 290 - Protein: 22g - Fat: 15g - Carbohydrates: 16g - Sugar: 12g - Fiber: 0g This dish packs a flavorful punch while still being easy to make. The brown sugar gives it sweetness, while the garlic adds a savory touch. When you savor this meal, you enjoy great taste and balanced nutrition. To make the marinade, you need a medium bowl. Combine these ingredients: - 1/4 cup packed brown sugar - 4 cloves minced garlic - 1 tablespoon soy sauce - 1 tablespoon apple cider vinegar - 1 tablespoon extra virgin olive oil - 1 teaspoon freshly grated ginger - 1/2 teaspoon red pepper flakes (optional) - A pinch of salt and black pepper Whisk everything together. Make sure the brown sugar dissolves well. The mixture should look smooth and shiny. This marinade gives your chicken its sweet and savory flavor. Get a large resealable bag or a shallow dish. Place your 4 boneless, skinless chicken thighs inside. Pour the marinade over the chicken. Make sure each piece gets covered. Seal the bag tightly or cover the dish. Refrigerate the chicken for at least 30 minutes. If you have time, marinate it for 2 hours. This helps the flavors soak into the meat. First, preheat your oven to 400°F (200°C). While the oven heats, line a baking sheet with parchment paper or foil. This makes for easy cleanup later. Once marinating is done, take the chicken out of the bag. Place it on the baking sheet. Reserve the leftover marinade; you’ll use it later. Bake the chicken in the preheated oven for 20-25 minutes. Check the internal temperature. It should reach 165°F (75°C) and look golden brown. While the chicken cooks, pour the reserved marinade into a saucepan. Bring it to a boil over medium-high heat. Once boiling, reduce the heat and let it simmer for about 5 minutes. This will thicken it. After baking, drizzle the thickened marinade over the chicken. Let it rest for 5 minutes before slicing. This keeps it juicy and flavorful. Enjoy your delicious brown sugar garlic chicken! For great flavor, marinate the chicken for at least 30 minutes. If you have time, let it sit for up to 2 hours. This helps the brown sugar and garlic soak in. Use a resealable bag for easy mixing. Ensure each piece is coated well. You can also poke small holes in the chicken. This helps the marinade get deeper inside. To cook chicken just right, aim for an internal temperature of 165°F (75°C). Use a meat thermometer for accuracy. Bake at 400°F (200°C) for 20-25 minutes. The chicken should be golden brown and juicy. Let it rest for 5 minutes after baking. This keeps the juices locked in. You can add more flavors to your marinade. Consider fresh herbs like thyme or rosemary. For a spicy kick, increase the red pepper flakes. If you enjoy sweetness, add honey or maple syrup. These options boost the taste and make the dish your own. Remember, cooking is all about exploring flavors! {{image_4}} You can cook brown sugar garlic chicken in different ways. Grilling adds a smoky flavor. To grill, marinate the chicken as usual. Preheat your grill to medium-high heat. Cook each side for about 6-7 minutes. Check that the chicken reaches 165°F (75°C). Slow cooking is also a great option. Simply place the marinated chicken in a slow cooker. Cook on low for 6-8 hours or high for 3-4 hours. This method keeps the chicken tender and juicy. You can enjoy a rich, sweet sauce too. You can change the flavor of this dish easily. To make it spicy, add more red pepper flakes. You might also mix in some chili paste for extra heat. If you want an herbal twist, add fresh herbs. Thyme or rosemary work well in this recipe. You can even try basil for a fresh taste. Experimenting with flavors can make this dish your own. Brown sugar garlic chicken pairs well with many sides. Here are a few ideas: - Fluffy steamed rice - Sautéed seasonal vegetables - Creamy mashed potatoes - A fresh garden salad - Quinoa for a healthy twist These sides will balance the sweet and savory notes of the chicken. You can mix and match to create a fun meal. Enjoy being creative with your plate! You can store leftover brown sugar garlic chicken in an airtight container. This keeps it fresh. Place it in the fridge right after it cools. It stays good for about 3 to 4 days. If you want to keep it longer, freezing is a great option. To reheat, you can use the oven or microwave. For the oven, preheat it to 350°F (175°C). Place the chicken in a baking dish and cover it with foil. Heat for about 15-20 minutes until warm. In the microwave, place the chicken on a microwave-safe plate. Heat it in short bursts, about 1-2 minutes at a time. Check to make sure it’s warm all the way through. If you want to freeze, make sure the chicken is fully cooled. Wrap each piece tightly in plastic wrap, then place them in a freezer bag. Squeeze out as much air as possible before sealing. This helps prevent freezer burn. The chicken can last for up to 3 months in the freezer. When ready to eat, thaw it in the fridge overnight before reheating. You can marinate chicken for at least 30 minutes. This gives the meat time to soak up flavors. For the best taste, I suggest marinating for 1 to 2 hours. If you have more time, you can even marinate it overnight. Just remember to keep it in the fridge while it soaks. Yes, you can use chicken breasts instead of thighs. Chicken breasts are leaner, so they cook faster. Make sure to check the internal temperature. It should reach 165°F (75°C) to be safe to eat. The flavor will be great, but the texture may be slightly different. I love serving brown sugar garlic chicken with fluffy steamed rice. It soaks up the tasty sauce well. You can also pair it with sautéed vegetables. Broccoli, bell peppers, or snap peas add color and crunch. For a fresh touch, add a salad on the side. This article covered how to make brown sugar garlic chicken. You learned about key ingredients, marination steps, and cooking methods. I shared tips to enhance flavor and ensure juicy chicken. Various cooking methods and side dish pairings give you options that suit your taste. Proper storage and reheating tips help you enjoy leftovers. I encourage you to try these ideas for tasty meals. Your kitchen adventures can impress friends and family. Enjoy cooking!

Brown Sugar Garlic Chicken Simple and Tasty Recipe

Making a Berry Banana Oat Smoothie is simple and fun. Here’s what you need: - 1 ripe banana, sliced - 1 cup mixed berries (fresh or frozen) - including strawberries, blueberries, and raspberries - 1/2 cup rolled oats - 1 cup almond milk (or your preferred milk) - 1 tablespoon honey or maple syrup (adjust based on your sweetness preference) - 1 tablespoon chia seeds (optional, for added nutrition and texture) - A pinch of ground cinnamon - Ice cubes (optional, for a chilled smoothie) These ingredients blend together to create a tasty and healthy drink. The ripe banana adds natural sweetness and creaminess. The mixed berries bring vibrant color and nutrients. Rolled oats add fiber, making it filling. Almond milk offers a smooth texture without dairy. You can sweeten it with honey or maple syrup to match your taste. Chia seeds boost nutrition and texture, while cinnamon adds warmth. Finally, ice cubes can chill your smoothie, making it refreshing. Enjoy the blend of flavors and health benefits! Start by placing your rolled oats into the blender. Blend them at a low speed. You want the oats to become a fine powder. This powder will create a smooth base for your smoothie. Oats add fiber and help keep you full. Next, add the sliced banana and mixed berries to the blender. You can use fresh or frozen berries like strawberries, blueberries, and raspberries. This mix will give your smoothie a sweet and fruity taste. Make sure all the fruit gets combined with the oats. Pour in the almond milk until it covers the fruit and oats. This will create a creamy texture. Then, drizzle in some honey or maple syrup. You can adjust the sweetness to your taste. If you want extra nutrition, add chia seeds now. Don’t forget a pinch of ground cinnamon for warmth and flavor. Blend all the ingredients on high speed. You want the mixture to become smooth and creamy. If you like your smoothie colder, toss in some ice cubes. Blend again until everything is well combined. This step is key for the perfect texture. Now it’s time to taste your smoothie. If it’s not sweet enough, add a little more honey or maple syrup. Blend again briefly to mix it in. This way, you can get the flavor just right for your liking. Pour the smoothie into tall glasses. This makes for a beautiful presentation. You can garnish with whole berries on top and a slice of banana on the rim. For an extra touch, sprinkle some oats or chia seeds on top. This will enhance both the look and texture of your smoothie. Enjoy it right away for the best taste! To get a smooth and creamy texture, start with your oats. Blend them on low speed until they turn into a fine powder. This step helps create a better base for your smoothie. Next, add the fruits. Bananas and berries blend well, adding sweetness and flavor. Pour in your almond milk and blend on high speed. This way, you ensure all ingredients mix well together. Taste your smoothie before serving. If you find it needs more sweetness, add honey or maple syrup. Begin with a tablespoon and blend again. You can always add more if needed. Remember, everyone's taste varies, so adjust the sweetness to your liking. If you want a thicker smoothie, add ice cubes before blending. Ice gives it a chilled and creamy feel. For a thinner smoothie, pour in more almond milk or your choice of liquid. Blend again until you reach your desired consistency. It’s all about what you enjoy! {{image_4}} You can switch fruits based on your taste. If you want a tropical twist, try mango. For a more tart flavor, use raspberries or blackberries. You can also blend in peaches or pears. Mixing different fruits keeps your smoothie exciting and fun. Want to make your smoothie even better? Add a scoop of protein powder. It helps keep you full longer. You can also toss in a handful of spinach. It adds vitamins without changing the taste much. Chia seeds are great too. They give a nice texture and extra nutrition. If you follow a dairy-free diet, almond milk works well. Other great choices include oat milk or coconut milk. These options fit perfectly in this smoothie. Make sure your sweetener is vegan too. Use maple syrup instead of honey for a plant-based treat. This way, everyone can enjoy a tasty Berry Banana Oat Smoothie! To keep your Berry Banana Oat Smoothie fresh, store it in the fridge. Use a sealed jar or container. This helps prevent it from absorbing other flavors. The smoothie stays good for up to 24 hours. Give it a good shake before drinking, as ingredients may settle. You can freeze your smoothie for later enjoyment. Pour it into ice cube trays or freezer-safe bags. Leave some room at the top, as it will expand when frozen. Smoothies can last in the freezer for about 1 to 2 months. When you want one, just take out what you need. To use your frozen smoothie, place it in the fridge overnight to thaw. If you need it fast, you can use the microwave. Set it to a low power level and heat in short bursts. Stir between intervals until it's smooth. Blend it again if needed for a nice texture. Yes, you can prepare this smoothie ahead of time. Blend the ingredients, then store it in the fridge. Use a sealed jar or container to keep it fresh. The smoothie tastes best within 24 hours. Give it a good shake before you drink it. You can use several alternatives for almond milk. Options include soy milk, oat milk, or coconut milk. Each choice will give a different flavor. Soy milk adds creaminess, while oat milk is sweet and thick. Coconut milk gives a tropical taste. Using frozen berries is a great idea! They make the smoothie cold and thick. Frozen berries also keep longer than fresh ones. They are often picked at peak ripeness, so they taste great. Just blend them straight from the freezer. A Berry Banana Oat Smoothie has about 300 calories per serving. This varies based on the sweetener and milk you choose. The banana and berries add natural sugars. The oats provide fiber, making it filling and nutritious. Absolutely! Adding greens boosts the smoothie’s nutrition. Spinach or kale blend well without changing the taste. Use a handful for added vitamins and minerals. You can also sneak in some avocado for creaminess and good fats. This article explored the delicious Berry Banana Oat Smoothie, highlighting simple ingredients and steps. You learned to blend ripe bananas, mixed berries, oats, and almond milk into a tasty, healthy drink. Remember, you can adjust sweetness to fit your taste and add nutrition boosters like protein powder. Enjoy the process of creating your perfect smoothie. It’s a fun way to eat healthier and explore new flavors. Whether you enjoy it fresh or frozen, this smoothie can fit into your busy life. Get creative and enjoy every sip!

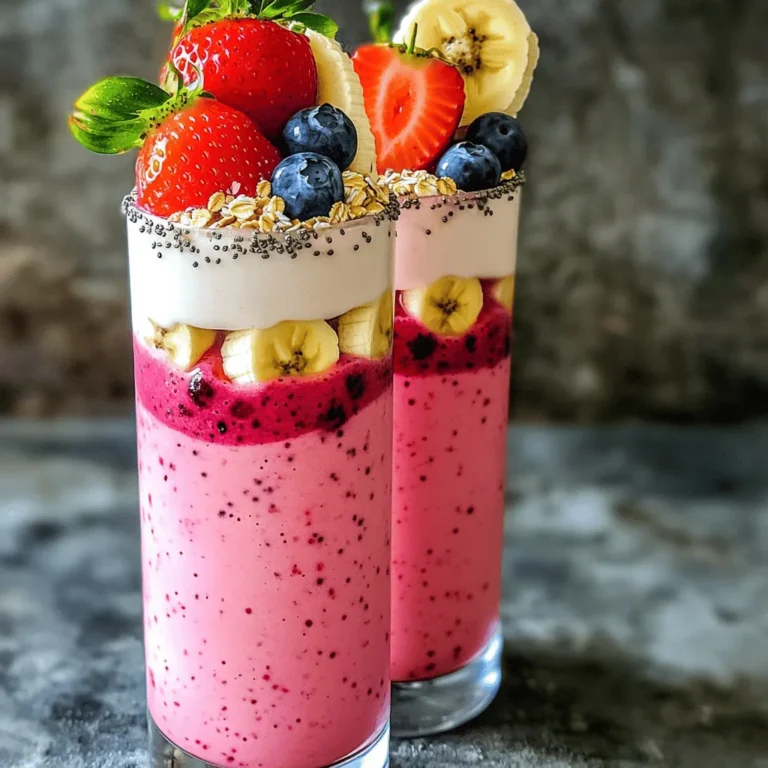
Berry Banana Oat Smoothie Easy and Healthy Blend

- 4 medium carrots, peeled and cut into bite-sized chunks - 3 medium parsnips, peeled and cut into similar-sized chunks - 2 medium sweet potatoes, peeled and cubed into generous pieces - 1 medium red onion, cut into quarters - 4 cloves of garlic, left whole and unpeeled - 2 teaspoons fresh rosemary, finely chopped - 2 teaspoons fresh thyme, finely chopped - 1 teaspoon smoked paprika for a hint of warmth - Sea salt and freshly cracked pepper to taste - 3 tablespoons extra-virgin olive oil Herb roasted root vegetables are a great dish to enjoy. They are simple to make and full of flavor. You can use bright, fresh veggies like carrots, parsnips, and sweet potatoes. These veggies not only taste great, but they also look colorful on your plate. Using fresh herbs like rosemary and thyme boosts the flavor. Smoked paprika adds warmth and depth. The extra-virgin olive oil helps the veggies roast nicely, making them crispy on the outside and tender inside. You can feel good about serving this dish. It’s packed with vitamins and minerals. Plus, it’s easy to customize with your favorite herbs or veggies. Try this simple recipe, and you’ll have a tasty and healthy side dish! - Preheat Oven to 400°F (200°C) Start by setting your oven to 400°F (200°C). This heat will bring out the best in our veggies. - Prepare and Chop Vegetables Next, peel and chop the root vegetables. Cut the carrots, parsnips, and sweet potatoes into bite-sized pieces. For the red onion, quarter it. Leave the garlic whole and unpeeled for a nice, mellow flavor. - Combining Vegetables and Oil In a big bowl, add the chopped veggies. Drizzle 3 tablespoons of extra-virgin olive oil over them. Make sure each piece gets some oil for great roasting. - Adding Herbs and Seasonings Now, sprinkle 2 teaspoons of chopped rosemary, 2 teaspoons of thyme, and 1 teaspoon of smoked paprika. Add sea salt and cracked pepper to taste. Use your hands or a spoon to mix everything well. You want the veggies nicely coated with oil and seasonings. - Spreading Mix on Baking Sheet Take a large baking sheet and spread the veggie mix in a single layer. This way, they roast evenly and get crispy edges. - Roasting Time and Technique Place the baking sheet in the preheated oven. Roast for about 30-35 minutes. Halfway through, stir the veggies to help them brown. They are done when they are tender and have golden-brown edges. Seasoning well is key to great flavor. Salt and herbs bring the vegetables to life. I suggest using sea salt and freshly cracked pepper. This mix enhances the natural taste of the vegetables. Fresh rosemary and thyme add depth and aroma. Toss the veggies well, so each piece gets coated. You don't need to marinate these veggies. Just season right before cooking. Stir the vegetables halfway during roasting. This step helps them cook evenly. I check for doneness by piercing a sweet potato with a fork. It should slide in easily. If the vegetables are still hard, give them more time. The goal is tender veggies with caramelized edges. Serving on a colorful platter makes this dish pop. A mix of orange, yellow, and purple creates visual appeal. Garnish with fresh herbs like rosemary or thyme. This extra touch adds freshness and beauty. You can also serve a bowl of tzatziki or creamy yogurt sauce on the side. It invites everyone to dip and enjoy! {{image_4}} You can switch up your root vegetables. Here are some great options: - Beets: These add sweetness and vibrant color. Roast them until tender for a rich flavor. - Turnips: They have a mild taste that gets sweeter when roasted. Cut them into similar sizes for even cooking. - Potatoes: Classic choice! They turn crispy outside and soft inside. Use any type you like, such as Yukon gold or red. Herbs can make your dish even better. Try these combinations: - Oregano and Basil: These herbs give a nice Mediterranean touch. Use dried or fresh, both work well. - Sage: This herb adds a warm, earthy flavor. It pairs beautifully with root veggies, enhancing their natural taste. Want to make your roasted vegetables pop? Here are some tips: - Adding a Splash of Balsamic Vinegar: This adds a tangy sweetness. Drizzle it over the veggies before roasting for extra depth. - Incorporating Spices like Cumin or Coriander: These spices bring a warm, aromatic flavor. Just a sprinkle can change your dish from good to great. To keep your herb roasted root vegetables fresh, follow these tips: - Refrigeration: Allow the vegetables to cool down first. Place them in the fridge within two hours of cooking. - Container Suggestions: Use airtight containers. Glass or BPA-free plastic containers work well for storing. When reheating, you have two main options: oven or microwave. - Oven vs. Microwave: The oven gives the best results. Preheat it to 350°F (175°C). Spread the vegetables on a baking sheet. Heat for about 10-15 minutes. The microwave is faster. Heat in short bursts of 30 seconds. Stir in between. - Tips for Maintaining Crispiness: To keep them crispy, avoid covering them with a lid when reheating. This allows moisture to escape. Freezing is a great way to enjoy these vegetables later. - How to Freeze Roasted Vegetables: Let them cool completely. Spread them on a baking sheet in a single layer. Freeze for about 1-2 hours. Then transfer to a freezer-safe bag. Remove as much air as possible to prevent freezer burn. - Thawing and Using Frozen Vegetables: Thaw overnight in the fridge. You can also thaw them in the microwave. Reheat in the oven for the best texture. Yes, you can use frozen vegetables. However, fresh root vegetables taste better. Frozen vegetables often lose some texture. They can turn mushy when roasted. If you use frozen, cut the roasting time. Check for doneness early, around 20 minutes. Herb-roasted root vegetables are very healthy. They are rich in vitamins and minerals. Carrots provide beta-carotene, good for your eyes. Parsnips are high in fiber, aiding digestion. Sweet potatoes offer vitamin A for skin health. They all contain antioxidants that fight free radicals. If you lower the oven to 375°F (190°C), roast for about 35-40 minutes. At 425°F (220°C), cut the time to 25-30 minutes. Always check for tenderness. Stir halfway to ensure even cooking. Remember, each oven works a bit differently. Adjust times as needed. Roasting root vegetables is fun and easy. We covered the best ingredients and prep steps. Don't forget the importance of seasoning for flavor. Try different herbs, vegetables, and flavors for variety. Store leftovers correctly so you can enjoy them later. Reheat them for tasty meals. Follow these tips for yummy results. You can adjust the roasting time to suit your oven. Embrace the joy of cooking and make these dishes your own. Enjoy your tasty, healthy meals!

Herb Roasted Root Vegetables Flavorful and Simple Dish

For this salad, you will need fresh, high-quality ingredients. Here is what you'll need: - 2 Ahi tuna steaks (approximately 6 ounces each) - 1/4 cup black sesame seeds - 1/4 cup white sesame seeds - 2 tablespoons olive oil - Salt and pepper to taste - 4 cups mixed salad greens (such as arugula, spinach, and baby kale) - 1 cucumber, thinly sliced - 1 carrot, shredded - 1/2 red bell pepper, thinly sliced - 1 avocado, sliced To enhance the taste of your salad, you will need a few dressing ingredients: - 2 tablespoons soy sauce (or tamari for a gluten-free option) - 1 tablespoon rice vinegar - 1 tablespoon sesame oil - 1 teaspoon honey or agave syrup These ingredients add depth and balance to the dish, making each bite flavorful. Want to take your salad to the next level? Try these garnishes: - Sliced green onions - Extra sesame seeds These add a nice touch and an extra crunch. Enjoy crafting your own version! Start by drying the Ahi tuna steaks with paper towels. This helps the sesame seeds stick better. Next, sprinkle salt and pepper on both sides. This simple step enhances the tuna's natural flavors. On a flat plate, combine the black and white sesame seeds. Take one tuna steak and press it firmly into the seeds. Make sure each side is well coated. This creates a nice, crunchy crust. Heat olive oil in a non-stick skillet over medium-high heat. Wait until the oil shimmers. Carefully place the tuna steaks in the skillet. Sear each side for about 2 minutes. This gives you a medium-rare finish. If you like it more cooked, adjust the time a little. After searing, remove the tuna and let it rest for a couple of minutes. In a large bowl, mix the salad greens with the sliced cucumber, shredded carrot, red bell pepper, and sliced avocado. Gently toss everything together. This colorful mix adds great texture and flavor to the salad. In a small bowl, whisk together soy sauce, rice vinegar, sesame oil, and honey or agave syrup. Mix until smooth. This dressing ties all the salad ingredients together with a nice balance of flavors. Once the tuna has rested, slice it against the grain into thin strips, about 1/2-inch thick. Lay the salad mixture on individual plates. Place the sliced tuna on top. Drizzle the dressing over everything. For a beautiful finish, add sliced green onions and more sesame seeds if you like. To get that ideal sear, start with dry tuna steaks. Pat them with paper towels. Season both sides with salt and pepper. Heat olive oil in your skillet until it shimmers. This means it’s hot enough. Place the tuna in the pan gently. Sear for about 2 minutes on each side for medium-rare. If you want it more cooked, add a minute. Let the tuna rest after cooking. This keeps it juicy. Mixing flavors is key for a tasty salad. Use a blend of greens like arugula and spinach. The peppery taste of arugula contrasts well with creamy avocado. Try adding thin cucumber slices and shredded carrots for crunch. Red bell pepper adds a sweet flavor and bright color. For more zest, consider adding a squeeze of lime juice. This will brighten up the dish and make it fresh. How you plate your dish matters. Start with a vibrant salad base. Arrange it neatly on the plate. Slice your tuna thinly and place it on top. Drizzle the dressing around the plate for an elegant touch. Sprinkle extra sesame seeds and sliced green onions for garnish. This not only looks great but adds flavor too. A beautiful plate makes every bite more enjoyable. {{image_4}} If you can't find Ahi tuna, you can use salmon or yellowfin tuna. Both options work well and still give a tasty meal. If you prefer a plant-based choice, try marinated tofu. It soaks up flavors well and has a nice texture when seared. Feel free to switch up the dressing. A ginger-soy dressing adds a spicy kick. For a creamier taste, try a wasabi mayo. A citrus vinaigrette with orange or lime juice brings freshness to the dish. These variations keep your salad exciting and full of flavor. You can add seasonal veggies for extra crunch and color. In spring, consider adding asparagus or snap peas. In the summer, cherry tomatoes and radishes shine. Fall brings butternut squash or roasted beets for a warm touch. Each season offers unique flavors to enhance your salad experience. To store leftover salad, first place it in an airtight container. Keep the salad separate from the dressing to avoid sogginess. You can store the salad in the fridge for up to two days. If you have leftover tuna, store it in a separate container. Store Ahi tuna in the coldest part of your fridge. Wrap it tightly in plastic wrap or foil. This helps keep it fresh. Use tuna within two days for the best taste and texture. If you don’t plan to eat it soon, freeze it. Wrap it well and place it in a freezer bag to prevent freezer burn. If you need to reheat tuna, do it gently. Place it in a skillet over low heat. Heat it for just a few minutes to warm through. Avoid cooking it too long, as it can become tough. You can also serve it cold on salads or in sandwiches, which keeps the flavor fresh. Yes, you can use frozen Ahi tuna. Just make sure to thaw it completely. Place it in the fridge overnight. This helps keep the texture nice. Pat it dry before cooking to prevent steaming. You can store the salad in the fridge for up to two days. Keep the dressing separate until you are ready to eat. This keeps the greens fresh and crunchy. Tamari is a great gluten-free option for soy sauce. Coconut aminos also works well. Both add a savory flavor without gluten. You can prepare parts of the salad in advance. Chop the veggies and store them in airtight containers. Cook the tuna just before serving for the best taste. Many sides go well with this salad. Try serving it with rice or quinoa. A light soup can also complement the dish. Fresh fruit like pineapple adds a sweet touch, too. This article guided you through creating a tasty sesame crusted ahi tuna salad. You learned about key ingredients, step-by-step cooking tips, and alternative options to explore. I also shared storage advice for leftovers and answered common questions. This dish is simple yet impressive. Enjoy experimenting with flavors and variations to make it your own. Your cooking skills will shine with practice. Remember, fresh ingredients and a little love make all the difference.

Savory Sesame Crusted Ahi Tuna Salad Recipe

- 1 cup unsalted butter, melted - 1 ½ cups packed brown sugar - 2 large eggs - 1 teaspoon vanilla extract The main ingredients for Cinnamon Snickerdoodle Blondies create a rich and gooey base. Unsalted butter gives a creamy texture. Brown sugar makes the blondies sweet and chewy. Eggs bind the mixture, adding moisture. Vanilla extract adds a warm flavor that enhances every bite. - 2 cups all-purpose flour - 1 teaspoon baking powder - 1 teaspoon ground cinnamon - ½ teaspoon salt - ¼ teaspoon baking soda The dry ingredients are essential for structure. All-purpose flour forms the base of the blondies. Baking powder and baking soda help them rise. Ground cinnamon provides that signature snickerdoodle taste. Salt enhances the overall flavor, balancing the sweetness. - 2 tablespoons granulated sugar - 1 teaspoon ground cinnamon The topping ingredients add a sweet, spiced crunch. Granulated sugar creates a nice contrast to the soft blondies. Ground cinnamon ties in the warm, comforting flavor we love in snickerdoodles. This topping is a must for that perfect finish! - Preheat your oven to 350°F (175°C). - Get a 9x13 inch baking dish ready. You can grease it with butter or use parchment paper. This helps with easy removal after baking. - In a big bowl, whisk the melted butter and brown sugar together. Mix until it looks smooth and creamy. - Add the eggs, one at a time, whisking well after each. This helps blend everything nicely. Then, stir in the vanilla extract for extra flavor. - In a different bowl, whisk together the dry ingredients: flour, baking powder, ground cinnamon, salt, and baking soda. - Gradually add this dry mix into the wet ingredients. Stir gently until just combined. Don’t overmix it! This keeps the blondies soft and chewy. - Pour the batter into your baking dish. Spread it out evenly with a spatula or the back of a spoon. - In a small bowl, mix together the granulated sugar and ground cinnamon for the topping. Sprinkle this mixture over the batter. - Bake in the preheated oven for 20-25 minutes. Check for doneness by inserting a toothpick in the center. It should come out clean or with a few moist crumbs. This means they are ready! - Once baked, take the dish out and let the blondies cool in the pan for about 10 minutes. After that, move them to a wire rack to cool completely. This step keeps their texture just right. To make cinnamon snickerdoodle blondies, texture is key. Do not overmix your batter. Overmixing can make the blondies tough. Mix just until you see no dry flour. This keeps them soft and chewy. Pay close attention to your baking time. Bake for 20-25 minutes, but watch closely. The edges should turn golden brown. A toothpick should come out clean or with a few moist crumbs. This tells you they are done! For a great look, dust the blondies with cinnamon sugar. It adds color and a tasty touch. Serve them on a nice plate to impress your guests. Pair these blondies with a scoop of vanilla ice cream. The cold creaminess matches well with the warm, sweet blondies. You can also enjoy them with a cup of coffee. The flavors blend beautifully together. Use high-quality vanilla extract to boost flavor. It makes a big difference! You can also try different types of sugar in your recipe. Brown sugar adds depth, while granulated sugar gives sweetness. Mixing them can create a unique taste. Don't be afraid to experiment! These small changes can lead to delicious surprises. {{image_4}} You can make these blondies even more fun with add-ins. Here are some tasty ideas: - Nuts: Chopped walnuts or pecans add a nice crunch and flavor. - Chocolate Chips: Mix in semi-sweet chocolate chips or white chocolate for extra sweetness. Adding these ingredients can create a new twist on the classic blondie. You can mix and match based on what you like best! You can also change up the flavor of your blondies. Here are two ideas: - Pumpkin Spice Variation: Add pumpkin spice for a fall treat. Just swap some of the cinnamon for pumpkin spice. - Almond Extract: Add a splash of almond extract for a nutty flavor that goes well with cinnamon. These twists can make your blondies unique, perfect for any occasion. If you have dietary needs, there are easy swaps you can make: - Gluten-Free Flour: Use gluten-free flour instead of all-purpose flour. This way, everyone can enjoy them. - Vegan Options: For a vegan version, use flax eggs instead of regular eggs and coconut oil instead of butter. These adjustments can help everyone enjoy your cinnamon snickerdoodle blondies! To keep your cinnamon snickerdoodle blondies fresh, use an airtight container. This prevents them from drying out. Glass or plastic containers work well. Store them at room temperature for best taste. Cinnamon snickerdoodle blondies last about 3 to 5 days at room temperature. If you want to keep them longer, freeze them. Wrap each blondie in plastic wrap, then place them in a freezer bag. They will stay good for up to three months in the freezer. Reheat your blondies in the oven for the best results. Set the oven to 350°F (175°C) and warm them for about 10 minutes. If you use a microwave, warm them in short bursts of 10-15 seconds. This helps avoid texture changes. Enjoy them warm for a delicious treat! Yes, you can use salted butter if you don't have unsalted. It will add a bit of saltiness to the blondies. This change can enhance the flavor but may make your blondies taste different. If you choose salted butter, reduce the added salt in the recipe. This way, you keep a good balance of flavors in your sweet treat. To check for doneness, use a toothpick. Insert it into the center of the blondies. If it comes out clean or with a few moist crumbs, they are done. If the toothpick has wet batter, bake for a few more minutes. Remember, blondies can be a bit gooey, so don't worry if they are not completely dry inside. The edges should look golden brown when they are ready. Leftover blondies can be used in many fun ways. You can crumble them over ice cream for a tasty sundae. You can also make a trifle by layering them with whipped cream and fruit. Another idea is to turn them into blondie bites by cutting them into smaller squares and serving them at parties. They can also be stored in an airtight container for up to a week. In this post, we covered how to make delicious blondies. We discussed key ingredients like butter, sugars, and eggs. I provided step-by-step instructions for mixing and baking. Tips for texture and serving were shared, along with fun variations and storage advice. Now, you can make the best blondies for any occasion. Enjoy experimenting with flavors and sharing your treats! Happy baking!

Cinnamon Snickerdoodle Blondies Irresistible Sweet Treat

To make baked Parmesan crusted chicken, gather these key items: - 4 boneless, skinless chicken breasts - 1 cup finely grated Parmesan cheese - 1 cup panko breadcrumbs - 1 teaspoon garlic powder - 1 teaspoon onion powder - 1 teaspoon Italian seasoning - Salt and freshly ground black pepper, to taste - 2 tablespoons extra virgin olive oil - 1 large egg, beaten These ingredients come together to create a crispy and cheesy coating that makes each bite delicious. For an extra touch, consider these garnishes: - 2 tablespoons fresh parsley, finely chopped Fresh parsley adds color and brightness to the dish. You can also add lemon wedges to enhance flavor. Each serving of baked Parmesan crusted chicken contains approximately: - Calories: 350 - Protein: 30g - Fat: 20g - Carbohydrates: 10g This dish is rich in protein and flavor while offering a satisfying crunch. Enjoy it with a side salad for a well-rounded meal. Start by preheating your oven to 400°F (200°C). This gets your oven ready for baking. While it heats, take your chicken breasts. Rinse them under cold water and then pat them dry with paper towels. Dry chicken helps the coating stick better. Next, set up your workspace. I like to use a large plate for the chicken. This keeps things neat and tidy. In a shallow mixing bowl, mix together the Parmesan cheese, panko breadcrumbs, garlic powder, onion powder, Italian seasoning, salt, and pepper. Make sure to stir it well. This mix gives your chicken a great flavor. In another bowl, beat the egg. Then add the olive oil and whisk until they mix. This wet mixture helps the breading stick to the chicken. Take a chicken breast and dip it into the egg mixture. Let any extra egg drip off. Then, coat it in the breadcrumb mix. Make sure to cover all sides. Press gently to help it stick. Place the coated chicken on a baking sheet lined with parchment paper. Space them out for even cooking. Bake your chicken for 25 to 30 minutes. It should reach 165°F (75°C) inside and look golden brown. After baking, let the chicken rest for about 5 minutes. This keeps it juicy. For a nice touch, sprinkle some fresh parsley on top before serving. Enjoy your delicious meal! To get a crispy crust, use panko breadcrumbs. They add a great crunch. Mix them well with Parmesan cheese and spices. Make sure to press the coating onto the chicken. This helps it stick better while baking. Bake at 400°F (200°C) for the right texture. If your oven has a convection setting, use it. This helps air circulate and gives an even crispiness. Baked Parmesan crusted chicken pairs well with many sides. Try it with roasted seasonal vegetables. A fresh mixed green salad complements it nicely too. You can also serve it with a side of rice or pasta. For a zesty touch, add lemon wedges. Squeeze fresh lemon juice over the chicken for a bright flavor. One common mistake is not letting the chicken rest before slicing. This can dry out the meat. Another error is skipping the egg wash. It helps the coating stick better. Make sure to coat the chicken evenly. Avoid overcrowding the baking sheet. This can lead to uneven cooking. Finally, don’t rush the cooking time. Always check the internal temperature for doneness. {{image_4}} You can make baked Parmesan crusted chicken even better with herbs and spices. Try adding dried thyme or rosemary for a warm, earthy taste. You can also mix in some paprika for a mild kick. If you love a good zing, add a pinch of cayenne pepper. Fresh herbs like basil or oregano can work well, too. Experiment and find your favorite flavor combination. While panko breadcrumbs give a great crunch, you can try other options. Regular breadcrumbs work fine but may not be as crispy. For a gluten-free version, use crushed gluten-free crackers or almond flour. You can even use crushed cornflakes for a unique texture. Each choice will change the dish slightly, so feel free to explore. Baked Parmesan crusted chicken pairs well with many sides. Roasted vegetables like broccoli or carrots add color and nutrition. A simple mixed green salad with lemon vinaigrette balances the meal nicely. You could also serve it with creamy mashed potatoes for a comforting touch. For a lighter option, try a quinoa salad or steamed asparagus. These sides can enhance your dining experience and make the meal more satisfying. Store your baked Parmesan crusted chicken in an airtight container. This keeps it fresh. Make sure to let it cool first. Place it in the fridge for up to three days. If you have extra crumbs, store them separately to keep them crispy. To reheat, use your oven for the best results. Preheat it to 350°F (175°C). Place the chicken on a baking sheet. Heat for about 10-15 minutes, until warm. You can also use a microwave, but it may make the crust soft. Heat in short bursts of 30 seconds and check often. You can freeze baked Parmesan crusted chicken for up to three months. Wrap each piece in plastic wrap, then place in a freezer bag. To cook, thaw overnight in the fridge. Then, reheat in the oven as mentioned above. This keeps the flavor and texture intact. Yes, you can use chicken thighs. Thighs are juicier and more flavorful than breasts. They also stay tender when baked. Just keep an eye on the cooking time. Thighs may take a bit longer to cook through. Aim for an internal temperature of 165°F (75°C) to ensure they are safe to eat. Leftovers will last for about 3 to 4 days in the fridge. Store them in an airtight container to keep them fresh. When reheating, make sure the chicken reaches 165°F (75°C) again. This keeps it safe and tasty. If you don’t finish them, consider freezing for longer storage. Yes, you can make this dish gluten-free! Use gluten-free panko breadcrumbs instead of regular ones. Check the Parmesan cheese label to ensure it is gluten-free as well. With these swaps, you can enjoy a crispy, tasty meal without gluten. Enjoy your deliciously crunchy baked chicken! This blog post covered essential ingredients, step-by-step instructions, and helpful tips for baking chicken. We discussed ways to keep your crust crispy and pair dishes well. I shared variations to match your taste and storage tips to keep your leftovers fresh. In summary, baking chicken is simple and fun. Use this guide to enjoy great meals. Remember, cooking should be enjoyable, so don't be afraid to experiment!

Baked Parmesan Crusted Chicken Simple and Tasty Recipe

- 1 lb ground chicken - 1/4 cup breadcrumbs - 1/4 cup green onions, finely chopped - 1 clove garlic, minced - 1 tablespoon ginger, freshly grated - 1 tablespoon soy sauce - 1 tablespoon sesame oil - 1 tablespoon honey - 1 teaspoon cornstarch - Salt and pepper to taste To make teriyaki chicken meatballs, you need simple, fresh ingredients. Ground chicken gives the meatballs a moist texture. Breadcrumbs help hold everything together. The green onions add a nice crunch and flavor. Garlic and ginger bring warmth and zest. Soy sauce and sesame oil give depth and richness. Honey adds a touch of sweetness. Cornstarch helps bind the mixture and gives it a smooth texture. Don’t forget salt and pepper to enhance all the flavors. - Sesame seeds for garnish - Additional green onions, chopped for garnish Garnishes make your dish look appealing. A sprinkle of sesame seeds adds a nice crunch. Chopped green onions brighten the dish with color and flavor. These small touches make your meal feel special and ready for sharing. - 1/4 cup soy sauce - 1/4 cup honey - 1 tablespoon cornstarch mixed with 2 tablespoons of water The teriyaki sauce is key to this recipe. Soy sauce gives it a savory base. Honey balances the saltiness with sweetness. Cornstarch mixed with water thickens the sauce nicely. This sauce coats the meatballs, making each bite flavorful and satisfying. Combine all main ingredients in a large bowl. Use 1 lb of ground chicken, 1/4 cup breadcrumbs, 1/4 cup finely chopped green onions, 1 clove minced garlic, 1 tablespoon freshly grated ginger, 1 tablespoon soy sauce, 1 tablespoon sesame oil, 1 tablespoon honey, 1 teaspoon cornstarch, salt, and pepper. Use your hands or a spatula to mix thoroughly. This blending ensures all flavors mix well. Preheat your oven to 400°F (200°C). Scoop about 1 tablespoon of the chicken mixture. Roll it into a firm ball, about 1 inch wide. Place each meatball on a baking sheet lined with parchment paper. Continue until you shape all the mixture into meatballs. Place the meatballs on the lined baking sheet. Bake them in the preheated oven for 15-20 minutes. They should turn golden brown and be fully cooked inside. Check to ensure they reach an internal temperature of 165°F for safety. While the meatballs bake, prepare the teriyaki sauce. In a small saucepan, combine 1/4 cup soy sauce, 1/4 cup honey, and 1 tablespoon cornstarch mixed with 2 tablespoons of water. Heat this mixture over medium heat. Stir continuously until it thickens, which takes about 5 minutes. Once the meatballs are cooked, take them out of the oven. Drizzle the thickened teriyaki sauce over the meatballs while they sit on the baking tray. Toss gently to coat them evenly in the sauce. This step adds a delicious glaze. Transfer the coated meatballs to a serving dish. Garnish with a sprinkle of sesame seeds and additional chopped green onions for a fresh look. Enjoy your flavorful teriyaki chicken meatballs! To make great meatballs, mix the ingredients well. This step helps spread the flavors. Use your hands or a spatula to combine everything. This ensures each meatball tastes the same. When you shape the meatballs, do not overcrowd the baking sheet. Leave some space between them. This helps them cook evenly and get nice and brown. Want to spice things up? Add crushed red pepper to the meat mixture. It gives your meatballs a nice kick. You can also use fresh herbs. Chopped cilantro or basil can brighten the taste. They add a fresh touch that makes your dish stand out. For a stunning look, serve your meatballs on a decorative platter. A rustic wooden board works great. Add a swirl of extra teriyaki sauce on top. This makes the dish more inviting. Pair your meatballs with a side of steamed rice or a bright salad. The colors and textures will make your meal pop! {{image_4}} You can switch up the meat for different flavors. - Use ground turkey instead of chicken. It makes a lighter meatball. - Try a vegetarian option. Use mashed chickpeas or tofu as the base. The sauce can add fun twists to your meatballs. - For a sweet and spicy kick, mix in some chili sauce. - Make a homemade pineapple teriyaki sauce for a tropical taste. How you serve your meatballs can change the meal. - Pair them with steamed vegetables for a healthy balance. - Add Asian-inspired salads for a fresh, crunchy side. Store your teriyaki chicken meatballs in an airtight container. They will stay fresh in the fridge for up to 3 days. This makes it easy to enjoy leftovers. Just make sure they are cooled before sealing. You can freeze uncooked meatballs for up to 3 months. This is great for meal prep. Just shape the meatballs and place them in a single layer on a baking sheet. Once frozen, transfer them to a freezer bag. Cooked meatballs can also be frozen. They reheat well, so you can enjoy them later. To reheat, place the meatballs in the oven at 350°F (175°C) for 10-15 minutes. This method keeps them warm and delicious. If you need a quick option, you can microwave them. Heat in short bursts until they are warm all the way through. Enjoy your tasty meal without the wait! To make sure your meatballs stay firm, use breadcrumbs as a binder. Mix them well with the ground chicken and other ingredients. Adding a beaten egg can also help bind everything together. Make sure to shape them tightly into balls. This prevents them from falling apart while cooking. Yes, you can prepare teriyaki chicken meatballs ahead of time. Form the meatballs and store them in the fridge for up to 24 hours before baking. You can also freeze them for later. Just make sure to place them in an airtight container. When ready to cook, bake from frozen or let them thaw first. Teriyaki chicken meatballs pair well with many sides. Here are some popular choices: - Steamed rice - Fried rice - Asian-style slaw - Roasted vegetables - Noodles These sides add flavor and balance to the dish. To change the sweetness of the sauce, you can add or reduce honey or sugar. If you find it too sweet, add a little more soy sauce. This will balance the flavors. You can also mix in a splash of rice vinegar for a tangy kick. To make teriyaki chicken meatballs gluten-free, use gluten-free breadcrumbs. Check the soy sauce label, as many brands contain gluten. You can substitute it with tamari, which is gluten-free. These simple swaps keep your dish safe for gluten-free diets. Teriyaki chicken meatballs are tasty and easy to make. We covered the main ingredients, step-by-step instructions, and useful tips. You can vary the recipe with different meats or sauces. Storage tips ensure your leftovers remain fresh. Enjoy these flavorful meatballs on busy nights or for meal prep. Now, you have all the tools to create a delicious dish that’s sure to please everyone. Get cooking and enjoy a delightful meal!

Teriyaki Chicken Meatballs Flavorful and Easy Recipe

To make Roasted Maple Dijon Sweet Potatoes, you need simple, fresh ingredients. Here’s the list: - 4 medium sweet potatoes, peeled and diced into 1-inch cubes - 3 tablespoons extra virgin olive oil - 2 tablespoons pure maple syrup - 2 tablespoons Dijon mustard (preferably whole grain for added texture) - 1 teaspoon garlic powder - 1 teaspoon smoked paprika - Sea salt and freshly cracked black pepper to taste - Fresh parsley, finely chopped (for garnish) These ingredients come together to create a dish that is sweet, tangy, and full of flavor. Sweet potatoes are naturally sweet and creamy. The maple syrup adds a touch of sweetness while the Dijon mustard brings a mild kick. Garlic powder and smoked paprika add depth and warmth. Using extra virgin olive oil helps with roasting, ensuring the potatoes get crispy on the outside. The seasoning enhances all the flavors, making each bite delicious. Lastly, fresh parsley gives a pop of color and freshness, making the dish visually appealing. Gather these ingredients, and let’s dive into cooking! Preheat your oven to 425°F (220°C). This high heat crisps the sweet potatoes well. Line a baking sheet with parchment paper. This helps with easy cleanup and prevents sticking. In a small bowl, mix three tablespoons of olive oil. Add two tablespoons of maple syrup and two tablespoons of Dijon mustard. I prefer whole grain mustard for its texture. Then, sprinkle in one teaspoon of garlic powder and one teaspoon of smoked paprika. Season with sea salt and black pepper. Whisk everything until smooth. Take four medium sweet potatoes, peel them, and cut them into one-inch cubes. Place the diced sweet potatoes in a large bowl. Pour the dressing over the sweet potatoes. Use a spatula to mix gently but thoroughly. Make sure each cube gets well-coated with the glaze. Spread the seasoned sweet potatoes on the lined baking sheet. Make sure they are in a single layer for even cooking. Roast them in the oven for 25 to 30 minutes. Halfway through, take out the sheet and flip the potatoes. This helps them brown evenly and stay tender. Once the sweet potatoes are golden brown and fork-tender, take them out of the oven. Let them cool for a couple of minutes. Transfer the sweet potatoes to a serving dish. Garnish with chopped fresh parsley for a pop of color. Serve warm and enjoy this tasty side dish! To get the best sweet potatoes, start with even-sized cubes. Cut them into 1-inch pieces. This step helps them cook evenly. Preheat your oven to 425°F (220°C) for the right heat. Line your baking sheet with parchment paper. This keeps them from sticking and makes cleanup easy. Spread the sweet potatoes in a single layer. Avoid crowding them; this allows for proper browning. The key to flavor lies in the dressing. Use high-quality Dijon mustard. Whole grain adds texture and taste. Pure maple syrup brings sweetness and depth. Don't skip the garlic powder and smoked paprika. They add warmth and a nice kick. Adjust the sea salt and black pepper to your taste. For a twist, try adding a pinch of cayenne for heat. Serve the sweet potatoes on a rustic wooden platter for a charming look. Drizzle a little extra maple syrup over the top. This adds shine and flavor. Garnish with finely chopped parsley for freshness. A colorful dish makes a great centerpiece. You can also use a colorful bowl to catch the eye. This dish is not just tasty; it's also beautiful! {{image_4}} You can change the spices to suit your taste. Try adding cumin for warmth. Cayenne pepper can give a nice kick. If you prefer a sweet twist, try cinnamon. Each option adds a unique flavor to the dish. If you want to swap the maple syrup, use honey or agave nectar. Brown sugar can also work well for a rich taste. Just remember, each sweetener might change the flavor slightly. Adjust the amount based on your preference. Roasted Maple Dijon Sweet Potatoes pair great with proteins. Serve them alongside grilled chicken for a hearty meal. They also go well with baked salmon for a healthy option. If you're vegetarian, enjoy them with black beans for extra protein. After cooking, let your roasted maple Dijon sweet potatoes cool down. Then, place them in an airtight container. They will stay fresh in the fridge for about 3 to 5 days. Always check for any signs of spoilage before use. If you want to freeze your sweet potatoes, make sure they cool first. Spread them in a single layer on a baking sheet. Freeze them for 1 to 2 hours until firm. After that, transfer them to a freezer-safe bag. They can last up to 3 months in the freezer. When you're ready to eat, thaw them in the fridge overnight. To reheat, you have a few easy options. You can use the oven, microwave, or skillet. For the oven, preheat to 350°F (175°C). Spread the sweet potatoes on a baking sheet and heat for about 10-15 minutes. In the microwave, heat them in 30-second intervals until warmed through. If you prefer the skillet, heat a little olive oil over medium heat and toss the sweet potatoes until warm. This way, they stay tasty and delicious! Yes, you can use regular potatoes. They will taste different but still work. You may want to adjust cooking time since regular potatoes cook differently. Sweet potatoes give a sweeter flavor that pairs well with maple and Dijon. Regular potatoes will be more starchy and less sweet. This dish is almost vegan! Just make sure to use maple syrup and check the Dijon mustard. Most brands are vegan, but some might contain honey. The other ingredients are already vegan, so it’s simple. You can enjoy this dish with confidence! Roasted Maple Dijon Sweet Potatoes pair well with many dishes. You can serve them alongside grilled chicken or fish. They also go great with a fresh salad or roasted veggies. For a cozy meal, try serving them with a hearty grain like quinoa or rice. Leftover sweet potatoes can last about 3 to 5 days in the fridge. Make sure to store them in an airtight container to keep them fresh. When you're ready to eat, just reheat them in the oven or microwave. Enjoy them warm for the best flavor! This blog post explored the delicious world of roasted maple Dijon sweet potatoes. We covered key ingredients and provided clear steps for preparing and roasting. I shared tips to ensure perfect results and variations to fit your taste. Finally, I addressed common questions about storage and serving. Enjoy crafting this dish and experimenting with flavors. You’ll appreciate how easy and rewarding cooking can be!

Roasted Maple Dijon Sweet Potatoes Flavorful Side Dish

To make creamy garlic herb chicken thighs, you need a few key ingredients. Each one plays a vital role in creating a rich flavor and a delightful dish. Here’s what you will need: - 4 bone-in chicken thighs, skin-on - 2 tablespoons olive oil - 4 cloves garlic, minced - 1 cup heavy cream - 1 cup chicken broth - 1 tablespoon Dijon mustard - 1 teaspoon dried thyme - 1 teaspoon dried rosemary - Salt and pepper, to taste - Fresh parsley, chopped (for garnish) These ingredients work together to create a dish that is both comforting and gourmet. The bone-in thighs give moisture and flavor. Olive oil helps to sear the chicken, making it crispy. Garlic adds a bold taste, while heavy cream helps create that rich, creamy sauce. The chicken broth adds depth, and Dijon mustard gives a nice tang. The dried thyme and rosemary bring in lovely herbal notes. Finally, salt and pepper enhance all the flavors. Don't forget the parsley at the end for a fresh touch! With these ingredients in hand, you are ready to create a meal that impresses. Cooking with quality ingredients always leads to the best results. So, gather these items, and let's get cooking! Start by patting the chicken thighs dry with paper towels. This step is key for getting crispy skin. You want to remove any moisture. Then, season both sides with salt and pepper. This simple seasoning brings out the best flavor in your chicken. Next, heat the olive oil in a large skillet over medium-high heat. Wait until the oil shimmers. Carefully place the chicken thighs skin-side down in the skillet. This will help the skin get golden and crispy. Sear them for about 5-7 minutes. Flip the thighs and cook for another 5 minutes. Once they are nicely browned, transfer the chicken to a plate and set it aside. In the same skillet, lower the heat to medium. Add the minced garlic to the leftover oil in the pan. Sauté it for about 30 seconds until it smells amazing. Be careful not to burn the garlic. Then, gradually pour in the chicken broth. Use a wooden spoon to scrape up any tasty brown bits from the bottom. Next, stir in the heavy cream and Dijon mustard. Mix everything well until combined. Now it's time to return the chicken to the skillet. Place the thighs back in, skin-side up. Cover the skillet and let it simmer on low heat for 25-30 minutes. This allows the chicken to soak up the flavors. Make sure the chicken reaches an internal temperature of 165°F. This ensures it is cooked through and safe to eat. To get that crispy skin, start by drying the chicken thighs. Use paper towels to pat them dry. This step helps the skin crisp up nicely. Next, heat the pan well. Aim for medium-high heat before adding the chicken. A hot pan locks in moisture and creates a golden crust. Want to boost the flavor? Try adding more herbs like oregano or basil. You can also use fresh garlic instead of dried. For a twist, swap Dijon mustard with whole grain mustard. This will give the sauce a nice texture and taste. Don't be afraid to experiment with spices! Serve your creamy garlic herb chicken thighs with buttery mashed potatoes. The creamy sauce pairs well with the potatoes. You can also add sautéed vegetables for color and nutrition. For a beautiful plate, drizzle sauce over the chicken. Garnish with fresh parsley for a pop of color. {{image_4}} You can swap chicken thighs for other proteins. Chicken breasts work well too. They cook faster, so check them often. Pork also makes a great choice. Use pork chops or tenderloin for a tasty change. Adjust cooking times to fit the protein you choose. Want a meat-free option? Try using tofu or mushrooms. Extra firm tofu can soak up the sauce well. Just sauté it until golden before adding the sauce. Mushrooms, like cremini or portobello, add a rich flavor. Simply slice them and cook until soft for a delightful twist. If you need gluten-free options, use gluten-free broth and mustard. Always read labels to ensure they meet your needs. For a dairy-free version, try coconut cream instead of heavy cream. It gives a nice, creamy texture while adding a subtle sweetness. These tweaks help everyone enjoy this dish! To keep your chicken thighs fresh, store them in an airtight container. Make sure the dish cools down before sealing. Place it in the fridge. It will stay good for up to three days. If you want the best taste, eat it sooner rather than later. You can freeze the chicken thighs for later meals. First, let the dish cool completely. Next, portion the chicken and sauce into freezer-safe bags. Try to remove as much air as possible. This will help prevent freezer burn. They can last up to three months in the freezer. When you reheat, you want to keep the chicken moist. The best way is to use a skillet. Heat it on low and add a splash of chicken broth. Place the chicken in the skillet and cover it. Heat it gently until warm. This keeps the chicken juicy and flavorful. You can also use the microwave, but be careful not to overcook it. Yes, you can use boneless chicken thighs. They cook faster than bone-in thighs. Bone-in thighs add more flavor and moisture. The bone helps keep the chicken juicy. If you choose boneless, check them often to avoid overcooking. To thicken your sauce, try these tips: - Simmer the sauce longer to reduce it. - Add a bit of cornstarch mixed with cold water. - Stir in more heavy cream and let it cook. - Use a whisk to mix well for a smooth texture. To check if chicken is cooked, use a meat thermometer. The internal temperature should reach 165°F. Look for clear juices when you cut the chicken. If it’s pink inside, it needs more time. Yes, there are several alternatives for heavy cream: - Use half-and-half for a lighter sauce. - Coconut cream works well for a dairy-free option. - Greek yogurt can add creaminess, but use it at the end. - Silken tofu blended until smooth is a great vegan choice. This blog post covered a tasty chicken dish with rich, creamy sauce. You learned how to prepare chicken thighs and create a delicious sauce with simple ingredients. Remember to dry the chicken for crispy skin and consider different proteins or vegetarian options for variety. After cooking, store leftovers well, so they stay fresh. With these tips, you can enjoy this meal again later. I hope you feel excited to try this recipe and share it with others!

Creamy Garlic Herb Chicken Thighs Flavorful Delight

PREV 1 … 5 6 7 … 10 NEXT
crunchy chronicle

explore

DessertsDinnerAppetizersDrinks

Our Policies

  • Cookie Policy
  • Copyright Policy
  • Disclaimer
  • GDPR Policy
  • Terms Of Use
Back to Top
  • About
  • Contact Us
  • Privacy Policy
© 2025 crunchy chronicle