FREE DINNER EBOOK! Get your copy!
  • Cookie Policy
  • GDPR Policy
  • Disclaimer
  • Terms Of Use
  • Visit my other site: Fun Cookie Recipes
crunchy chronicle
  • Home
  • Dinner
  • Desserts
  • Drinks
  • Appetizers
  • Contact
  • About
  • Privacy Policy
  • Home
  • Dinner
  • Desserts
  • Drinks
  • Appetizers
  • Contact
  • About
  • Privacy Policy
  • Cookie Policy
  • GDPR Policy
  • Disclaimer
  • Terms Of Use
Visit my other site: Fun Cookie Recipes

HOME / CATEGORIES /

Latest

- 3 ripe bananas, thoroughly mashed - 1/2 cup creamy peanut butter - 1/2 cup granulated sugar - 1/4 cup packed brown sugar - 1/4 cup unsweetened applesauce - 2 large eggs - 1 teaspoon pure vanilla extract - 1 1/2 cups all-purpose flour - 1/2 teaspoon baking soda - 1/2 teaspoon baking powder - 1/4 teaspoon salt - 1/2 cup chocolate chips (dark or semi-sweet) - 1/4 cup chopped walnuts (optional) The key to this banana bread is the balance of flavors. The ripe bananas add natural sweetness and moisture. I always choose bananas that are very ripe for the best taste. Creamy peanut butter gives it a rich flavor and creamy texture. Next, we have sugars. Granulated sugar adds sweetness, while brown sugar brings a hint of molasses. Applesauce replaces some fat and keeps the bread moist. Adding eggs gives structure. Pure vanilla extract enhances the overall flavor. For the dry part, all-purpose flour is the base. Baking soda and baking powder help it rise. A little salt rounds out the flavors. Finally, chocolate chips add a delightful richness, while walnuts, if you choose to add them, give an awesome crunch. Each ingredient plays an important role in making this a delightful treat. First, preheat your oven to 350°F (175°C). This step is key for even baking. While the oven heats, prepare your loaf pan. You can grease it lightly with cooking spray or butter. Alternatively, you might line it with parchment paper. This makes it easy to remove the bread later. Next, take three ripe bananas and mash them well in a large bowl. Then, add in 1/2 cup of creamy peanut butter. Mix these until smooth. Now, it's time to add the sugars. Include 1/2 cup of granulated sugar and 1/4 cup of brown sugar. Add 1/4 cup of unsweetened applesauce and two large eggs. Finish with 1 teaspoon of pure vanilla extract. Whisk everything until it’s creamy and well combined. In another bowl, whisk together the dry ingredients. Use 1 1/2 cups of all-purpose flour, 1/2 teaspoon of baking soda, 1/2 teaspoon of baking powder, and 1/4 teaspoon of salt. Mixing these first ensures they blend well into the batter. Now, take the dry mix and add it to the wet mix. Use a spatula to fold the two together gently. Be careful not to over-mix; it's okay if a few lumps remain. After that, fold in 1/2 cup of chocolate chips and, if you like, 1/4 cup of chopped walnuts for some crunch. Once your batter is ready, transfer it to the prepared loaf pan. Smooth the top with your spatula. Place the pan in the preheated oven. Bake for 60-65 minutes. You know it's done when a toothpick comes out clean or with a few moist crumbs. After baking, let the banana bread cool in the pan for about 10 minutes. Then, carefully move it to a wire rack to cool completely. To serve, slice the bread and arrange it on a plate. Drizzle some extra peanut butter on top and scatter a few chocolate chips for flair. You can even place a fresh banana beside the slices for a lovely touch. You can switch out some ingredients for healthier options. Instead of peanut butter, try almond butter. It adds a nice touch. For sugar, use coconut sugar. It gives a deeper flavor with a lower glycemic index. If you need to make this vegan, replace the eggs with applesauce. Use 1/4 cup of applesauce for each egg. This keeps the bread moist and tasty. Getting the texture just right is key. You want your bread moist but not soggy. If the batter seems too thick, add a splash of milk to loosen it. To check if your bread is done, insert a toothpick in the center. If it comes out clean or with a few crumbs, it’s ready. If there’s wet batter, bake it a bit longer. To serve this bread beautifully, slice it evenly. Use a sharp knife for clean cuts. Place the slices on a rustic wooden board. Drizzle some creamy peanut butter on top. Scatter a few chocolate chips for extra appeal. For a lovely touch, add a fresh banana beside the slices. This makes the dish look inviting and adds some color. {{image_4}} You can easily change the flavor of your chocolate peanut butter banana bread. Adding spices like cinnamon or nutmeg brings warmth and depth. Just a pinch can change the taste. You might also try adding mix-ins like dried fruit or seeds. Chopped dates or cranberries add sweetness. Pumpkin seeds or sunflower seeds offer a nice crunch. If you need a gluten-free option, use alternative flours. Almond flour or oat flour work great. They keep the bread moist and tasty. For a low-sugar version, you can use less sugar or a sugar substitute. Applesauce already adds sweetness, so you can cut back on granulated sugar. Seasonal fruits can enhance your banana bread. Try adding fresh berries in the summer or chopped apples in the fall. Nuts, like pecans or hazelnuts, can add a seasonal twist too. For festive occasions, think about adding spices like ginger or cloves. They give a holiday vibe to every slice. To store banana bread at room temperature, wrap it in plastic wrap. This keeps it fresh. Place it in a cool and dry spot, away from sunlight. It can last for 2 to 3 days. Enjoy the soft texture and rich flavors during this time. Refrigerating banana bread helps it stay fresh longer. It can last for about a week in the fridge. Just place it in an airtight container. This method slows down spoilage and helps keep the bread moist. However, it may lose some freshness in flavor. Freezing banana bread is a great way to save it for later. First, wrap it tightly in plastic wrap, then place it in a freezer bag. This protects it from freezer burn. It can last for up to 3 months in the freezer. When ready to eat, let it thaw in the fridge overnight. For the best texture, warm it up in the oven for a few minutes before serving. Yes, you can use frozen bananas. They are perfect for banana bread. Frozen bananas are often riper and sweeter. To use them, thaw the bananas first. Drain any extra liquid. Then mash them well before mixing. This helps keep your bread moist and flavorful. To reduce the sweetness, cut back on sugar. You can use half the granulated sugar. You can also skip the brown sugar. Add more mashed bananas for flavor. You might try unsweetened applesauce too. This will keep the bread moist without adding extra sugar. If your banana bread is too dense, check your mixing method. Over-mixing can cause density. Mix wet and dry ingredients just until combined. If your bananas are too large, use smaller ones. You can also add a bit more baking powder. This helps to lighten the texture. Chocolate peanut butter banana bread lasts a few days at room temperature. Store it in a sealed container. If you refrigerate it, it can last up to a week. For longer storage, freeze it for up to three months. Just slice and wrap each piece tightly. Yes, you can add protein powder. Use a small amount, about 1/4 cup. Choose a protein that blends well. Mix it with the dry ingredients before combining. This way, it won’t change the bread’s texture too much. Adjust the liquid slightly if needed to keep it moist. This article covered all you need to know about making Chocolate Peanut Butter Banana Bread. You learned the key ingredients, step-by-step instructions, and useful baking tips. Remember, you can customize the recipe to suit your diet and taste. Store it well to enjoy later! Experiment with flavors and have fun baking. Your kitchen will fill with delicious scents and smiles. Happy baking!

Chocolate Peanut Butter Banana Bread Delightful Treat

For these smoky chipotle chicken quesadillas, you need simple yet tasty items. Here’s the list: - 2 cups cooked shredded chicken - 1 cup shredded Monterey Jack cheese - 1 cup shredded cheddar cheese - 1-2 tablespoons chipotle peppers in adobo sauce, minced - 1 small red onion, finely chopped - 1 bell pepper (red or green), thinly sliced - 2 tablespoons olive oil - 1 teaspoon garlic powder - 1 teaspoon smoked paprika - Salt and pepper to taste - 4 large flour tortillas Each ingredient adds flavor and texture. The chicken brings protein, while the cheeses melt beautifully. The chipotle peppers give a nice smoky kick, and the veggies add freshness. You can make your meal even better with some extras. Consider serving with: - Sour cream - Guacamole These options add creaminess and richness, balancing the spice from the chipotle. For the best chicken, rotisserie chicken works great. It saves time and is full of flavor. If you prefer, you can cook your chicken. Just season it well before shredding. Look for chicken that is juicy and tender. This will make your quesadillas even more delicious. Always taste your chicken before adding it to the mix. A good chicken will elevate the whole dish. Start by mixing the shredded chicken in a large bowl. Add the minced chipotle peppers, garlic powder, smoked paprika, salt, and pepper. Stir well so the chicken gets covered in the spices. This step is key. It helps build the smoky flavor you want. Next, heat a skillet over medium heat. Pour in the olive oil and let it warm up. Once hot, add the chopped red onion and the sliced bell pepper. Sauté these for about five minutes. Stir them occasionally. The goal is to soften the veggies and give them a nice color. This step adds sweetness and crunch to your filling. Now, combine the sautéed vegetables with the chicken mixture. Gently fold in the Monterey Jack and cheddar cheeses. This mix will be your filling. Heat a clean skillet over medium heat. Place one tortilla in it and spread a generous portion of the filling over half of the tortilla. Fold the tortilla in half to cover the filling. Cook the quesadilla for three to four minutes on each side. You want it crispy and golden brown, with melted cheese inside. Repeat this for the other tortillas. After cooking, take the quesadillas out of the skillet. Let them rest for a minute. This resting time helps the filling set. Then, slice each quesadilla into wedges. This makes them easy to serve and eat. Enjoy them hot with sour cream and guacamole on the side. To get your quesadillas crispy, use a hot skillet. Preheat your skillet for a few minutes before adding oil. Use enough oil to coat the pan but not too much to make it greasy. Cook each side for about 3-4 minutes. You want a golden brown color. If you like it extra crispy, press down gently on the quesadilla with a spatula while cooking. This helps the tortilla brown better. Spice is key in these quesadillas. Start with one tablespoon of minced chipotle peppers. Taste the filling after mixing. If you want more heat, add a bit more pepper. Remember, the spice can increase as it cooks. If it gets too spicy, you can add more cheese to balance it out. Sour cream or guacamole can also help cool the heat when serving. Leftover quesadillas are a great option for lunch. Store them in an airtight container in the fridge for up to three days. To reheat, place them in a skillet over medium heat. This keeps them crispy. You can also use leftover chicken in salads or wraps. Mixing the chicken with different spices can create new flavors for your meals. {{image_4}} If you want a meat-free option, try cheese and veggie quesadillas. Use the same tortillas and cheese. For the filling, mix in sautéed mushrooms, zucchini, and spinach. You can add chipotle peppers for a smoky kick. This option is tasty and satisfying. Feel free to swap cheeses based on your taste. You can use pepper jack for more heat or gouda for a creamy texture. Mixing different cheeses can create a unique flavor. Just remember to stick with cheeses that melt well for the best results. You can enhance the quesadillas by adding beans or avocado. Black beans or pinto beans add protein and fiber. Avocado brings creaminess that balances the spice. Just layer them in with your chicken and cheese for a delicious twist. Leftover quesadillas are easy to store. Let them cool down to room temperature first. Then, wrap each quesadilla in plastic wrap or foil. Place them in an airtight container. This method keeps them fresh for up to three days in the fridge. If you want to enjoy them later, freezing is a great option. To freeze quesadillas, follow the same cooling steps. Wrap each one tightly. You can stack them in a freezer-safe bag or container. Label the bag with the date so you know when you made them. Frozen quesadillas last up to three months. This way, you have a quick meal ready whenever you want. Reheating quesadillas is simple. The best method is to use a skillet. Heat it over medium heat and add a little oil. Place the quesadilla in the skillet for about 3-4 minutes on each side. This makes the tortilla crispy again and melts the cheese. You can also use an oven. Preheat it to 350°F (175°C). Place the quesadilla on a baking sheet for 10-15 minutes. Either way, enjoy your tasty leftovers! For quesadillas, cooked shredded chicken works best. I often use rotisserie chicken for ease. It saves time and adds great flavor. Use chicken breast or thighs if you prefer cooking from scratch. Shred the chicken into small pieces for even filling. The chicken should mix well with the spices and cheese. Yes, you can make quesadillas ahead of time. Prepare the filling and store it in the fridge. You can assemble the quesadillas later. This way, they stay fresh and delicious. If you cook them early, let them cool before storing. When ready to eat, reheat in a skillet or oven for best results. Toppings enhance the flavors of your quesadillas. I recommend sour cream and guacamole for dipping. They add creaminess that balances the spice. Fresh cilantro or diced tomatoes can add brightness. You can also try salsa or pickled jalapeños for a kick. Choose toppings that suit your taste and enjoy! You’ve learned how to make great chicken quesadillas from scratch. We covered key ingredients, step-by-step cooking, and tips to enhance your meal. Remember, use fresh chicken and crisp veggies for the best taste. Explore fun variations like veggie quesadillas for extra flavor. Store leftovers wisely and enjoy them later. Cooking should be fun and tasty, so get creative in the kitchen. You now have the knowledge to impress friends and family with your quesadilla skills. Happy cooking!

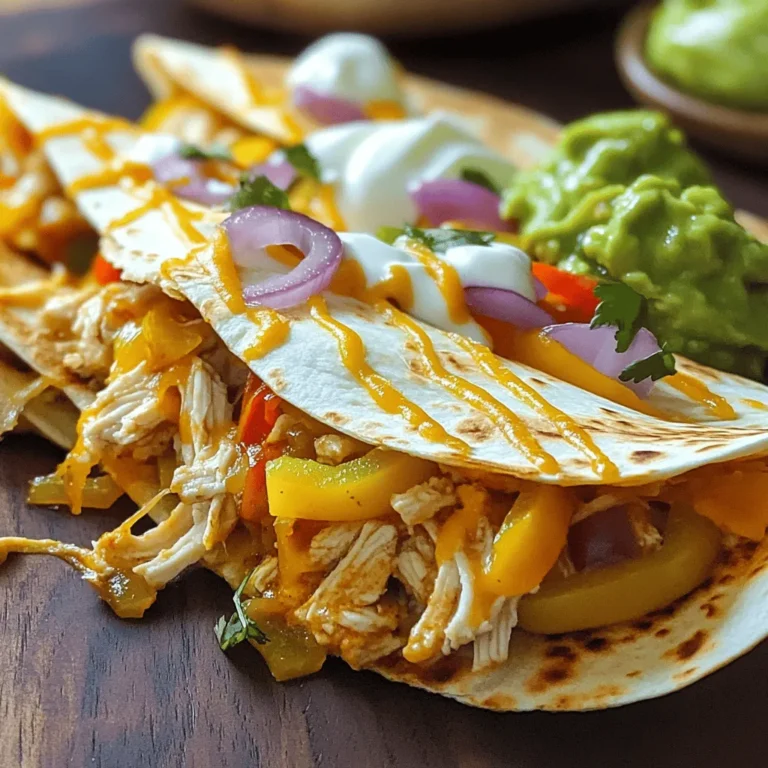
Smoky Chipotle Chicken Quesadillas Zesty and Simple Recipe

- 2 boneless, skinless chicken breasts - 1 cup Italian-seasoned breadcrumbs - 1/2 cup grated Parmesan cheese - 1 teaspoon garlic powder - 1 teaspoon onion powder - 1 teaspoon dried oregano - 1/2 teaspoon salt - 1/4 teaspoon black pepper - 1/2 cup marinara sauce - 1 cup shredded mozzarella cheese - Olive oil spray - Chicken Breasts: Use thighs for a juicier option. - Breadcrumbs: Panko breadcrumbs add extra crunch. - Parmesan Cheese: Grate it fresh for more flavor. - Garlic and Onion Powder: Fresh garlic and onions can work too. - Dried Oregano: Try Italian seasoning if you want a blend. - Marinara Sauce: Any tomato sauce works if you prefer. - Mozzarella Cheese: Use provolone or gouda for a twist. - Olive Oil Spray: Any cooking spray or oil can substitute. - Measuring Cups: For accurate ingredient amounts. - Measuring Spoons: For precise seasoning. - Air Fryer: Essential for cooking the chicken. - Meat Mallet or Rolling Pin: To pound the chicken flat. - Shallow Bowl: For mixing the breading. - Plastic Wrap or Parchment Paper: To pound the chicken without mess. - Tongs: For flipping the chicken safely. - Spatula: Helpful for serving the chicken. These ingredients and tools help create a tasty Air Fryer Chicken Parmesan. Each one plays a key role in making your dish both delicious and easy to prepare. Start by placing the chicken breasts between two sheets of plastic wrap. This will help keep your kitchen clean. Use a meat mallet or rolling pin to pound the chicken. Aim for an even thickness of about 1/2 inch. This step is key because it helps the chicken cook evenly. Next, you will set up your breading station. In a shallow bowl, mix the following ingredients: - 1 cup Italian-seasoned breadcrumbs - 1/2 cup grated Parmesan cheese - 1 teaspoon garlic powder - 1 teaspoon onion powder - 1 teaspoon dried oregano - 1/2 teaspoon salt - 1/4 teaspoon black pepper Stir these ingredients until they blend well. This mix will give your chicken great flavor and crunch. Now it's time to cook the chicken. Preheat your air fryer to 380°F (193°C). Run it for about 5 minutes. This step helps create a crispy texture. Lightly spray the air fryer basket with olive oil spray to avoid sticking. Place the breaded chicken breasts in the basket in a single layer. If your air fryer is small, you may need to cook in batches. Before cooking, spray the tops of the chicken with olive oil spray. Cook the chicken for 10 minutes. Flip the chicken halfway through for even crispiness. After 10 minutes, carefully remove the basket. Spoon marinara sauce over each piece of chicken. Evenly sprinkle shredded mozzarella cheese on top. Return the basket to the air fryer and cook for an additional 3-5 minutes. You want the cheese to melt and bubble. Finally, take the chicken out and let it rest for a couple of minutes. This keeps the juices locked in. Enjoy your crispy Air Fryer Chicken Parmesan! To get that perfect crispiness, start with even chicken breasts. Pound them to about 1/2 inch thick. This step helps them cook evenly. Use Italian-seasoned breadcrumbs for added flavor. Lightly spray the chicken with olive oil. This helps the breadcrumbs crisp up nicely. Cook at 380°F for the best results. Flip the chicken halfway through cooking to ensure both sides are crispy. One common mistake is not preheating the air fryer. Always preheat it for about 5 minutes. This step helps cook the chicken evenly and crisply. Another mistake is overcrowding the basket. Make sure to leave space between the chicken pieces. This allows hot air to circulate, giving you that nice crunch. Lastly, don’t skip the oil spray. It’s key for that golden brown finish. For cooking chicken parmesan, set your air fryer to 380°F (193°C). Cook for 10 minutes initially, flipping halfway through. After adding marinara and mozzarella, cook for an additional 3-5 minutes. This melts the cheese perfectly. Each air fryer is different, so check your chicken to ensure it’s cooked through. The internal temperature should reach 165°F (74°C) for safe eating. {{image_4}} You can switch up the cheese in this recipe. Instead of mozzarella, try provolone for a sharper taste. Goat cheese can add a creamy twist if you like something unique. For a richer flavor, use fontina. Each cheese offers a new taste that can change the dish's vibe. Marinara is classic, but you can explore other sauces. Try pesto for a fresh, herby flavor. Alfredo sauce can add creaminess, making it indulgent. For a spicy kick, use arrabbiata sauce. Each sauce adds a different layer of flavor that keeps things exciting. You can make this dish even better by adding veggies. Spinach or arugula adds color and nutrition. Bell peppers or zucchini can offer a nice crunch. Fresh herbs like basil or parsley can brighten the dish. Don't be shy to experiment; each addition can elevate your meal. To keep your air fryer chicken parmesan fresh, place leftovers in an airtight container. Make sure the chicken cools down first. Store it in the fridge for up to three days. If you want to enjoy it later, consider freezing instead. When you're ready to eat, the best way to reheat is in the air fryer. Set it to 350°F (175°C). Heat the chicken for about 5-7 minutes. This keeps it crispy and warm. You can also use a microwave, but it may lose some crispiness. If you want to freeze chicken parmesan, wrap each piece in plastic wrap. Then, place them in a freezer bag. It can last for up to three months. To thaw, move it to the fridge overnight. Then reheat as mentioned earlier. Enjoy your tasty meal anytime! The best air fryer for chicken parmesan has a good size and strong heat. I recommend an air fryer with at least 3.5 quarts. This size lets you cook two chicken breasts at once. Look for models with adjustable temperature settings. A timer feature is also helpful. Brands like Philips, Ninja, and Cosori often receive high marks. Yes, you can make chicken parmesan without breadcrumbs. You can use crushed nuts, like almonds or walnuts, instead. Another option is to use ground oats or cornmeal. These will give you a crunchy texture without using bread. Just make sure to season them well for flavor. Cook chicken parmesan in an air fryer for about 10 minutes at 380°F. Flip the chicken halfway through for even cooking. After adding marinara and cheese, cook for an extra 3-5 minutes. This ensures the cheese melts nicely. Always check that the chicken is cooked through before serving. In this blog post, I covered the key ingredients for chicken parmesan, how to prepare them, and essential cooking tips. You learned how to create crispy chicken with variations and storage tips to keep it fresh. Remember, using the right ingredients and techniques makes all the difference. Avoid common mistakes and enjoy experimenting with flavors. This dish can impress and satisfy everyone at your table. Now, get cooking and enjoy your homemade chicken parmesan!

Air Fryer Chicken Parmesan Quick and Tasty Recipe

- 1 pound large shrimp, peeled and deveined - 3 tablespoons honey - 3 tablespoons soy sauce - 2 tablespoons extra virgin olive oil - 4 cloves garlic, finely minced - 1 teaspoon red pepper flakes - Juice of 1 fresh lime - Salt and freshly ground black pepper to taste - Fresh cilantro, chopped (for garnish) - Skewers (bamboo or metal) - Mixing bowl - Grill or grill pan The main ingredients in spicy honey garlic shrimp skewers bring rich flavor. Large shrimp form the base, soaking up the marinade. Honey adds sweetness, while soy sauce provides a savory kick. Olive oil enhances moisture and helps with cooking. For the additional ingredients, garlic gives a bold taste. Red pepper flakes bring the heat, which you can adjust to fit your spice level. Fresh lime juice adds a zesty touch that brightens the dish. Salt and pepper round out the flavors, while fresh cilantro gives a pop of color and freshness. You will need skewers for grilling. If you use bamboo, soak them in water to prevent burning. A mixing bowl helps you blend the marinade well. A grill or grill pan is perfect for cooking the skewers to a juicy finish. - Combine Ingredients for Marinade: In a medium bowl, mix together honey, soy sauce, olive oil, minced garlic, red pepper flakes, lime juice, salt, and pepper. Stir well until everything is blended. - Refrigerate for Flavor Development: Add the peeled and deveined shrimp to the marinade. Make sure each shrimp is coated. Cover the bowl with plastic wrap and let it sit in the fridge for at least 30 minutes. If you can wait, two hours will give even better flavor. - Preheat Instructions: Heat your grill or grill pan over medium-high heat. This will help to cook the shrimp evenly. - Soaking Bamboo Skewers: If you use bamboo skewers, soak them in water for 10-15 minutes. This step keeps them from burning on the grill. - Threading the Shrimp: Take the marinated shrimp and carefully slide them onto the skewers. Aim for 4-5 shrimp per skewer. Leave some space between each shrimp for even cooking. - Cooking Time per Side: Place the skewers on the hot grill. Cook for about 2-3 minutes on each side. The shrimp will turn pink and opaque when done. For extra flavor, baste them with leftover marinade while grilling. - Optimal Time for Flavor: I suggest marinating the shrimp for at least 30 minutes. This time lets the shrimp soak up all the flavors. If you have more time, go for two hours. The longer you marinate, the better the taste. - Adjusting Spice Levels: If you like it hot, add more red pepper flakes. For a milder kick, use less or skip it. You control the spice! - Basting While Cooking: While grilling, brush the shrimp with leftover marinade. This adds more flavor and keeps them juicy. Just be careful not to let the brush touch raw shrimp to avoid germs. - Checking for Doneness: The shrimp are done when they turn pink and opaque. This usually takes about 2-3 minutes on each side. Keep an eye on them; overcooking can make them tough! - Presentation Ideas: Serve the skewers on a nice platter with lime wedges. Drizzling extra honey on top makes it look fancy and taste even better. - Accompaniments: Pair the skewers with rice or a fresh salad. Rice soaks up the sauce, and a salad adds crunch. Enjoy the mix of flavors! {{image_4}} You can switch shrimp for other seafood. Scallops are a great choice. They have a sweet taste that pairs well with honey. You can also try fish like salmon or swordfish. Just cut them into bite-sized pieces for skewers. If you want a veggie option, use zucchini, bell peppers, or mushrooms. These add a nice crunch and soak up the honey garlic flavors. Adjusting sweetness is easy. Add more honey for a sweeter dish. If you want less sweetness, reduce the honey amount. You can also use maple syrup as a fun twist. For a spicier kick, increase the red pepper flakes. You can even add sliced jalapeños for more heat. Mix in some ginger for an extra zing. These skewers taste great over rice. White or brown rice works well. You can also serve them as a topping on salads. Toss some greens with a light dressing, then add the skewers. This makes a colorful and healthy meal. Don't forget to add lime wedges for an extra burst of flavor! To keep your spicy honey garlic shrimp skewers fresh, store them properly. Place them in an airtight container. This helps lock in flavor and moisture. Cooked skewers can last in the fridge for up to three days. If you want to keep them longer, consider freezing. Freezing is a great option if you want to save extra skewers. First, let the cooked skewers cool completely. Then, wrap them in plastic wrap or foil. Place them in a freezer-safe bag. This keeps out air and prevents freezer burn. When you’re ready to eat, thaw them in the fridge overnight. This keeps them safe and tasty. Reheating your shrimp skewers is simple. The best methods are grilling or pan-frying. Both methods keep the shrimp juicy and flavorful. If using a microwave, do so in short bursts. Heat them on low power to avoid overcooking. Always check that the shrimp are heated through before serving. Enjoy the bold flavors again! I recommend marinating the shrimp for at least 30 minutes. This time allows the shrimp to soak up all the tasty flavors. If you want a stronger taste, you can marinate them for up to 2 hours. Just remember, don’t go longer than that. The shrimp may become too soft. Yes, you can use frozen shrimp. First, you need to thaw them. Place the frozen shrimp in the fridge overnight. If you’re short on time, you can run them under cold water for about 10-15 minutes. Make sure to drain them well and pat them dry before marinating. These skewers pair well with many sides. Here are some tasty options: - Rice, like jasmine or basmati - Grilled vegetables, such as bell peppers or zucchini - A fresh salad with cilantro and lime - Quinoa for a healthy twist - Noodles tossed in a light sauce These choices enhance the flavors and make your meal complete! These shrimp skewers are a fun and tasty dish. You learned how to marinate shrimp, grill them, and choose great sides. Remember to try variations and store leftovers properly. Cooking can be simple and enjoyable. With these tips, you’ll impress family and friends with your skills. Keep experimenting and have fun with flavors. Happy grilling!

Spicy Honey Garlic Shrimp Skewers Flavorful Delight

- 1 cup plain yogurt (Greek or regular) - 1/2 cup vegetable oil - 1 cup granulated sugar - 3 large eggs - Zest of 2 lemons (about 2 tablespoons) - 1/4 cup fresh lemon juice - 1 1/2 cups all-purpose flour - 2 teaspoons baking powder - 1/2 teaspoon baking soda - 1/4 teaspoon salt - 1 cup fresh raspberries (or frozen, thawed and drained) - 1 teaspoon vanilla extract - Powdered sugar for dusting (optional) In this lemon raspberry yogurt cake, each ingredient plays a vital role. The yogurt keeps the cake moist and adds a tangy flavor. The vegetable oil helps create a soft texture. The sugar balances the tartness of the raspberries and lemons. - Additional fresh raspberries - Thin slices of lemon - Mint leaves Garnishing can make your cake look more inviting. Adding fresh raspberries or lemon slices gives a burst of color. Mint leaves add a nice touch and a hint of freshness. - Substitute Greek yogurt with regular yogurt for a lighter cake. - Use coconut oil instead of vegetable oil for a hint of coconut flavor. - Swap in whole wheat flour for a healthier option. - Try using honey or maple syrup instead of granulated sugar for a natural sweetener. These alternatives can cater to your taste and dietary needs. Experimenting with different ingredients can lead to exciting new flavors while keeping the essence of the cake intact. Start by preheating your oven to 350°F (175°C). Grab a 9x5-inch loaf pan. You can grease and flour it or line it with parchment paper. This helps with easy removal after baking. In a large bowl, whisk together 1 cup of plain yogurt, 1/2 cup of vegetable oil, and 1 cup of granulated sugar. Mix until everything is smooth and blended well. Now, add in 3 large eggs, one at a time. Make sure to mix well after each egg. Next, stir in the zest of 2 lemons, 1/4 cup of fresh lemon juice, and 1 teaspoon of vanilla extract. Keep mixing until the mixture is completely smooth. In a separate bowl, sift together 1 1/2 cups of all-purpose flour, 2 teaspoons of baking powder, 1/2 teaspoon of baking soda, and 1/4 teaspoon of salt. This helps remove lumps and makes the cake lighter. Gradually add the dry mixture to the wet ingredients. Stir gently with a spatula or wooden spoon. Be careful not to overmix, as this can make the cake dense. You want it just combined. Gently fold in 1 cup of fresh raspberries. Keep them intact for bursts of flavor in each slice. This adds a sweet and tart touch to your cake. Pour the batter into the prepared loaf pan. Smooth the top with a spatula. Bake in the oven for 50-60 minutes. The cake is done when a toothpick comes out clean or with a few moist crumbs. Let it cool in the pan for about 10 minutes. Then, transfer it to a wire rack to cool completely. If you like, dust the top with powdered sugar for a sweet finish. To make your lemon raspberry yogurt cake light, use room-temperature ingredients. Cold ingredients can make the batter dense. Mix the wet ingredients well before adding the dry ones. Avoid overmixing. Stir just until you see no dry flour. This helps keep the cake airy. To stop the raspberries from sinking, coat them in a bit of flour before adding. Toss them in a small bowl with a tablespoon of flour. This slight coating helps them stay suspended in the batter. Fold them in carefully. This keeps the raspberries whole and juicy. Serve the cake on a pretty plate. Add fresh raspberries around the slices. Thin lemon slices can add color. For a sweet touch, dust the top with powdered sugar. It gives a nice finish. You can also serve with a dollop of whipped cream. This adds richness to each bite. {{image_4}} You can switch out the raspberries for other fruits. Blueberries, strawberries, or blackberries all work well. If you choose strawberries, cut them into small pieces. This will help them mix well into the batter. Each fruit adds its unique taste. For a tropical twist, try diced pineapple or mango. Just remember, adjust the sugar slightly if the fruit is sweeter. If you need gluten-free, use almond flour or a gluten-free blend. It works great with the yogurt too. For a dairy-free version, swap yogurt for coconut yogurt. Use a neutral oil like coconut or avocado oil instead of vegetable oil. These changes keep the cake moist and tasty. You won’t miss the dairy or gluten at all! You can boost flavor in fun ways. Try adding a pinch of cardamom or cinnamon for warmth. For a zingy touch, add a bit of orange zest along with the lemon. If you love nuts, fold in chopped walnuts or almonds. They add a nice crunch and flavor. You can also drizzle a simple glaze on top for extra sweetness. Mix powdered sugar with lemon juice for a bright finish. To keep your lemon raspberry yogurt cake fresh, store it in an airtight container. This will help retain its moisture and flavor. If you don't have a container, wrap the cake tightly in plastic wrap. Place it in a cool, dry area away from direct sunlight. This method keeps it tasty for several days. You can freeze this cake for later enjoyment. First, let the cake cool completely. Then, wrap it tightly in plastic wrap, followed by aluminum foil. This double wrapping prevents freezer burn. Label the package with the date and type of cake. You can freeze it for up to three months. When you are ready to eat it, thaw it in the fridge overnight. When stored properly, the lemon raspberry yogurt cake lasts about 5 to 7 days at room temperature. If you keep it in the fridge, it can last up to 10 days. Just remember to check for any signs of spoilage, like mold or an off smell. Enjoy your cake at its best! Yes, you can use frozen raspberries. Just make sure to thaw and drain them first. This helps keep your cake from getting too wet. Also, they can add a nice burst of flavor. You can tell the cake is done when a toothpick comes out clean. Insert it into the center of the cake. If it has a few moist crumbs, it’s still good. Just don’t let it bake too long or it may dry out. You can substitute yogurt with sour cream or buttermilk. Both will keep the cake moist. However, the flavor will change a bit. If you want a tangy note, stick with yogurt. Serve the cake on a nice plate. You can add fresh raspberries on the side. A light dusting of powdered sugar on top adds a sweet touch. For a colorful finish, place lemon slices around the cake. Yes, you can make this cake a day ahead. Store it in an airtight container to keep it fresh. It actually tastes better after resting, as the flavors meld together nicely. Just dust with powdered sugar right before serving. In this blog post, we covered key ingredients for your cake, from must-haves to garnishes. You saw step-by-step instructions to ensure a perfect bake, with tips for a light texture and beautiful presentation. We explored variations and storage methods, so you can enjoy your cake longer. Remember, experimenting with flavors keeps things fresh. I hope you feel ready to bake a delicious cake that impresses everyone. Enjoy the process and the tasty results!

Lemon Raspberry Yogurt Cake Fresh and Flavorful Treat

- 2 lbs boneless, skinless chicken thighs - 1 can (13.5 oz) coconut milk - 1/4 cup freshly squeezed lime juice - 2 tablespoons lime zest The main ingredients make this dish shine. The chicken thighs stay juicy and tender during cooking. Coconut milk adds a rich, creamy texture. Lime juice and zest bring brightness and freshness. - 1 tablespoon honey - 3 cloves garlic, finely minced - 1 teaspoon ground cumin - 1 teaspoon smoked paprika - 1 teaspoon salt - 1/2 teaspoon ground black pepper - 1/4 teaspoon red pepper flakes (optional for heat) Each seasoning boosts the flavor. Honey adds a hint of sweetness. Garlic gives a savory depth. Cumin and smoked paprika add warmth and a slight smokiness. Adjust the red pepper flakes for your heat level. - 8 small corn tortillas - 1 cup shredded red cabbage - 1/2 cup fresh cilantro, roughly chopped - Lime wedges, for serving Toppings make the tacos fun and colorful. Corn tortillas offer a soft base. Shredded cabbage adds crunch. Fresh cilantro brings brightness. Lime wedges let you customize the tanginess on each taco. Start by mixing the coconut milk, lime juice, lime zest, honey, and minced garlic in your slow cooker. Add ground cumin, smoked paprika, salt, black pepper, and red pepper flakes if you like heat. Stir the mixture well until everything is combined. Next, take your chicken thighs and place them in the slow cooker. Make sure each piece gets a nice coat of the coconut lime sauce. This step is key. It ensures the chicken will soak up all those amazing flavors. You can choose to cook the chicken on low heat for 6 to 7 hours or on high heat for 3 to 4 hours. The low heat makes the chicken very tender, but both methods work well. Once the time is up, transfer the chicken to a plate. Use two forks to shred the chicken into small pieces. Then, return the shredded chicken back into the slow cooker. Give it a good stir so the chicken mixes with the sauce again. Now it's time to warm your corn tortillas. You can do this in a skillet over medium heat. Heat them for about 30 seconds on each side until they are soft. To fill the tacos, take a warm tortilla and add a generous scoop of the coconut lime chicken. For toppings, I recommend shredded red cabbage for crunch and chopped cilantro for freshness. Serve your tacos right away with lime wedges on the side. These add a zesty flavor that makes the dish even better. Marinating the chicken is key to a rich flavor. The coconut milk, lime juice, and spices create a tasty blend. Let the chicken soak in this mix for at least an hour or overnight if you can. This step helps the chicken soak up all those great flavors. You can adjust the spice levels too. If you like it spicy, add more red pepper flakes. If you prefer mild, skip them altogether. Garnishing makes your tacos pop. Use fresh cilantro and lime wedges for a bright look. Place a few sprigs of cilantro on top of each taco. Squeeze lime juice over the tacos for extra zing. For gatherings, arrange the tacos on a large platter. Add lime wedges around the platter for a fun touch. You can even include sliced jalapeños for those who enjoy some heat. Preparation is everything when cooking. Chop your ingredients the night before. This way, you save time on cooking day. Using a slow cooker liner can make cleanup a breeze. Just place the liner in the pot, and you’ll avoid scrubbing later. This small step can save you a lot of time and effort! {{image_4}} You can switch out the chicken for pork or tofu. Pork adds a nice, rich flavor. Tofu is a great choice for a vegan option. Both alternatives work well with the coconut lime sauce. If you're looking for dairy-free options for the sauce, simply skip the honey or substitute it with maple syrup. This keeps the dish creamy and delicious without dairy. To make the tacos even more exciting, you can add fruits like mango or pineapple. These fruits boost sweetness and add a tropical flair. You can also mix in fresh herbs like mint or basil for a unique twist. They bring a bright flavor that pairs well with the coconut and lime. For those who need gluten-free options, use corn tortillas. They are naturally gluten-free and perfect for these tacos. If you want low-carb options, consider using lettuce wraps instead of tortillas. This keeps the meal light and fresh while still being satisfying. After you enjoy your tacos, store any leftovers in the fridge. Place them in an airtight container. This keeps the chicken moist and fresh. You can use glass or plastic containers for storage. Make sure to consume the leftovers within three days for the best taste. To reheat, use a microwave or stovetop. If using a microwave, place the chicken on a plate. Cover it with a damp paper towel. Heat for about 1-2 minutes, checking often. For stovetop, warm the chicken in a skillet over low heat. This keeps the flavor and texture intact. Reheat for about 5-10 minutes, stirring occasionally. You can freeze the leftovers too. Place the chicken in a freezer-safe bag or container. Remove as much air as possible. This helps prevent freezer burn. The chicken can last up to three months in the freezer. When you’re ready to enjoy again, thaw the chicken in the fridge overnight. After thawing, reheat it using your favorite method. This way, you can savor those delicious flavors once more! You can store these tacos in the fridge for up to three days. Keep them in an airtight container to prevent them from drying out. If you want to save them longer, freeze the chicken filling. It lasts about three months in the freezer. Make sure to label your container with the date. Yes! You can prepare the coconut lime sauce a day before. Mix the coconut milk, lime juice, and spices, then store it in the fridge. You can also marinate the chicken overnight in the sauce for better flavor. Just keep it in the fridge until you are ready to cook. These tacos pair well with various sides. Consider serving them with: - Black beans or refried beans - Mexican rice or cilantro lime rice - Grilled corn on the cob - A fresh garden salad with avocado dressing - For drinks, try a light beer or a refreshing limeade These additions will elevate your taco night. Enjoy the flavors and let the fun begin! To sum up, this blog post guides you on making Slow Cooker Coconut Lime Chicken Tacos. You learned about key ingredients, cooking steps, and easy tips for quick meal prep. I hope you feel ready to craft delicious tacos for any occasion. Remember, you can easily tweak the recipe to fit your taste. Enjoy experimenting with different flavors and toppings. Happy cooking!

Slow Cooker Coconut Lime Chicken Tacos Delight

- 1 cup unsalted butter, melted - 2 cups granulated sugar - 1 cup packed brown sugar - 4 large eggs, at room temperature - 1 teaspoon pure vanilla extract - 1 cup all-purpose flour - 1 cup unsweetened cocoa powder - 1 teaspoon baking powder - 1/2 teaspoon salt - 16 oz cream cheese, softened to room temperature - 1 cup pumpkin puree - 3/4 cup granulated sugar - 2 large eggs, at room temperature - 1 teaspoon pure vanilla extract - 1 teaspoon pumpkin pie spice - 1/2 teaspoon ground cinnamon When making these bars, fresh ingredients are key. I suggest using unsalted butter for the brownie layer. This lets you control the saltiness in your dessert. The sugars add sweetness and moisture. The eggs help bind everything together. For the pumpkin cheesecake layer, it’s best to use cream cheese at room temperature. This makes it easier to mix smoothly. Pumpkin puree gives a rich flavor and a lovely color. The spices add warmth and that cozy fall taste we all love. Mixing them well is vital for a creamy texture. You can find most of these ingredients at any grocery store. If you want to improve flavor, choose high-quality vanilla extract and pumpkin puree. These small changes can make a big difference in your final dish. Enjoy the process of gathering these ingredients. It's the first step to baking something truly delicious! - Preheat your oven to 350°F (175°C). - Grease a 9x13 inch baking pan. You can also line it with parchment paper. This makes it easy to remove the bars later. - Start by melting 1 cup of unsalted butter in a bowl. You can use the microwave or stovetop. - Once melted, mix in 2 cups of granulated sugar and 1 cup of packed brown sugar. Stir until smooth. - Add 4 large eggs one at a time. Mix well after each. Then, stir in 1 teaspoon of pure vanilla extract. - In another bowl, sift together 1 cup of all-purpose flour, 1 cup of unsweetened cocoa powder, 1 teaspoon of baking powder, and 1/2 teaspoon of salt. - Gradually fold the dry mix into the wet mix. Stir gently until just combined. Don’t overmix! - Pour the brownie batter into the prepared pan. Spread it evenly across the bottom. - In a clean bowl, beat 16 oz of softened cream cheese with an electric mixer until smooth. - Add 1 cup of pumpkin puree, 3/4 cup of granulated sugar, 2 large eggs, 1 teaspoon of vanilla extract, 1 teaspoon of pumpkin pie spice, and 1/2 teaspoon of ground cinnamon. Mix well until creamy. - Carefully pour this pumpkin cheesecake mix over the brownie layer. Use a spatula to spread it evenly. - Place the pan in the oven and bake for 30-35 minutes. - The edges should be set, but the center will jiggle slightly. A toothpick in the brownie part should come out mostly clean. - After baking, let the pan cool at room temperature. - Transfer the pan to the fridge and chill for at least 2-3 hours. This helps the bars set properly. - When ready to serve, lift the bars out using parchment paper if you lined the pan. - Cut them into squares or bars. - For a lovely touch, serve them on a decorative platter. Add a dollop of whipped cream and a sprinkle of pumpkin pie spice on top. - Avoiding overmixing: When you mix the brownie batter, stir gently. Overmixing can make your brownies tough. Mix just until the flour disappears. This keeps the texture soft and fudgy. - Ensuring proper cooling: After baking, let the bars cool in the pan. Let them sit for about 30 minutes at room temperature. Then, chill them in the fridge for at least two hours. This helps the layers set and makes cutting easier. - Suggestions for additional spices: You can add a pinch of nutmeg or ginger for more warmth. These spices blend well with pumpkin and enhance the fall flavor. - Topping ideas: Try adding a dollop of whipped cream on top. You can also sprinkle some crushed pecans or a dash of caramel sauce for extra sweetness. - How to achieve the perfect brownie texture: Use melted butter and avoid too much flour in the brownie layer. This keeps the bars rich and moist. Also, bake them just until the edges set. - Ensuring a creamy cheesecake layer: Make sure your cream cheese is soft. Beat it until smooth before adding other ingredients. This avoids lumps and makes the cheesecake layer creamy and rich. {{image_4}} You can easily swap ingredients for different diets. For gluten-free options, use a gluten-free flour mix. This keeps the texture nice and helps everyone enjoy the bars. For a vegan twist, use flax eggs instead of regular eggs. Mix one tablespoon of ground flaxseed with three tablespoons of water for each egg. You can also use vegan cream cheese for the cheesecake layer. Make these bars even more special by adding chocolate chips or nuts. Dark chocolate chips give a rich taste, while walnuts or pecans add a nice crunch. You can also change the spices. For a twist, try adding ginger or nutmeg, which pairs well with pumpkin and gives a warm flavor. You can incorporate other seasonal ingredients too. Try adding dried cranberries for a pop of color and flavor. For holidays, consider using peppermint extract in winter or lemon zest in spring. These small changes can make your pumpkin cheesecake brownie bars fit any celebration perfectly. To store your pumpkin cheesecake brownie bars, place them in an airtight container. This keeps them fresh and moist. You can also cover the pan tightly with plastic wrap. The bars stay good in the fridge for up to one week. If you want to save some for later, freezing is a great option. Cut the bars into squares, then wrap each piece in plastic wrap. Place the wrapped bars in a freezer-safe bag or container. They can last in the freezer for about three months. After taking them out of the fridge or freezer, let the bars sit at room temperature for a bit. If you froze them, thaw them overnight in the fridge. For a warm treat, you can reheat them in the microwave for about 10-15 seconds. Enjoy your tasty bars with a dollop of whipped cream! No, you should not use pumpkin pie filling. Pumpkin pie filling has added spices and sugars. This can change the taste of your bars. Stick to pure pumpkin puree for the best results. Check the edges and center of your brownie layer. The edges should look firm, while the center should jiggle slightly. Use a toothpick to test; it should come out mostly clean. If it has wet batter, it needs more time. Yes, you can make these bars in advance. They chill well in the fridge. Make them a day or two before you plan to serve them. This allows the flavors to meld together nicely. Cracking can happen due to overbaking or sudden temperature changes. If it cracks, don’t worry! You can cover it with whipped cream or a sprinkle of cinnamon. This adds charm and hides the cracks. To make your bars festive, add a dollop of whipped cream on top. A sprinkle of pumpkin pie spice adds a nice touch. You can also use colorful fall-themed plates or garnishes to dress up your presentation. This recipe combines rich brownie and creamy pumpkin cheesecake for a delightful treat. We explored key ingredients, step-by-step baking, and tips for perfect results. Remember to try various flavors or ingredient swaps for unique twists. Enjoy your delicious bars fresh or stored. With a little care, they can impress friends and family. Happy baking!

Pumpkin Cheesecake Brownie Bars Tasty Fall Delight

- 1 cup rolled oats - 1 ½ cups unsweetened almond milk (or other milk alternatives) - ¼ cup Greek yogurt (optional) - 1 tablespoon maple syrup - ½ teaspoon ground cinnamon - ¼ teaspoon ground nutmeg - 1 teaspoon pure vanilla extract - 1 medium apple, diced (I recommend Granny Smith or Honeycrisp) - 1 tablespoon chia seeds - Chopped walnuts or pecans - Extra apple slices for garnish These ingredients bring the taste of apple pie to your breakfast. First, we have the rolled oats. They form the base and add a nice texture. Almond milk makes the oats creamy. You can use any milk you like, even cow's milk. Next, for that apple pie flavor, we mix in maple syrup, cinnamon, nutmeg, and vanilla. These spices are key. They add warmth and sweetness, just like in a classic pie. Don’t forget the apple! Diced apples give a crunchy bite and sweetness. I suggest Granny Smith for a tart taste or Honeycrisp for a sweeter flavor. Chia seeds are great too. They add a boost of nutrition and help thicken the oats. Finally, we can top our oats with chopped walnuts or pecans. They add a nice crunch. Extra apple slices make for a pretty garnish and offer more flavor. Gather these ingredients, and you're ready to make a delicious and easy breakfast! To start, grab a mixing bowl. Combine 1 cup of rolled oats, 1 ½ cups of almond milk, and 1 tablespoon of chia seeds. Use a whisk or spoon to stir well. Ensure everything is mixed nicely. This base is the heart of your dish. Next, it's time for the fun part! Add in 1 diced apple, 1 tablespoon of maple syrup, ½ teaspoon of ground cinnamon, ¼ teaspoon of nutmeg, and 1 teaspoon of pure vanilla extract. Stir until all the flavors blend together. You want each bite to burst with taste. If you like your oats creamy, this step is for you. Fold in ¼ cup of Greek yogurt gently. This adds a rich texture and makes your oats feel special. It’s not a must, but trust me, it elevates the dish! Now, divide the mixture into two jars or containers. Make sure they have tight lids. Seal them up and place them in the refrigerator. Let them chill overnight or for at least 4 hours. This helps the oats soak up the milk and flavors. In the morning, take out your jars. Stir the oats well. If they seem too thick, add a splash of almond milk to reach your desired texture. For a crunchy finish, top with chopped walnuts or pecans. You can also add extra apple slices for a lovely garnish. To make the best apple pie overnight oats, use fresh, crisp apples. I love Granny Smith or Honeycrisp for their great flavor. You can also adjust the maple syrup to fit your taste. If you prefer it sweeter, add a bit more syrup. For a lovely presentation, serve your oats in clear jars. This way, you can show off the beautiful layers. A sprinkle of cinnamon on top adds a nice touch. You can also drizzle extra maple syrup for that sweet finish. To balance the sweet and tart, consider adding a pinch of salt. It really brings the flavors together! You can also try different nuts like almonds or pecans. The added crunch makes your oats even better. {{image_4}} You can change the fruit in your oats. If you want a twist, try pears or peaches. They add sweetness and taste great. You can also mix in nut butter, like almond or peanut. This gives a rich flavor that pairs well with the oats. If you need dairy-free oats, swap Greek yogurt for coconut yogurt. This keeps it creamy without dairy. For the milk, you can choose oat milk or soy milk. Both options work well and taste delicious. For a cozy fall flavor, add pumpkin spice to your oats. It brings warmth and a nice aroma. You can also toss in dried cranberries for a festive touch. They add a pop of color and a bit of tartness. Store your overnight oats in airtight containers in the refrigerator. This keeps them fresh and tasty. They are best consumed within 3-5 days for optimal freshness. After that, the flavors may fade. Freezing is not recommended for overnight oats. The texture changes and may become mushy. Only prepare and store for short-term use. This way, you can enjoy the best taste and texture. These oats are ideal served cold. If you like them warm, you can heat them in the microwave. Just stir well and adjust the consistency with a splash of milk before serving. This helps make every bite delicious! Yes, use plant-based milk and omit Greek yogurt. This simple switch makes it easy to enjoy a vegan version. Almond, soy, or oat milk all work well. They typically last in the fridge for up to 5 days. This means you can make a batch and enjoy them throughout the week. Just remember to keep them sealed in jars. Quick oats will work but may result in a mushier texture. Rolled oats soak up the liquid better, keeping a nice bite. If you prefer a softer texture, go ahead and use quick oats. Fresh fruits, seeds, coconut flakes, and additional spices. You can mix and match to find your favorite toppings. Try bananas, berries, or even a sprinkle of cocoa powder for a treat. Yes, you can prep for the week and store them in the fridge. Just make sure to keep them in airtight containers. This way, you can grab them each morning and enjoy a quick, healthy meal. This guide covered making delicious overnight oats with simple ingredients. You learned about the base, flavoring, optional creaminess, and storage tips. Plus, we explored fun variations and creative serving ideas. Embrace the chance to customize your oats. Experiment with flavors and toppings to suit your taste. Overnight oats are a quick, healthy breakfast option you can enjoy every day. Get creative, and happy prepping!

Tasty Apple Pie Overnight Oats Simple Morning Meal

- 1 pound store-bought gnocchi - 2 cups fresh broccoli florets - 2 cups vegetable broth (low-sodium preferred) - 1 cup sharp cheddar cheese, shredded - 1 cup heavy cream - 1/2 cup grated Parmesan cheese - 2 cloves fresh garlic, minced - 1 tablespoon extra-virgin olive oil - Salt and pepper to taste - Red pepper flakes (optional, for a spicy kick) Gathering the right ingredients is key to making this dish shine. The gnocchi serves as the base, providing a soft and chewy texture. Fresh broccoli adds color and nutrition. I always choose low-sodium vegetable broth for better control over salt levels. Sharp cheddar cheese gives a rich flavor, while heavy cream adds creaminess. Parmesan cheese complements the cheddar perfectly. Fresh garlic brings a burst of flavor, and olive oil adds richness. Don't forget salt and pepper for seasoning, and red pepper flakes if you want some heat. This dish comes together quickly, so it’s best to have everything ready before you start cooking. Trust me, you will love the rich and cheesy taste of One-Pot Cheesy Broccoli Gnocchi! Heating the Olive Oil Start by heating 1 tablespoon of extra-virgin olive oil in a large pot over medium heat. Wait until the oil shimmers. This means it is hot enough to cook. Sautéing the Garlic Add 2 cloves of minced garlic to the oil. Sauté the garlic for 1-2 minutes. It should smell nice but not burn. Burning the garlic can make the dish taste bitter. Adding Broth and Broccoli Now, add 1 pound of store-bought gnocchi to the pot. Stir to coat the gnocchi in the oil and garlic. Then, pour in 2 cups of low-sodium vegetable broth. Next, add 2 cups of fresh broccoli florets. Simmering the Mixture Increase the heat slightly. Bring the mixture to a gentle simmer. This will help the flavors mix well. Let it cook until the broccoli is bright green and tender, about 5-7 minutes. Adding Heavy Cream Stir in 1 cup of heavy cream. Let it simmer for another few minutes. This will make the sauce rich and creamy. Incorporating Cheeses Lower the heat to a simmer. Gradually add 1 cup of shredded sharp cheddar cheese and 1/2 cup of grated Parmesan cheese. Stir continuously until the cheeses melt. The sauce will become smooth and thick. Seasoning the Dish Season with salt and freshly cracked black pepper. If you like some heat, sprinkle in red pepper flakes. Adjust the seasoning to your taste. Enjoy your creamy, cheesy broccoli gnocchi! Cooking Time for Gnocchi Gnocchi cooks quickly. In just 2-3 minutes, they turn golden. Keep an eye on them. Overcooking makes them mushy. Aim for a light golden color before adding other ingredients. Avoiding Overcooked Broccoli Broccoli should be bright green and tender, not mushy. Add it to the pot with the broth. Let it simmer for about 5-7 minutes. This time allows the broccoli to soften without losing its vibrant color. Recommended Seasonings Seasoning is key. Use salt and pepper to taste. For a little heat, add red pepper flakes. They bring a nice kick. You can also add garlic powder or onion powder for extra depth. Suggested Cheeses for Variations Cheese makes this dish creamy and rich. Sharp cheddar is great, but feel free to mix. Try Gruyère or mozzarella for different flavors. You can even use a spicy cheese if you like. Each cheese adds its own twist to your meal. {{image_4}} Gluten-Free Options You can enjoy this dish gluten-free by using gluten-free gnocchi. Many brands offer this option made from potato or rice flour. Just check the label to ensure it meets your needs. Vegan Alternatives For a vegan version, swap the heavy cream for coconut milk or cashew cream. Use nutritional yeast instead of cheese for a cheesy flavor. You can also find vegan gnocchi made from potatoes. Different Vegetables Feel free to change the broccoli. You can use spinach, kale, or even zucchini. Each vegetable brings its own taste and texture. Just remember to adjust the cooking time based on what you choose. Alternative Sauces If you want to mix things up, try adding different sauces. A light alfredo or pesto can add new flavors. You can also use a tomato-based sauce for a fun twist on this recipe. - How to Store Leftovers After enjoying your One-Pot Cheesy Broccoli Gnocchi, let it cool to room temperature. Place leftovers in an airtight container to keep it fresh. You can store it in the fridge for up to three days. If you want to save it longer, consider freezing it. - Recommended Storage Containers Use glass or plastic containers with tight-fitting lids. They keep flavors in and prevent spills. If you plan to freeze, make sure the container is freezer-safe. This will help protect the dish from freezer burn. - Best Methods for Reheating When it’s time to enjoy your leftovers, the best method is to reheat on the stove. Pour the gnocchi into a pot over low heat. Stir gently to warm it up evenly. You can also use a microwave. Just make sure to cover it and heat in short bursts to avoid drying it out. - Keeping the Dish Creamy To keep the sauce creamy, add a splash of milk or broth while reheating. This will help restore the rich texture. Stir slowly as it warms to blend everything back together. Enjoy your meal just like the first time! The total cooking time is about 25 minutes. You can easily whip this dish up on a busy night. The prep time is around 10 minutes, so you can start cooking right away. Yes, you can make this dish in advance. To meal prep, cook the gnocchi and broccoli as directed. Then, store them in an airtight container in the fridge. When you are ready to eat, just reheat it on the stove. Add a little extra cream if needed to keep it creamy. This dish pairs well with simple side salads. A fresh garden salad or a Caesar salad adds a nice crunch. You can also serve it with garlic bread for a cozy, hearty meal. Enjoying it with a glass of white wine can enhance your dining experience too. This blog post shared a simple and tasty recipe for One-Pot Cheesy Broccoli Gnocchi. You learned about the key ingredients, step-by-step cooking instructions, and tips to enhance flavor. We also discussed dietary modifications and proper storage methods. Overall, this dish is easy to make and customize. Enjoy cooking it and make it your own! You'll love how quick and satisfying it is. Happy cooking!

One-Pot Cheesy Broccoli Gnocchi Easy Dinner Recipe

- 1 cup rolled oats - 1 cup almond milk (or your preferred dairy or non-dairy milk) - 1 large ripe apple, peeled and diced into small cubes - 2 tablespoons packed brown sugar - 1 teaspoon ground cinnamon - 1 tablespoon pure vanilla extract - 2 tablespoons caramel sauce (store-bought or homemade; plus extra for drizzling) - 1/4 cup Greek yogurt (optional for creaminess) - 1 tablespoon chia seeds (optional for nutrition) - Chopped nuts or granola for topping (optional for extra crunch) When I make caramel apple pie overnight oats, I love to use fresh ingredients. The rolled oats form the base. They soak up all the flavors overnight. Almond milk is my go-to, but you can use any milk you like. A ripe apple adds sweetness and crunch. The flavor enhancers really make this dish special. Brown sugar gives it that warm, sweet taste. Ground cinnamon adds a cozy spice that reminds me of fall. Pure vanilla extract brings everything together with its rich aroma. I also like to add some fun components. Caramel sauce is a must! You can use store-bought or make your own. Greek yogurt adds a nice creaminess, but it’s not necessary. Chia seeds boost the nutrition and are easy to mix in. For toppings, I enjoy chopped nuts or granola for added crunch. This mix of ingredients creates a delightful breakfast that is both tasty and satisfying. Each bite feels like a treat, and it’s simple to prepare. So, gather your ingredients and let’s get started! - First, grab a medium mixing bowl. - Combine 1 cup of rolled oats and 1 cup of almond milk. - Add 1 tablespoon of pure vanilla extract. - Stir until everything blends well. - Now, add 1 large diced apple to the oat mix. - Sprinkle in 2 tablespoons of packed brown sugar and 1 teaspoon of ground cinnamon. - If you want, include 1 tablespoon of chia seeds. - Fold in 1/4 cup of Greek yogurt for creaminess, if using. - Drizzle in 2 tablespoons of caramel sauce into the mixture. - Save a little caramel for topping later. - Mix gently until the caramel is well spread throughout. - Transfer the mixture into airtight containers or mason jars. - Seal them tightly and refrigerate overnight. - Before serving, give the oats a good stir to mix again. To make your oats just right, you can adjust the milk. If you want them thicker, use less milk. For creamier oats, add more almond milk. Greek yogurt also helps create a smooth texture. It makes each bite rich and creamy. You can change the fruits in this recipe. Try using pears or fresh berries instead of apples. They add a different taste and keep it fun. If you want a twist, swap caramel for chocolate or butterscotch. Each new flavor brings excitement to your breakfast. Toppings can add crunch to your oats. Chopped nuts or granola work well. They make each bite even better. You can also pair these oats with other breakfast dishes. A side of fresh fruit or yogurt adds variety to your meal. {{image_4}} You can make this recipe dairy-free with simple swaps. Use plant-based milk like almond, oat, or coconut milk. Just pick one you enjoy. If you skip the Greek yogurt, your oats will still taste great. The oats will remain creamy without it. To keep this recipe gluten-free, use certified gluten-free oats. Regular oats may contain gluten from cross-contamination. You can also replace any flour for toppings with almond flour or coconut flour. These options add flavor and keep it gluten-free. Want to boost the taste? Adding nut butters like almond or peanut butter gives richness to the oats. You can also sprinkle in spices like nutmeg or ginger for a warm kick. These extra flavors make every bite even more delightful. Caramel apple pie overnight oats last about 4 to 5 days in the fridge. To keep them fresh, use airtight containers. Glass jars work well for storage. This keeps the oats from drying out and helps hold the flavor. You can warm up your overnight oats if you prefer them hot. The best way is to use the microwave. Heat in 30-second bursts, stirring in between. You can also enjoy them chilled, which is great on warm days. To save time, prepare multiple jars for the week ahead. You can mix and match flavors in each jar. For example, swap apples for other fruits like pears or berries. Customizing each jar keeps breakfast fun and exciting! Caramel apple pie overnight oats can stay fresh for up to five days in the fridge. To keep them safe and tasty, store them in airtight containers. Make sure to seal them well to avoid any unwanted odors from your fridge. If you notice any off smells or changes in texture, it’s best to toss them. Yes, you can make these oats vegan easily. Use plant-based milk like oat, soy, or coconut milk instead of almond milk. For the yogurt, choose a vegan option or leave it out. The caramel sauce can also be checked for dairy ingredients or swapped for a homemade vegan version. If you don’t have almond milk, you can use any milk you like. Options include soy milk, oat milk, or coconut milk. You can also use regular cow’s milk if you prefer. Just remember to check for flavors that might change the taste of your oats. You can use instant oats, but they will change the texture. Instant oats cook faster and become softer. This means your overnight oats may not have the same chewy bite. If you choose instant oats, reduce the soaking time to about 30 minutes instead of overnight. This blog post shared a simple recipe for caramel apple pie overnight oats. We covered main ingredients, step-by-step instructions, and helpful tips. You can easily customize flavors and textures to suit your taste. Storing leftovers is easy, too. Just remember to keep them sealed. These oats are not just tasty; they're also great for meal prep. Enjoy the process and have fun with variations. Your mornings will thank you for this delicious start!

Caramel Apple Pie Overnight Oats Delightful Recipe

PREV 1 2 3 … 10 NEXT
crunchy chronicle

explore

DessertsDinnerAppetizersDrinks

Our Policies

  • Cookie Policy
  • Copyright Policy
  • Disclaimer
  • GDPR Policy
  • Terms Of Use
Back to Top
  • About
  • Contact Us
  • Privacy Policy
© 2025 crunchy chronicle