WANT TO SAVE THIS RECIPE?
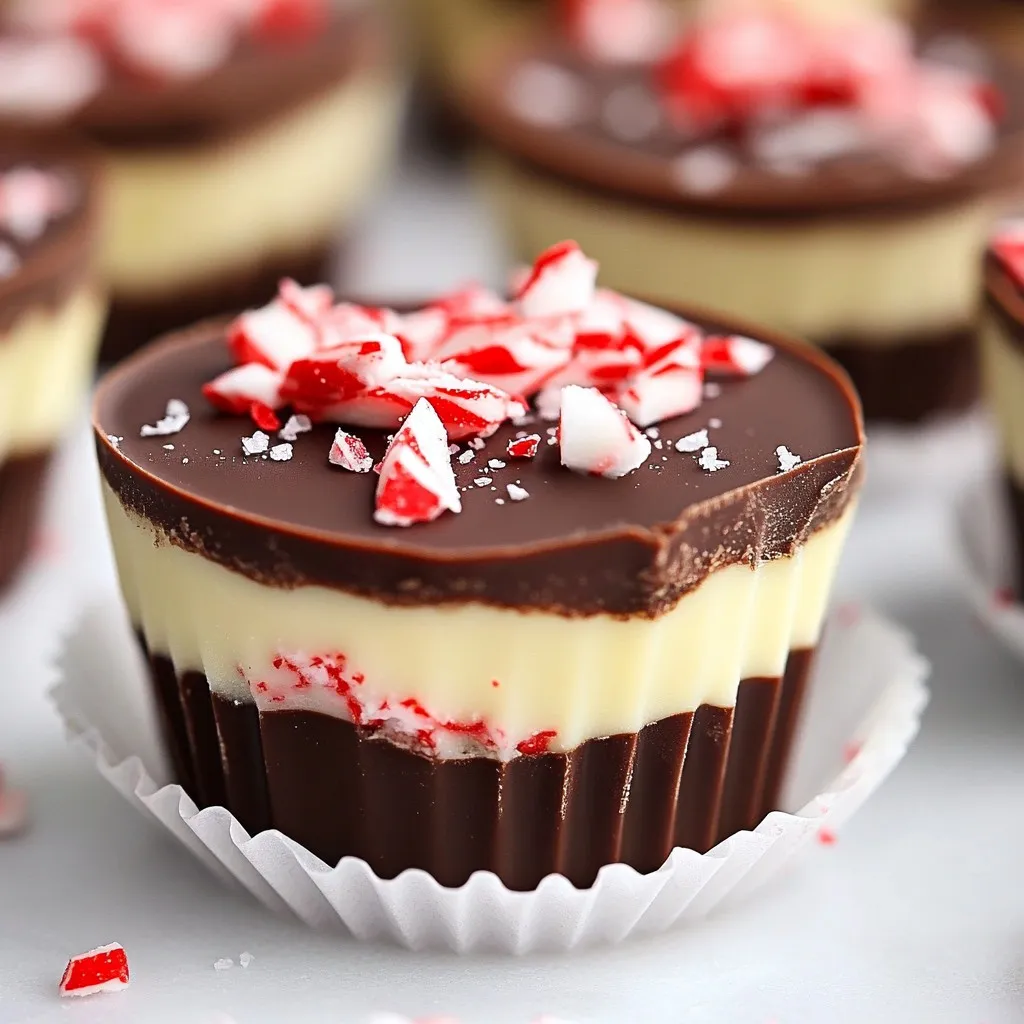
Get ready to indulge in a festive delight! My Peppermint Chocolate Bark Cups are the perfect sweet treat for your holiday gatherings. With a rich chocolate base and a refreshing minty twist, these cups are easy to make and even easier to enjoy. In this guide, I’ll walk you through each step, from the ingredients to creative variations and storage tips. Let’s get started on making these tasty holiday bites!

Why I Love This Recipe
- Festive Flavor: The combination of peppermint and chocolate creates a delightful holiday flavor that is both refreshing and indulgent.
- Easy to Make: This recipe is straightforward and requires minimal ingredients, making it accessible for bakers of all skill levels.
- Customizable: You can easily adjust the toppings or flavorings to suit your personal taste, making each batch unique.
- Perfect for Gifting: These chocolate bark cups make a beautiful and thoughtful gift for friends and family during the holiday season.
Ingredients
Complete Ingredient List
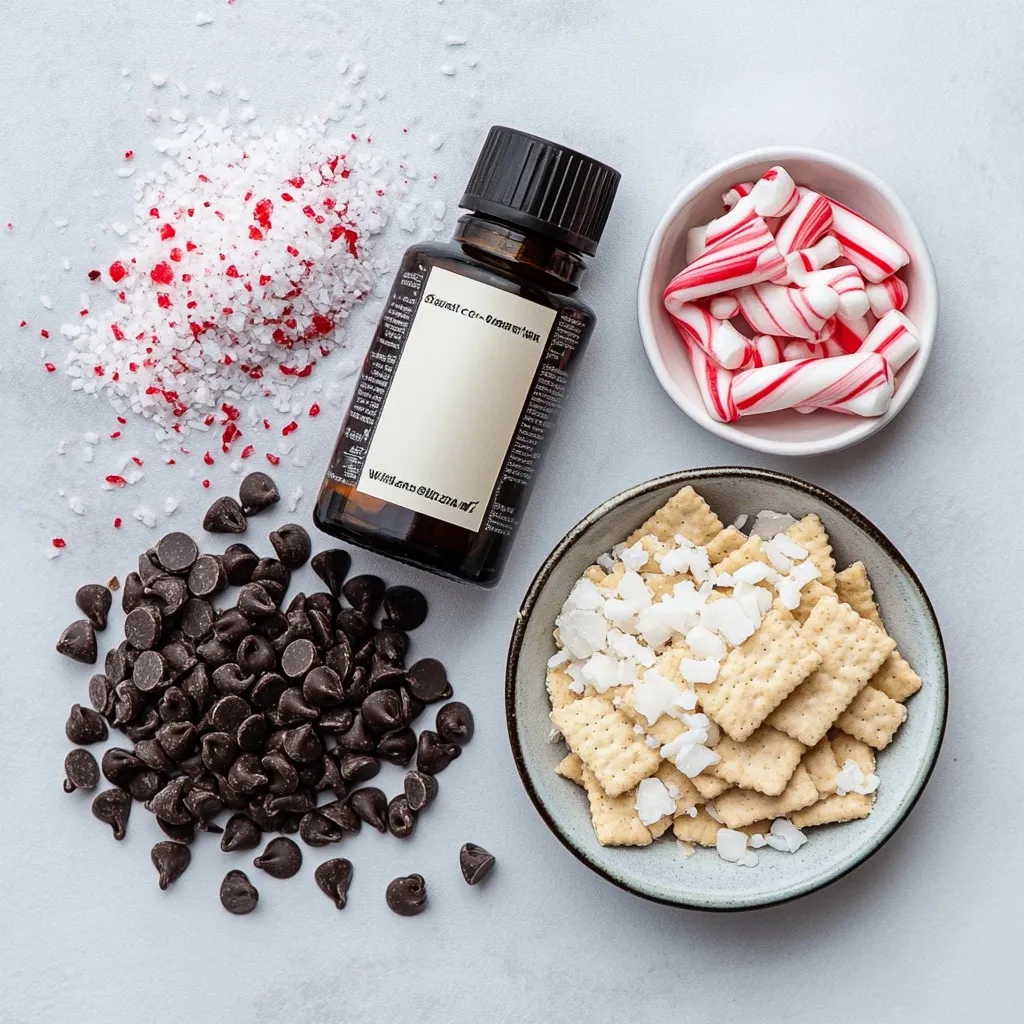
To make peppermint chocolate bark cups, you will need:
– 1 cup semi-sweet chocolate chips
– 1 cup white chocolate chips
– 1 teaspoon peppermint extract
– 1/2 cup crushed candy canes (plus extra for topping)
– 1/2 cup finely crushed graham crackers (for base)
– 1 tablespoon coconut oil (to aid melting)
– Sea salt flakes (optional, for garnish)
Substitutions and Alternatives
If you need to adjust the recipe, several swaps can work well:
– Use dark chocolate chips instead of semi-sweet for a richer taste.
– Swap white chocolate chips for yogurt-covered chips for a tangy twist.
– Substitute peppermint extract with almond extract for a different flavor.
– Try gluten-free graham crackers if you need a gluten-free option.
– Use vegetable oil instead of coconut oil for melting chocolate.
Optional Garnishes
For extra flair, consider these garnishes:
– Add a sprinkle of colorful holiday sprinkles on top.
– Use crushed nuts for added crunch and flavor.
– Drizzle melted chocolate over the top for a decorative touch.
– Fresh mint leaves can make your presentation pop.
These ingredients and options make your peppermint chocolate bark cups festive and fun!
Step-by-Step Instructions
Preparing the Cupcake Tin
Start by lining a standard muffin tin. You can use paper liners or silicone cups. This makes it easy to pop out the cups later. Make sure to place them evenly in the tin for uniform cups.
Melting the Semi-Sweet Chocolate
In a microwave-safe bowl, mix 1 cup of semi-sweet chocolate chips and half a tablespoon of coconut oil. Heat this mixture in the microwave. Use 30-second intervals. Stir well each time until it is smooth and melted. This step is key for a nice texture.
Creating the Base and Adding Layers
Scoop a small amount of the melted chocolate into each cupcake liner. Use a spoon to spread it evenly across the bottom. Once done, place the muffin tin in the freezer. Let it chill for about 10 minutes. This will help the base set nicely before adding more layers.
Next, melt 1 cup of white chocolate chips in a separate bowl. Repeat the same heating method as before, adding the last half tablespoon of coconut oil. Stir until smooth.
Once melted, mix in 1 teaspoon of peppermint extract and half a cup of crushed candy canes. This adds a refreshing flavor.
Retrieve the muffin tin from the freezer. Pour the white chocolate mixture over the semi-sweet layer. Fill each cup to about 3/4 full.
Final Steps to Set and Serve
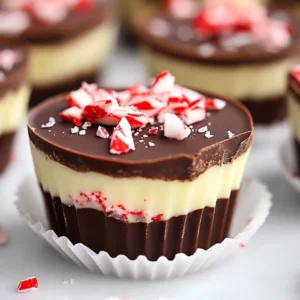
Sprinkle the top of each filled cup with the remaining crushed candy canes. Press them down gently so they stick. If you like, add sea salt flakes for a touch of contrast.
Now, place the muffin tin back into the freezer. Let the cups set for at least 30 minutes. Once firm, carefully pop them out of the tin.
You can enjoy these delicious bark cups right away or store them in an airtight container in the fridge for later. They make a fun treat for holiday gatherings or a sweet gift for friends!
Tips & Tricks
Melting Chocolate Smoothly
To melt chocolate smoothly, use a microwave-safe bowl. Combine your chocolate chips with coconut oil. The oil helps the chocolate melt evenly. Heat in the microwave using 30-second bursts. Stir after each burst. This keeps the chocolate from burning. If you see any lumps, keep stirring until it is smooth.
Ensuring a Perfect Set
To get a perfect set, chill your cups in the freezer. After pouring in each layer, freeze for at least 10 minutes. This helps the chocolate harden well. After adding the final layer, freeze for 30 minutes. Check that it feels solid before removing from the tin. Cold temperatures are key for a great texture.
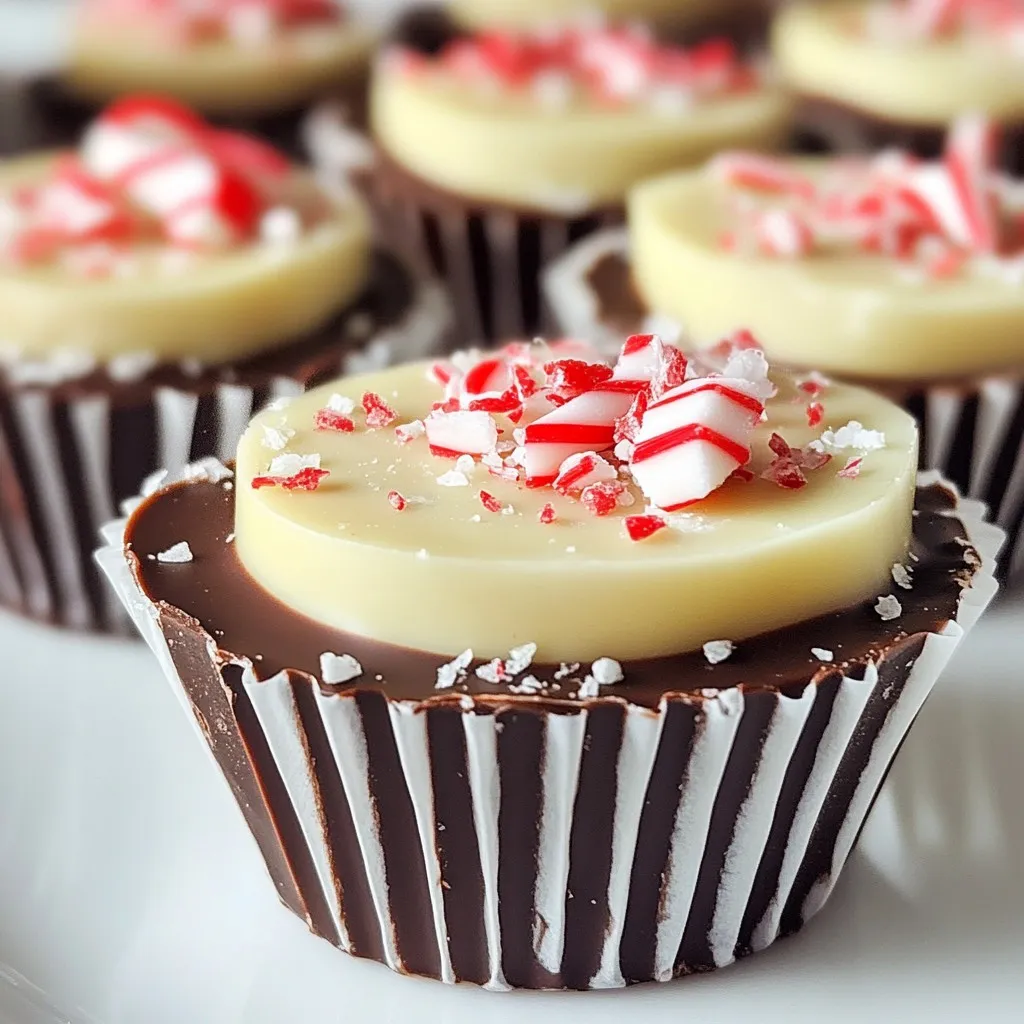
Decorating Ideas for Presentation
Make your peppermint chocolate bark cups look fancy. After adding crushed candy canes, sprinkle some sea salt on top. This adds a nice touch and a flavor twist. For a festive look, try adding fresh mint leaves. You can also use colored sprinkles for a fun pop. Arrange them on a platter for a beautiful display.
Pro Tips
- Use Quality Chocolate: For the best flavor and texture, choose high-quality chocolate chips. They melt better and create a smoother finish.
- Chill Between Layers: Allow each layer of chocolate to set in the freezer before adding the next. This helps the layers adhere better and prevents them from mixing.
- Customize Your Toppings: Feel free to experiment with different toppings like nuts, sprinkles, or dried fruits for a unique twist on your bark cups.
- Storage Tips: Store your peppermint chocolate bark cups in an airtight container in the refrigerator to keep them fresh and prevent melting.
Variations
Flavor Variants
You can change the flavor of your peppermint chocolate bark cups easily. Instead of peppermint extract, try using:
– Almond extract
– Orange extract
– Vanilla extract
Each extract gives a new twist to your treats. Just remember to keep the amount the same: one teaspoon works well. Experimenting with flavors can make your bark cups special for every holiday.
Chocolate Mix-ins and Toppings
Mix-ins can add fun textures and flavors. Consider these options:
– Mini marshmallows
– Chopped nuts like almonds or walnuts
– Dried fruit such as cranberries
You can also top your cups with different items. Here are some ideas:
– Drizzle of dark chocolate
– Sprinkles for color
– Sea salt flakes for contrast
These additions can delight your taste buds and make your bark cups even more festive.
Dietary Adjustments
You can adjust this recipe to fit different diets. For a vegan version, use:
– Dairy-free chocolate chips
– Coconut cream instead of white chocolate
If you’re looking for a gluten-free option, make sure to use gluten-free graham crackers as the base. These simple swaps allow everyone to enjoy peppermint chocolate bark cups, no matter their dietary needs.
Storage Info
Best Practices for Storing Bark Cups
To keep your peppermint chocolate bark cups fresh, store them in an airtight container. Place parchment paper between layers to avoid sticking. Keep them in the fridge to maintain their firmness and flavor. If you plan to eat them within a week, this method works best. For longer storage, consider freezing them.
Shelf Life and Freshness Tips
These bark cups stay fresh for about one week in the fridge. If stored properly, they can last up to three months in the freezer. Keep an eye on the texture and flavor. If they start to look dull or taste off, it’s best to toss them.
How to Freeze for Later
To freeze your bark cups, place them on a baking sheet first. Make sure they don’t touch each other. Freeze them for about two hours until solid. Then, transfer them to an airtight container. Label the container with the date. When you’re ready to enjoy, thaw them in the fridge. This keeps the flavor intact!
FAQs
Can I use other types of chocolate?
Yes, you can use different chocolates. Dark chocolate or milk chocolate works well. Each type adds its own flavor. Dark chocolate gives a rich taste, while milk chocolate is sweeter. You may also mix chocolates. Just keep the same amounts as the recipe states.
How do I make these bark cups ahead of time?
You can easily make these cups ahead of time. Prepare them a few days in advance. After they set, store them in an airtight container. Keep them in the fridge for freshness. You can also freeze them if you want to save them longer. Just let them thaw before serving.
Are there any nut-free options for this recipe?
Yes, this recipe is nut-free as written. The main ingredients do not include nuts. For toppings, ensure your candy canes are also nut-free. If you want to add more flavor, try using crushed cookies or seeds. Always check labels to be safe.
This post covered how to make delicious bark cups. We discussed the ingredient list, substitutions, and garnishes. Then, I provided step-by-step instructions for preparing the cupcakes. I shared helpful tips for melting chocolate and decorating your treats. You can also try different flavors and storage tips. Finally, I answered common questions to help you succeed. Enjoy creating these treats with the knowledge and skills you now hav
Peppermint Chocolate Bark Cups
Delightful chocolate cups infused with peppermint and topped with crushed candy canes, perfect for the holidays.
Prep Time 15 minutes mins
Cook Time 45 minutes mins
Total Time 1 hour hr
Course Dessert
Cuisine American
Servings 12
Calories 150 kcal
- 1 cup semi-sweet chocolate chips
- 1 cup white chocolate chips
- 1 teaspoon peppermint extract
- 1/2 cup crushed candy canes (plus extra for topping)
- 1/2 cup finely crushed graham crackers (for base)
- 1 tablespoon coconut oil (to aid melting)
- optional Sea salt flakes (for garnish)
Prepare the Cupcake Tin: Begin by lining a standard muffin tin with paper liners or silicone baking cups. This will make it easier to remove the cups once they are set.
Melt the Semi-Sweet Chocolate: In a microwave-safe bowl, combine the semi-sweet chocolate chips with half of the coconut oil (1/2 tablespoon). Heat in the microwave, using 30-second intervals, stirring well between each interval until the mixture is completely melted and smooth.
Create the Base: Take a spoon and scoop a small amount of the melted semi-sweet chocolate into the bottom of each cupcake liner. Use the back of the spoon or your fingers to spread the chocolate evenly across the base of each cup. Place the muffin tin in the freezer for approximately 10 minutes to allow the chocolate to set.
Melt the White Chocolate: In a separate microwave-safe bowl, combine the white chocolate chips with the remaining 1/2 tablespoon of coconut oil. Melt the white chocolate in the microwave using the same method as before, until it is completely smooth and melted.
Add Peppermint Flavor: Once the white chocolate is melted, stir in the peppermint extract along with half of the crushed candy canes, mixing thoroughly to ensure an even distribution of flavor and texture.
Fill the Cups: Retrieve the muffin tin from the freezer. Carefully pour the white chocolate mixture over the set semi-sweet chocolate, filling each cup until it is about 3/4 full.
Top with Crushed Candy Canes: Generously sprinkle the remaining crushed candy canes over the top of each filled white chocolate cup. Lightly press down on the candy canes to ensure they stick into the chocolate. If desired, add a small pinch of sea salt flakes on top for an extra flavor boost.
Set in Freezer: Place the muffin tin back in the freezer and allow the bark cups to set for at least 30 minutes, or until they are completely firm and solid.
Serve Your Creation: Once the cups have set, carefully remove the chocolate bark cups from the tin. They can be enjoyed immediately or stored in an airtight container in the refrigerator for later enjoyment.
These delightful treats are perfect for holiday gatherings or as a sweet gift. Arrange them on a festive platter and garnish with fresh mint leaves for an elegant touch.
Keyword chocolate, holiday treats, peppermint
WANT TO SAVE THIS RECIPE?