If you love the taste of chocolate and peanut butter, you will adore this Chocolate Peanut Butter Banana Bread! It’s moist, rich, and easy to make. Using ripe bananas and creamy peanut butter, this recipe brings joy to every bite. Whether you want a cozy breakfast treat or a sweet snack, this delightful bread fits the bill. Join me as I walk you through the simple steps to create this tasty treat!
Ingredients
List of Ingredients
– 3 ripe bananas, thoroughly mashed
– 1/2 cup creamy peanut butter
– 1/2 cup granulated sugar
– 1/4 cup packed brown sugar
– 1/4 cup unsweetened applesauce
– 2 large eggs
– 1 teaspoon pure vanilla extract
– 1 1/2 cups all-purpose flour
– 1/2 teaspoon baking soda
– 1/2 teaspoon baking powder
– 1/4 teaspoon salt
– 1/2 cup chocolate chips (dark or semi-sweet)
– 1/4 cup chopped walnuts (optional)
The key to this banana bread is the balance of flavors. The ripe bananas add natural sweetness and moisture. I always choose bananas that are very ripe for the best taste. Creamy peanut butter gives it a rich flavor and creamy texture.
Next, we have sugars. Granulated sugar adds sweetness, while brown sugar brings a hint of molasses. Applesauce replaces some fat and keeps the bread moist.
Adding eggs gives structure. Pure vanilla extract enhances the overall flavor.
For the dry part, all-purpose flour is the base. Baking soda and baking powder help it rise. A little salt rounds out the flavors.
Finally, chocolate chips add a delightful richness, while walnuts, if you choose to add them, give an awesome crunch. Each ingredient plays an important role in making this a delightful treat.
Step-by-Step Instructions
Preheating and Preparing the Pan
First, preheat your oven to 350°F (175°C). This step is key for even baking. While the oven heats, prepare your loaf pan. You can grease it lightly with cooking spray or butter. Alternatively, you might line it with parchment paper. This makes it easy to remove the bread later.
Mixing the Wet Ingredients
Next, take three ripe bananas and mash them well in a large bowl. Then, add in 1/2 cup of creamy peanut butter. Mix these until smooth. Now, it’s time to add the sugars. Include 1/2 cup of granulated sugar and 1/4 cup of brown sugar. Add 1/4 cup of unsweetened applesauce and two large eggs. Finish with 1 teaspoon of pure vanilla extract. Whisk everything until it’s creamy and well combined.
Mixing the Dry Ingredients
In another bowl, whisk together the dry ingredients. Use 1 1/2 cups of all-purpose flour, 1/2 teaspoon of baking soda, 1/2 teaspoon of baking powder, and 1/4 teaspoon of salt. Mixing these first ensures they blend well into the batter.
Combining Wet and Dry Ingredients
Now, take the dry mix and add it to the wet mix. Use a spatula to fold the two together gently. Be careful not to over-mix; it’s okay if a few lumps remain. After that, fold in 1/2 cup of chocolate chips and, if you like, 1/4 cup of chopped walnuts for some crunch.
Baking Instructions
Once your batter is ready, transfer it to the prepared loaf pan. Smooth the top with your spatula. Place the pan in the preheated oven. Bake for 60-65 minutes. You know it’s done when a toothpick comes out clean or with a few moist crumbs.
Cooling and Serving
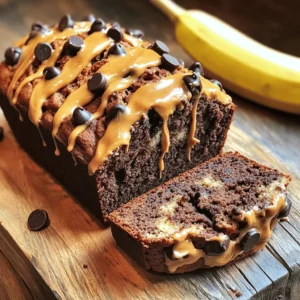
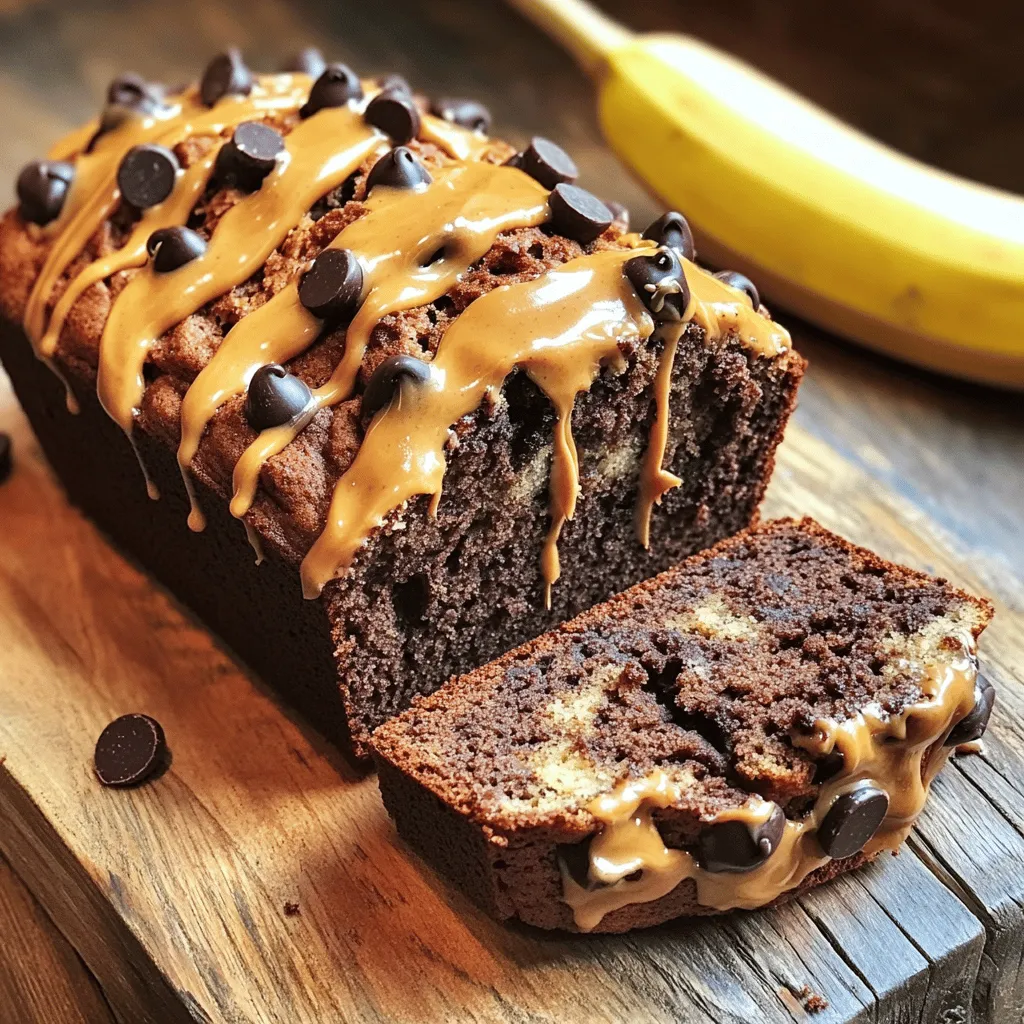
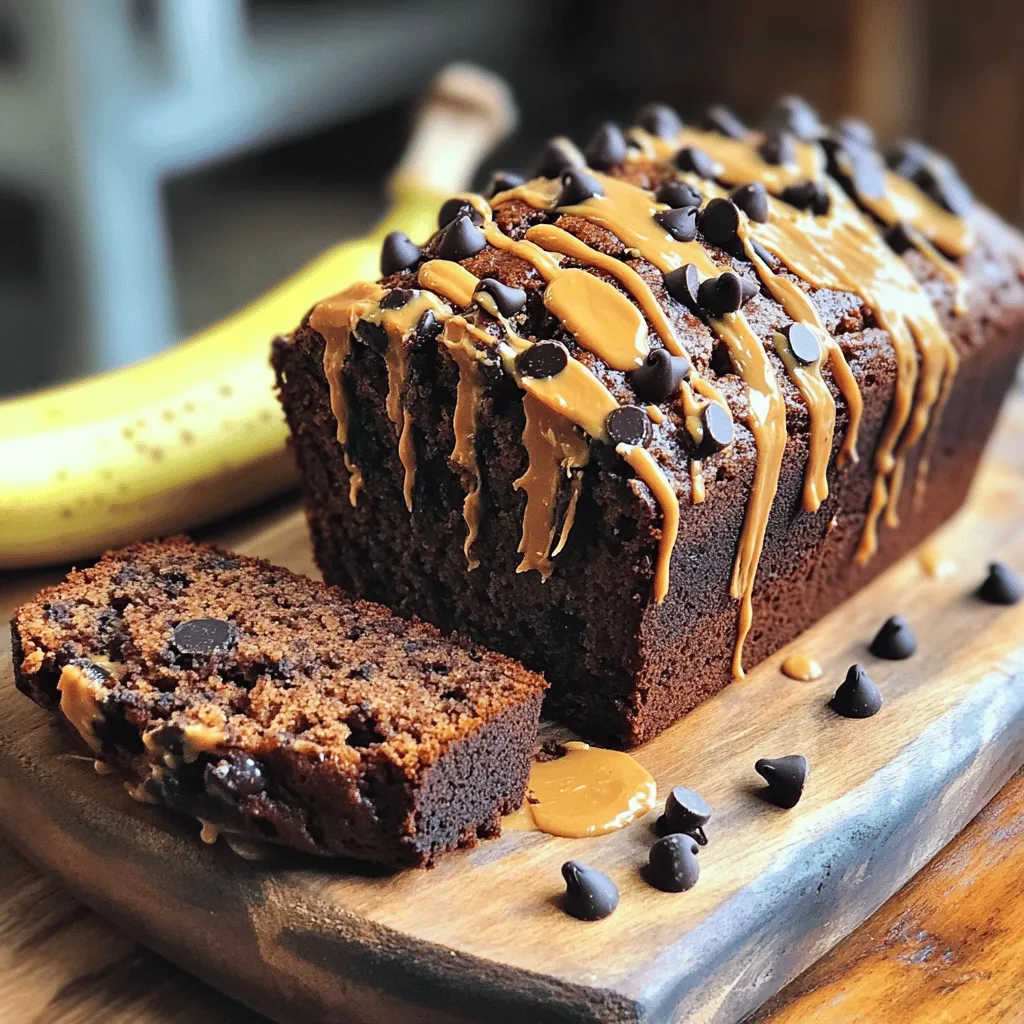
After baking, let the banana bread cool in the pan for about 10 minutes. Then, carefully move it to a wire rack to cool completely. To serve, slice the bread and arrange it on a plate. Drizzle some extra peanut butter on top and scatter a few chocolate chips for flair. You can even place a fresh banana beside the slices for a lovely touch.
Tips & Tricks
Ingredient Substitutions
You can switch out some ingredients for healthier options. Instead of peanut butter, try almond butter. It adds a nice touch. For sugar, use coconut sugar. It gives a deeper flavor with a lower glycemic index. If you need to make this vegan, replace the eggs with applesauce. Use 1/4 cup of applesauce for each egg. This keeps the bread moist and tasty.
Baking Tips
Getting the texture just right is key. You want your bread moist but not soggy. If the batter seems too thick, add a splash of milk to loosen it. To check if your bread is done, insert a toothpick in the center. If it comes out clean or with a few crumbs, it’s ready. If there’s wet batter, bake it a bit longer.
Presentation Tips
To serve this bread beautifully, slice it evenly. Use a sharp knife for clean cuts. Place the slices on a rustic wooden board. Drizzle some creamy peanut butter on top. Scatter a few chocolate chips for extra appeal. For a lovely touch, add a fresh banana beside the slices. This makes the dish look inviting and adds some color.
Variations
Flavor Variations
You can easily change the flavor of your chocolate peanut butter banana bread. Adding spices like cinnamon or nutmeg brings warmth and depth. Just a pinch can change the taste. You might also try adding mix-ins like dried fruit or seeds. Chopped dates or cranberries add sweetness. Pumpkin seeds or sunflower seeds offer a nice crunch.
Diet-Specific Variations
If you need a gluten-free option, use alternative flours. Almond flour or oat flour work great. They keep the bread moist and tasty. For a low-sugar version, you can use less sugar or a sugar substitute. Applesauce already adds sweetness, so you can cut back on granulated sugar.
Seasonal Variations
Seasonal fruits can enhance your banana bread. Try adding fresh berries in the summer or chopped apples in the fall. Nuts, like pecans or hazelnuts, can add a seasonal twist too. For festive occasions, think about adding spices like ginger or cloves. They give a holiday vibe to every slice.
Storage Info
Room Temperature Storage
To store banana bread at room temperature, wrap it in plastic wrap. This keeps it fresh. Place it in a cool and dry spot, away from sunlight. It can last for 2 to 3 days. Enjoy the soft texture and rich flavors during this time.
Refrigerating Banana Bread
Refrigerating banana bread helps it stay fresh longer. It can last for about a week in the fridge. Just place it in an airtight container. This method slows down spoilage and helps keep the bread moist. However, it may lose some freshness in flavor.
Freezing Instructions
Freezing banana bread is a great way to save it for later. First, wrap it tightly in plastic wrap, then place it in a freezer bag. This protects it from freezer burn. It can last for up to 3 months in the freezer. When ready to eat, let it thaw in the fridge overnight. For the best texture, warm it up in the oven for a few minutes before serving.
FAQs
Can I use frozen bananas for this recipe?
Yes, you can use frozen bananas. They are perfect for banana bread. Frozen bananas are often riper and sweeter. To use them, thaw the bananas first. Drain any extra liquid. Then mash them well before mixing. This helps keep your bread moist and flavorful.
How can I make my banana bread less sweet?
To reduce the sweetness, cut back on sugar. You can use half the granulated sugar. You can also skip the brown sugar. Add more mashed bananas for flavor. You might try unsweetened applesauce too. This will keep the bread moist without adding extra sugar.
What should I do if my banana bread is too dense?
If your banana bread is too dense, check your mixing method. Over-mixing can cause density. Mix wet and dry ingredients just until combined. If your bananas are too large, use smaller ones. You can also add a bit more baking powder. This helps to lighten the texture.
How long does Chocolate Peanut Butter Banana Bread last?
Chocolate peanut butter banana bread lasts a few days at room temperature. Store it in a sealed container. If you refrigerate it, it can last up to a week. For longer storage, freeze it for up to three months. Just slice and wrap each piece tightly.
Can I add protein powder to this recipe?
Yes, you can add protein powder. Use a small amount, about 1/4 cup. Choose a protein that blends well. Mix it with the dry ingredients before combining. This way, it won’t change the bread’s texture too much. Adjust the liquid slightly if needed to keep it moist.
This article covered all you need to know about making Chocolate Peanut Butter Banana Bread. You learned the key ingredients, step-by-step instructions, and useful baking tips. Remember, you can customize the recipe to suit your diet and taste. Store it well to enjoy later! Experiment with flavors and have fun baking. Your kitchen will fill with delicious scents and smiles. Happy baking!