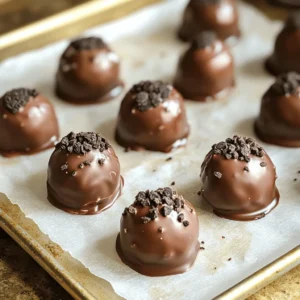
If you’re craving a sweet treat that’s quick and fun to make, you’ve hit the jackpot! In this post, I will guide you through creating No-Bake Oreo Cookie Truffles—delicious bites that require no oven at all. With just a few simple ingredients like Oreo cookies and cream cheese, you can whip up a dessert delight that impresses anyone. Let’s dive in and make these easy truffles your new go-to treat!
Ingredients
Main Ingredients
– 1 package (15.6 oz) Oreo cookies
– 1 (8 oz) package cream cheese, softened
– 1 ½ cups semi-sweet chocolate chips
– 1 tablespoon coconut oil (optional)
Coating Ingredients
– Additional crushed Oreo cookies for topping
To make these truffles, you need a few simple ingredients. The star of the show is, of course, the Oreo cookies. They bring that rich chocolate flavor you crave. You will also need cream cheese. It adds creaminess and helps bind the mixture.
Next, we have semi-sweet chocolate chips. They create a perfect shell for each truffle. If you want a smoother finish, add coconut oil. This is optional but highly recommended. Lastly, keep some crushed Oreo cookies to sprinkle on top. This adds an extra crunch and a pretty look.
Gather these ingredients, and you’re ready to dive into this easy dessert delight!
Step-by-Step Instructions
Crushing the Oreos
To start, I crush the Oreos. You can use a food processor for speed. Just pulse them until they turn into fine crumbs. If you don’t have one, place the cookies in a strong plastic bag. Then, use a rolling pin to crush them. Make sure they are finely ground for the best texture.
Mixing with Cream Cheese
Next, I mix the crushed Oreos with softened cream cheese. This step is key to getting the right dough-like texture. I prefer using my hands or a spatula to combine everything well. It should feel like a thick dough that holds together nicely.
Shaping and Chilling the Truffles
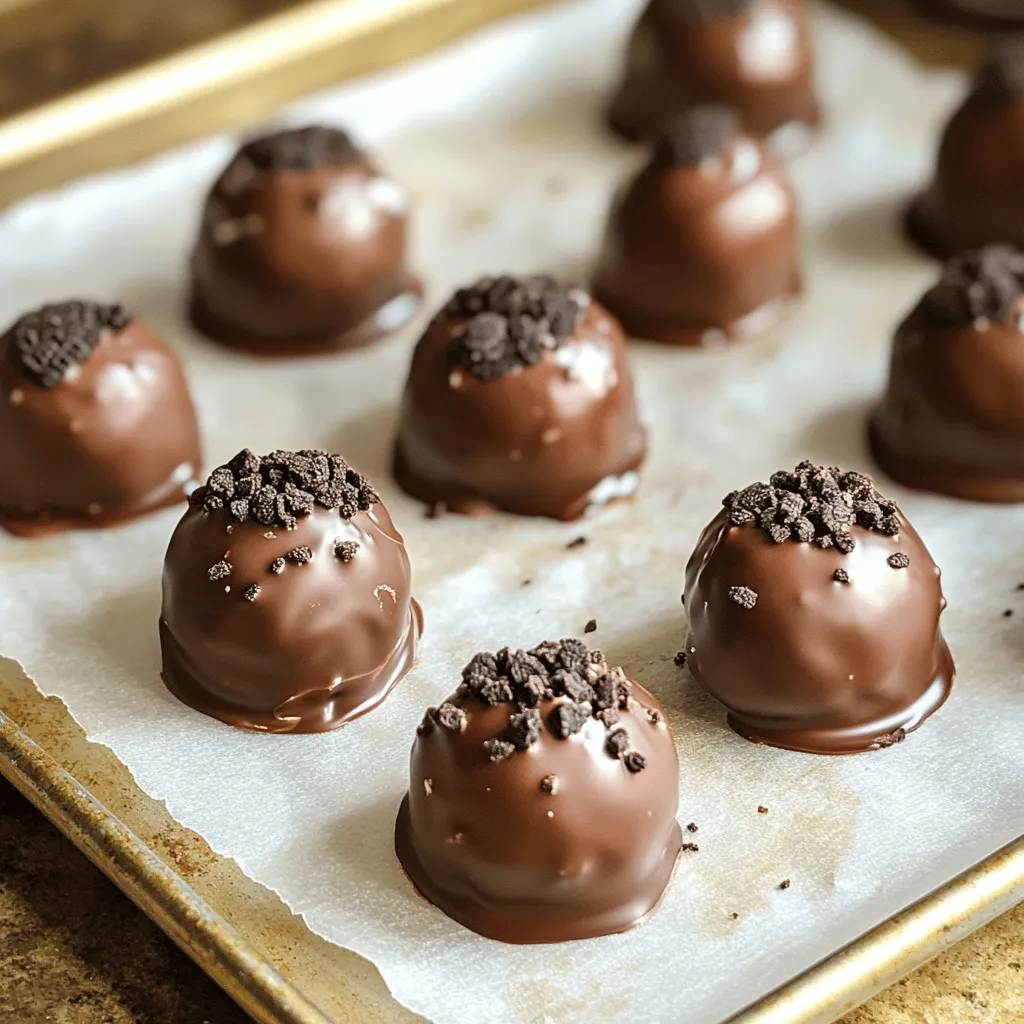
Now, I shape the mixture into truffles. I take about a tablespoon of the dough and roll it into a smooth ball. I place each truffle on a baking sheet lined with parchment paper. Once they are all shaped, I chill them in the fridge for 30 minutes. This helps them firm up, making them easier to coat.
Melting the Chocolate
While the truffles chill, I melt the chocolate. I put semi-sweet chocolate chips in a microwave-safe bowl. If I want a smoother texture, I add a tablespoon of coconut oil. I microwave the mixture in 20-second intervals. After each interval, I stir until the chocolate is completely smooth.
Coating the Truffles
Once the chocolate is melted, I coat the truffles. I dip each chilled truffle into the melted chocolate. I make sure it is fully covered. Using a fork, I lift the truffle out and let the excess chocolate drip off. Then, I place it back on the baking sheet.
Finishing Touches
While the chocolate is still warm, I sprinkle crushed Oreo crumbs on top. This adds a nice look and extra flavor. I let the chocolate set at room temperature or in the fridge for 15-20 minutes. Then, the truffles are ready to enjoy!
Tips & Tricks
Tips for Perfect Texture
Using softened cream cheese is key. It mixes well with crushed Oreos. If your cream cheese is cold, the mix will be too thick. Take it out ahead of time. Let it sit for about 30 minutes before use. This helps create a smooth and creamy texture.
Truffle Size Variations
You can adjust the size of your truffles. For bite-sized treats, roll smaller balls, about one teaspoon each. For a more decadent feel, make them larger, about two tablespoons. This way, you can fit them to any occasion—parties, gifts, or just a personal treat.
Chocolate Coating Alternatives
While semi-sweet chocolate is a classic choice, try white chocolate for a sweet twist. Melt it the same way you do dark chocolate. You can also use dark chocolate for a rich flavor. Each option changes the taste and look of your truffles, so feel free to experiment!

Variations
Flavor Enhancements
You can make these truffles even better with flavor extracts. Adding a splash of vanilla or almond extract brings warmth to the sweet Oreo flavor. Use about half a teaspoon for a nice touch. You can also try mint extract for a fresh twist. Just remember to start with a small amount, then taste. Adjust as needed to find your favorite flavor.
Different Coating Options
Want to change up the look and taste? Try different coatings! Instead of just chocolate, you can use colorful sprinkles or crushed nuts. Chopped almonds or walnuts add a nice crunch. You can roll the truffles in these options right after dipping them in chocolate. This gives your truffles a unique look and extra flavor.
Vegan or Dairy-Free Adaptations
You can easily make these truffles vegan or dairy-free. Instead of cream cheese, use a vegan cream cheese or cashew cream. For the chocolate, choose dairy-free chocolate chips. This way, everyone can enjoy these tasty treats, no matter their diet. Plus, they still taste amazing and rich!
Storage Info
Best Practices for Storage
To keep your Oreo cookie truffles fresh, store them in an airtight container. This helps prevent them from drying out or absorbing other smells from the fridge. Place a layer of parchment paper between the truffles if stacking them. Always refrigerate the truffles. They taste best when chilled.
Shelf Life
These truffles last about one week in the fridge. If you keep them in an airtight container, they stay fresh and tasty. After a week, the flavor might fade. They can still be safe to eat, but the taste may not be as good.
Freezing Truffles
You can freeze your truffles for up to three months. To freeze, place them on a baking sheet in a single layer. Once they are frozen solid, transfer them to an airtight freezer bag. When you’re ready to enjoy them, thaw in the fridge overnight. This way, they stay soft and delicious.
FAQs
Can I use low-fat cream cheese?
Yes, you can use low-fat cream cheese. However, it may change the flavor and texture. Low-fat options can make the truffles a bit less creamy. The rich taste might not be as strong. For the best results, I recommend using full-fat cream cheese.
How do I prevent chocolate from seizing?
To prevent chocolate from seizing, use a microwave-safe bowl. Heat the chocolate slowly in 20-second intervals. Stir after each interval. If you add coconut oil, it helps the chocolate melt smoothly. Make sure no water gets into the chocolate. Even a drop can cause it to seize.
What can I do if the truffles are too soft?
If your truffles are too soft, chill them longer in the fridge. If they still don’t firm up, you can add crushed Oreos to the mixture. This will help thicken it. Roll the mixture again into balls once it firms up.
Can I make these truffles in advance?
Yes, you can make these truffles ahead of time. They store well in the fridge for up to a week. To keep them fresh, place them in an airtight container. You can also freeze the truffles for longer storage. Just thaw them in the fridge before serving.
You now know how to make delicious Oreo truffles step by step. We covered everything from the main ingredients to the best storage tips. Remember, the right texture and coating can make a big difference. Don’t hesitate to try new flavors or coatings to impress your friends. These truffles are great for any occasion. With practice, you’ll master this fun treat. Enjoy making and sharing your tasty creations!