If you’re craving a sweet treat that combines creamy cheesecake with classic peanut butter and jelly, you’re in the right place! My No-Bake Peanut Butter Jelly Cheesecake Bars are easy to make and perfect for any occasion. Plus, you don’t even need an oven! I’ll walk you through each step, share tips for the best texture, and offer fun variations. Let’s dive into making this delicious dessert together!
Ingredients
Essential Ingredients for No-Bake Peanut Butter Jelly Cheesecake Bars
To make these bars, you’ll need some key ingredients. Each one plays a big role in flavor and texture. Gather the following:
– 1 cup graham cracker crumbs
– 1/2 cup unsweetened cocoa powder
– 1/3 cup melted coconut oil
– 2 cups cream cheese, softened
– 1 cup creamy peanut butter
– 1/2 cup powdered sugar
– 1 teaspoon vanilla extract
– 1 cup mixed berry jam (raspberry or strawberry works beautifully)
– 1/4 cup crushed peanuts (for garnish)
These ingredients work together to create a creamy, rich, and delicious bar that everyone will love. The graham cracker crumbs and cocoa powder create a tasty crust. The mix of cream cheese and peanut butter gives the cheesecake layer a smooth texture.
Optional Toppings and Garnishes
While the bars are great as is, you can add some fun toppings! Here are a few ideas:
– Fresh berries (strawberries, raspberries, or blueberries)
– Whipped cream for a fluffy touch
– A drizzle of chocolate sauce for extra sweetness
– More crushed peanuts for added crunch
These toppings can make your dessert even more appealing. Feel free to mix and match to suit your taste.
Nutritional Information per Serving
Knowing what you eat is important. Each serving has:
– Calories: 250
– Total Fat: 18g
– Saturated Fat: 8g
– Cholesterol: 30mg
– Sodium: 150mg
– Total Carbohydrates: 20g
– Dietary Fiber: 2g
– Sugars: 10g
– Protein: 4g
This dessert is rich and satisfying. Enjoy it in moderation as a sweet treat!
Step-by-Step Instructions
Preparing the Crust
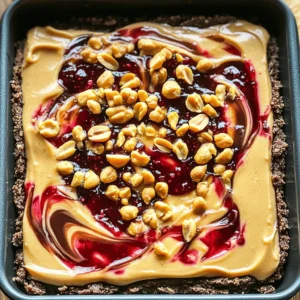
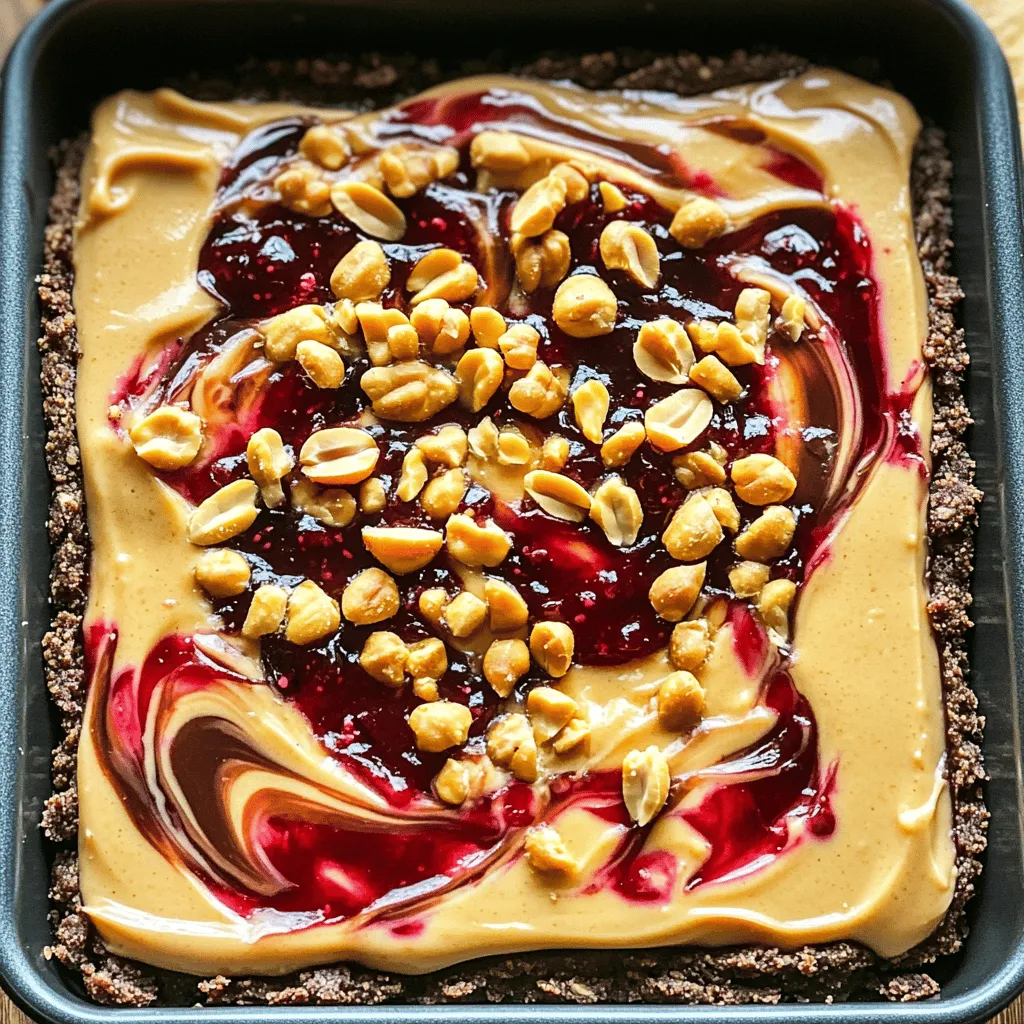
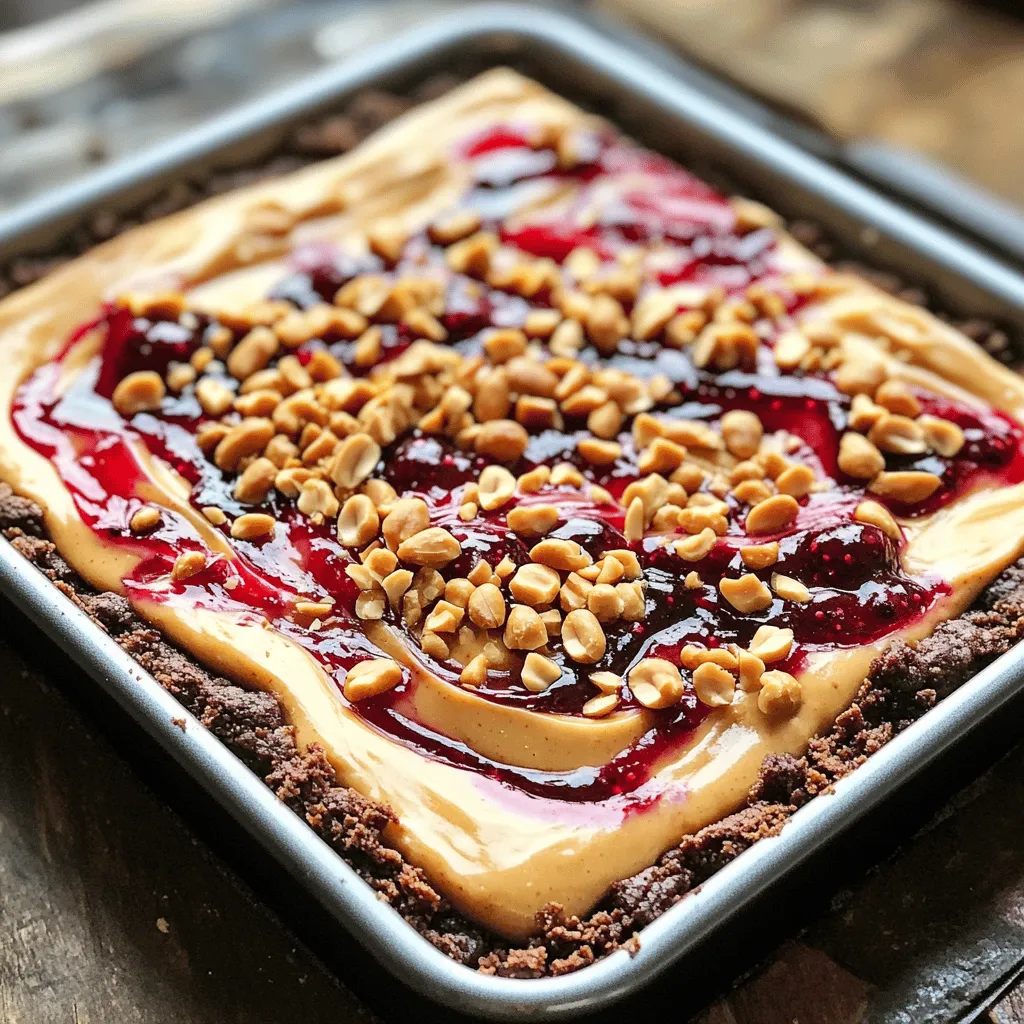
Start with a medium bowl. Add 1 cup of graham cracker crumbs and 1/2 cup of cocoa powder. Mix them well. This mix gives a rich flavor to the crust. Now, pour in 1/3 cup of melted coconut oil. Stir it until it looks like damp sand. Next, grab an 8×8 inch baking pan and grease it lightly. Pour the crumb mix into the pan. Press it down with a measuring cup. Make sure it is compact and even. This step is key for a good base.
Making the Peanut Butter Cheesecake Layer
In another large bowl, add 2 cups of softened cream cheese. Then, mix in 1 cup of creamy peanut butter. Add 1/2 cup of powdered sugar and 1 teaspoon of vanilla extract. Use an electric mixer to blend this mix. Beat it until it is smooth and creamy. There should be no lumps left. Once smooth, gently spread this peanut butter mixture over the crust. Use a spatula to make the top flat and even. This layer adds a rich taste that pairs well with the jam.
Adding the Berry Jam Swirl
Now, take 1 cup of mixed berry jam. You can use raspberry or strawberry jam for great flavor. Dollop the jam over the peanut butter layer. Then, take a knife or toothpick and swirl it gently. This creates a lovely marbled look. Try to spread the jam evenly for the best taste. Once done, cover the pan with plastic wrap and place it in the fridge. Refrigerate for at least 4 hours, but overnight is best. This waiting time helps the bars set up nicely.
Tips & Tricks
Common Mistakes to Avoid
When making no-bake peanut butter jelly cheesecake bars, it’s easy to make mistakes. Here are some tips to avoid them:
– Not measuring ingredients: Always measure your ingredients. This helps keep the right balance.
– Skipping the chilling time: Don’t rush! These bars need time to set. Chill for at least four hours.
– Using cold cream cheese: Make sure the cream cheese is softened. Cold cream cheese makes mixing hard.
– Overmixing the filling: Mix until smooth, but don’t overdo it. Overmixing can add air and change texture.
How to Achieve the Perfect Texture
To get that creamy texture you want, follow these steps:
– Soften the cream cheese: Let it sit at room temperature for 30 minutes. This makes it easier to mix.
– Use an electric mixer: This helps blend the peanut butter well with the cream cheese. Aim for a smooth consistency.
– Don’t skip the coconut oil: This adds creaminess and helps the bars hold together.
– Press the crust firmly: Make sure your graham cracker crust is compact. This keeps it from crumbling when you cut it.
Presentation Tips for Serving
How you present your bars can make a big difference. Here are some ideas:
– Serve chilled on a nice platter: A colorful plate makes the bars look even better.
– Add fresh berries: Place some fresh berries next to the bars. This adds color and freshness.
– Sprinkle crushed peanuts: Just before serving, add crushed peanuts on top. This gives a nice crunch and style.
– Cut into even squares: Use a sharp knife to cut neat squares or rectangles. This makes them easy to serve.
Try these tips for a perfect experience with your no-bake peanut butter jelly cheesecake bars!
Variations
Flavor Swaps: Different Jams and Nut Butters
You can switch up the jam for a new taste. Try raspberry, strawberry, or even blueberry jam. Each jam brings its own flavor. If you want a nutty twist, swap peanut butter for almond or cashew butter. These swaps make the bars unique and fun. You can even mix jams for a fruity surprise.
Gluten-Free Options for the Crust
If you need a gluten-free option, use gluten-free graham crackers. Crush them just like regular ones. You can also use oats or almond flour. Mix these with cocoa powder and coconut oil, just like the original. This way, everyone can enjoy the bars without worry.
Vegan Alternatives to Dairy Ingredients
For a vegan version, substitute cream cheese with a nut-based cream cheese. Look for brands made from cashews or almonds. Use maple syrup instead of powdered sugar for sweetness. You can also select a plant-based butter or coconut cream. These changes keep the bars creamy and delicious without dairy.
Storage Info
Best Practices for Refrigeration
To keep your no-bake peanut butter jelly cheesecake bars fresh, store them in the fridge. Place the bars in an airtight container. This will help prevent them from drying out. Make sure to keep them covered with plastic wrap or a lid. This keeps the flavors locked in and the texture just right.
How Long Do They Last?
These cheesecake bars can last up to one week in the fridge. If you store them properly, they stay yummy. Check for any signs of spoilage before you eat them. If they look or smell off, it’s best to toss them.
Freezing Instructions for Longer Storage
If you want to keep them longer, you can freeze the bars. First, cut them into squares. Wrap each piece in plastic wrap, then place them in a freezer-safe bag. They can last up to three months in the freezer. When you’re ready to eat, thaw them in the fridge overnight. This way, they stay creamy and delicious.
FAQs
Can I use a different type of crust?
Yes, you can use other crusts. Graham cracker crumbs work well, but you can try crushed cookies like Oreos or vanilla wafers. If you need a gluten-free option, use gluten-free graham crackers or almond flour. Just mix with melted coconut oil as in the recipe. Press it firmly into the pan for a good base.
What if I can’t find mixed berry jam?
If you can’t find mixed berry jam, no worries! Raspberry or strawberry jam works just as well. You can also blend your favorite berries with a bit of sugar to make your own jam. This way, you can customize the flavor to your liking.
How can I make these bars healthier?
You can make these bars healthier by using low-fat cream cheese. You can also swap out the powdered sugar for a natural sweetener like honey or maple syrup. If you want to cut down on calories, use less peanut butter or a nut butter alternative. Adding some chia seeds or flaxseeds can boost the nutrition too!
You learned how to make delicious no-bake peanut butter jelly cheesecake bars. We covered the must-have ingredients, detailed instructions, and tips for perfect results. I shared ways to add variety and adjusted the recipe for special diets. With the right storage, these bars stay fresh and tasty.
Remember, cooking should be fun. Experiment and find what you love. Enjoy your tasty creation!